Content Repurposing AI: How It Works and Where It Fits
Learn what content repurposing AI is, how the pipeline works, key use cases, metrics to track and the safeguards that keep clips accurate.
5 min read
November 6, 2026

Step-by-step YouTube Shorts upload guide for 2026: vertical specs, metadata, thumbnails, and timing tips to get more views.
Written by:


You've got a 40-minute podcast, interview or property walkthrough sitting in your editor, and you've already spotted three clips that could work as Shorts. Then the first export comes out horizontal, the captions sit under YouTube's buttons, and one speaker is half out of frame.
That's the normal failure point. A good YouTube Shorts upload isn't decided on the publish screen. It's decided earlier, when you choose the moment, reframe it for a phone, check the audio rights and review the rendered file.
Treat every upload as a quality-control step for repurposed footage. You'll publish a little slower at first, but you'll stop posting clips that were never built for the feed they're entering.
The most common broken upload is a horizontal video squeezed into a vertical file with black bars baked in. It looks like an export error on a phone, and no title fixes it. Start with the file itself.
The YouTube upload encoding guidance supports native frame rates including 24, 25, 30, 48, 50, and 60 fps, recommends BT.709 for standard dynamic range color, and sets 1080p as the maximum resolution supported for Shorts. Keep the source frame rate so YouTube doesn't have to convert cadence and create duplicate frames or motion judder.
Shorts format requirements at a glance
| Setting | Recommended value | Why it matters |
|---|---|---|
| Aspect ratio | 9:16 vertical (square also accepted) | Fills the phone screen without bars |
| Maximum length | Up to 3 minutes | Longer files do not qualify as Shorts |
| Resolution | 1080p maximum | 1080p is the supported ceiling for Shorts |
| Frame rate | Match source: 24, 25, 30, 48, 50 or 60 fps | Prevents duplicate frames and motion judder |
| Color | BT.709, standard dynamic range | Matches YouTube's recommended color space |
| Framing | No letterbox or pillarbox bars | Black borders look like an export error on a phone |
For a fuller breakdown of canvas and export choices, see this guide to the YouTube Shorts format before you batch a whole series.
Most repurposed clips fail on framing, not length. Crop the long recording to a 9:16-safe composition and track whoever is speaking. When the other person answers, switch the crop instead of leaving both faces tiny at the edges.
Keep faces, captions and product details in the central safe area, away from interface overlays. For a local business clip, that means the machine, counter or finished result stays centered, not tucked into a corner.
Cut at a moment that makes sense alone. One full question and answer, one objection handled, one before and after. A long interview becomes several self-contained clips that way.
Practical rule: Watch the rendered file full-screen on your phone before uploading. If you have to squint at captions there, viewers in the feed won't read them either.
Encode with a modern web-compatible codec and container, then check all six rows above. Only then is the file ready for Studio or the app.
Work in order, because each screen changes what the next one asks you. Rushing to the title field before you've sorted audio and framing is how drafts pile up half-finished.
The five core stages look like this:
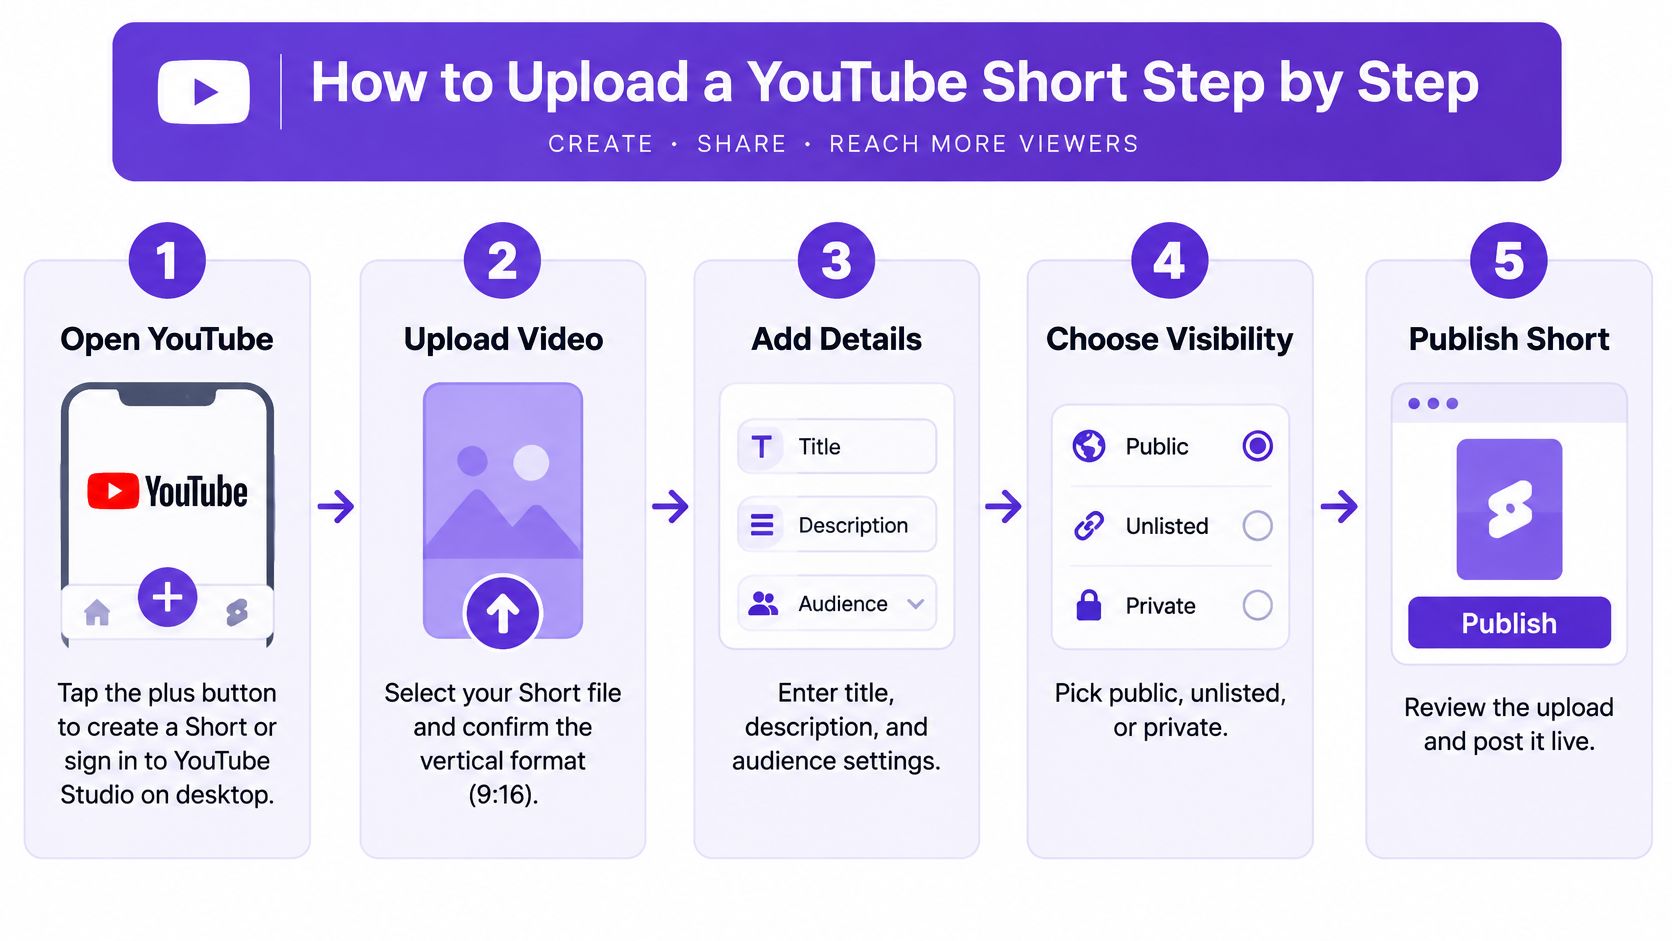
Open the right uploader. In the YouTube app, tap the plus button to create a Short. On desktop, sign in to YouTube Studio, click Create and upload your vertical file. The common slip is uploading a horizontal master and hoping Studio will convert it. It won't reframe it for you.
Choose music before you import on mobile. Library audio on mobile may be limited to short clips, so pick the track first if you're relying on it. If you've already mixed licensed or original audio into your export, don't layer a library track over speech just because the option is there.
Trim and finish the picture. Trim dead air at the start, add captions or text, and apply a filter only if it doesn't shift skin tones or product colors. Keep essential text centered. Text near the bottom or right edge gets covered by buttons and descriptions.
Add the title and description. Write them for the clip in front of you, not for the full episode it came from. A podcast clip about pricing mistakes shouldn't carry the full episode title about the guest's career history.
Pick a thumbnail frame. Choose a frame with a clear face or a readable object, mid-expression rather than mid-blink. If every frame is blurry, your source moment is too weak or your crop is too tight.
Set audience and visibility. Answer the audience and made-for-kids questions before anything goes live, then choose public, unlisted, private or scheduled. Don't leave this to memory across a batch. One wrong setting can sit unnoticed on a whole set of drafts.
Publish or schedule. Post now if it's part of a timing test you're running manually, or schedule it into a planned slot. Then open the draft as a viewer would see it.
Desktop batch selection is useful when you've cut several clips from one recording, but it doesn't finish the job for you. You still need to open each draft and complete its details one at a time. Budget real time for titles, audience settings and thumbnail frames per clip.
Batch the file transfer if you want. Never batch the review. Each Short gets its own first frame, captions and title check.
If you're working away from your desk, this walkthrough on how to upload YouTube Shorts from your phone covers the mobile route in detail. It's handy for a quick site clip or event moment that doesn't need a desktop edit.
Finish with a silent preview in feed view. The first second should hold attention without audio, captions should stay legible at phone size, and the title should match what the viewer sees. If the opening frame needs explanation, recut the start instead of rewriting the title to compensate.
I would rather delay one clip by ten minutes for that preview than publish five with captions buried under the interface.
Say a real estate agent cuts a clip from a full walkthrough and titles it 3 Mistakes Buyers Make at Open Houses. The description names the neighborhood, adds one sentence of context and links to the full tour. That Short makes a specific promise in the first three seconds, and the video either keeps it or it doesn't.
That alignment is the whole job of metadata.
A creator reviewing title, frame and audience settings before publishing looks like this in practice:
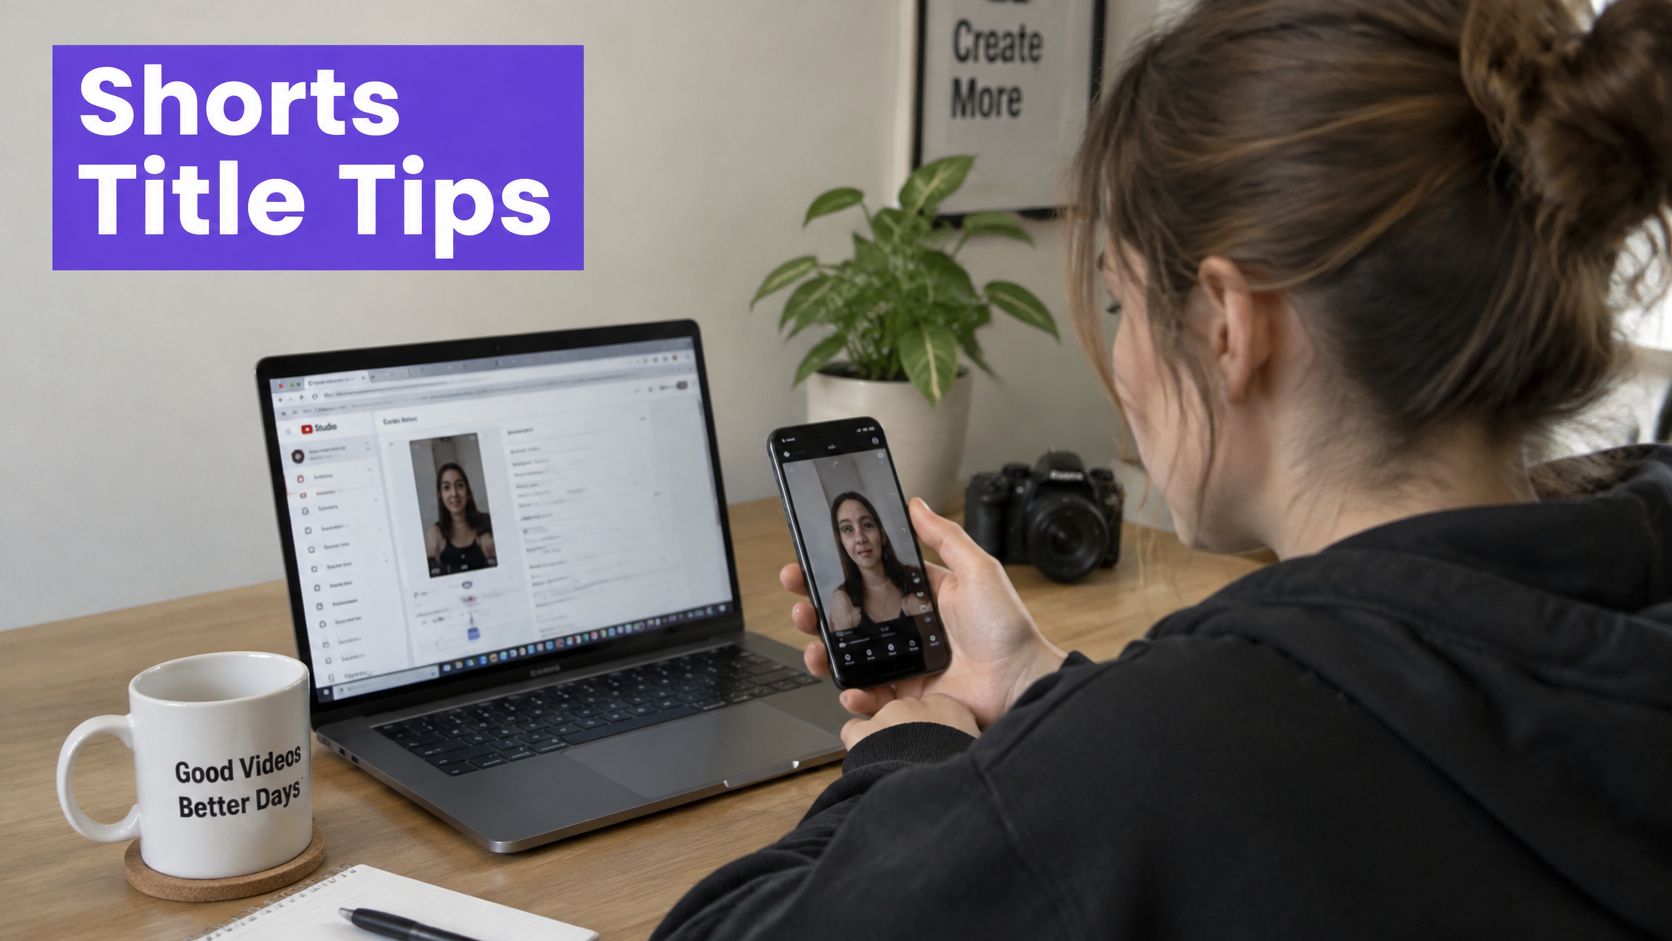
Keep titles short enough to read at a glance and lead with the payoff. Put the mistake, result or question early instead of burying it after your series name or episode number.
Use the description for context the title can't carry. One or two sentences, a link to the related long video where it helps, and one or two relevant hashtags. A long hashtag list reads like you're hoping volume will replace relevance.
For podcasters, add the guest's name in the description when the guest is the reason someone would search for the clip. Audio quality and framing start earlier though, and this resource on YouTube podcast production and setup is worth reviewing if your source recordings keep producing awkward crops.
Shorts autoplay in the feed, but the frame you choose still shows on your channel page and in search. Pick a face, a readable object or a clear before and after moment. Avoid a frame where captions do all the work and the image says nothing.
This guide to choosing a YouTube Shorts thumbnail goes deeper on frame selection if your channel page looks inconsistent. Check what your channel can set rather than assuming the desktop and mobile options match.
Set the made-for-kids answer correctly for each clip, because it affects comments and recommendations. Don't copy the setting blindly from the long video if the clip targets a different audience. Add the Short to a playlist when it's part of a series, such as buyer tips, sermon highlights or lesson recaps.
The walkthrough below shows how those publishing choices come together on the details screen:
Before you publish, read the title and description aloud. Then watch the opening seconds with the sound down. If they don't say the same thing, change the weaker one now.
A podcast clip posted after work may suit one audience, while a local business tip may reach viewers at a different time. Posting-time performance varies by niche and audience, so use a consistent test rather than treating any slot as a universal winner.
Keep format, length and topic type as steady as possible. If one slot gets polished interview clips and another gets rough phone footage, you're testing production quality as well as timing.
Test matrix for a four-week timing experiment
| Slot | Why it is tested | Compare on |
|---|---|---|
| Tuesday 4 p.m. | Tests an afternoon weekday slot | Stayed to watch and average view duration |
| Thursday 7 a.m. | Tests an early slot outside the 8 to 10 a.m. window | Stayed to watch and average view duration |
| Saturday noon | Tests whether weekend viewing differs from weekday viewing | Stayed to watch and average view duration |
Use your audience's main time zone if it differs from yours. If viewers span several zones, note their locations when reviewing results rather than relying on a single overall average.
Compare results over the same period after each upload. A Short may start slowly and gain views later, or get early attention that fades. Judge each slot using comparable clips and the same viewing measures.
After four weeks, keep the slot that performs better across those comparisons. Retest if your audience, format or posting cadence changes.
Read the metrics in order. If you start with raw views, you'll fix the wrong thing.
YouTube Studio exposes "Stayed to watch", defined as the percentage of viewers who watched instead of swiping away, alongside feed exposure and engagement measures, in the YouTube Studio analytics guidance. That sequence tells you where the clip broke. It also notes that Shorts longer than one minute with an active copyright claim may be affected, so licensed or original audio is the safer choice for repurposed business content.
Start with exposure. If the Short barely entered the feed, rewriting the opening line won't solve a topic or audience mismatch. Next look at whether people stayed once they saw it, then at whether they finished.
Post-publish symptoms, likely causes and the change to test
| Symptom in Studio | What it points to | Change to test |
|---|---|---|
| Low feed exposure | Topic, audience or distribution | Try a different topic angle or audience framing |
| High exposure, weak Stayed to watch | Poor first frame or opening sentence | Rewrite the opening visual or first spoken line |
| Strong early viewing, weak completion | Pacing or a late payoff | Tighten the middle and deliver the payoff sooner |
Say a tutorial clip gets shown widely but most viewers swipe away immediately. The topic earned a chance. The first frame, a wide shot of a desk with no visible result, lost it. Recut the same tip starting on the finished result and you have a clean comparison.
Say an interview clip holds people early, then drops halfway. Don't change the hook. Tighten the pause before the answer, cut the repeated setup and move the strongest sentence earlier.
Publish comparable clips and change a single thing per test. Try one opening visual against another, or one first spoken sentence, caption treatment or duration. Wait until each clip has gathered meaningful impressions before you compare stayed to watch, average view duration and retention.
For more ways to turn those patterns into reach, this breakdown of how to get views on a YouTube Short connects retention signals to distribution. Use it after you've identified the symptom, not as a list of changes to apply all at once.
Log each test in a simple sheet with the source video, variable changed, slot and result. One clip rarely settles a question. Three to five comparable clips usually show a pattern you can act on without guessing from memory.
Before a second batch, run five checks on the first clips. Scaling a flawed template just gives you more flawed Shorts to delete or ignore later.
Then assign each next clip one test variable, schedule it into a timing slot you're measuring and set a review date. Don't publish first and decide later what you were testing. You won't reconstruct it from memory.
Scale up only when one variation clearly beats the others across comparable impressions. If three to five similar clips produce no clear winner, you're still testing, and that's fine. Keep the batch small until the pattern resolves.
A repeatable repurposing workflow helps. We build Taja to create shorts, clips with captions, thumbnails and platform-ready posts from a long-form video, then auto-schedule them to all of the user's platforms, and Backlog Boost can repurpose older videos into shorts, clips and text outputs. The tooling speeds up production, but your per-clip review still decides what deserves to go live.
Pick your next long video today, cut three clips from it, run the five checks and publish the strongest one in your next test slot.
If you're cutting every clip by hand, Taja AI can turn a long-form video into captioned Shorts, thumbnails and platform-ready posts, then auto-schedule them across your channels so your review time goes into hooks and framing instead of repetitive exports. Bring your next podcast, walkthrough or lesson, generate a batch, run the five-check pass on each clip and publish only the versions that earn it.


We are blessed to work with leading brands & Companies


We try to make easy and simple for every professionals. Get 30 days free trial - No credit card required.


© 2025 Taja AI. All rights reserved.