.jpeg)

How to Flip Video: Mirror and Rotate Quickly
Learn how to flip video in popular editors and mobile apps. Step-by-step guide to horizontal mirrors and vertical flips with quality and privacy tips.
5 min read
October 9, 2026

Master the motion blur effect for cinematic video. Learn shutter speed, creative uses, and pro editing tips for better content.
Written by:


You've probably had this happen. You record a solid video, the lighting is fine, the audio is clear, the message is useful, and yet the finished clip still looks a little cheap. When someone turns their head, the movement feels twitchy. When you cut a long interview into shorts, the gestures feel sharp in the wrong way. The content is good, but the motion looks wrong.
That missing piece is often motion blur effect control.
Most creators treat motion blur like an optional filter. It isn't. It's one of the main reasons polished footage feels smooth while rushed footage feels brittle. Once you understand what blur is doing, you stop guessing. You start making choices. And if you use AI tools to turn long videos into clips, captions, thumbnails, and social assets, those choices affect more than style. They also affect how well software can read your footage.
A fast example.
You film yourself talking while walking through an office or down a street. On your camera screen, it looks sharp, so you assume you nailed it. Later, on your laptop, every arm movement looks harsh. Your hand gestures jump from one position to the next like a slideshow. It doesn't feel cinematic. It feels like a series of still photos shown too quickly.
That difference usually isn't your camera brand, your lens, or your editing software. It's the amount of blur captured during motion.
The easiest way to think about it is this: motion blur is the smear between positions. If a moving hand appears in one spot in one frame and another spot in the next, some blur between those positions helps your brain read that change as fluid motion. Without it, movement can look clipped and mechanical.
Artists recognized this long before modern editing apps made the effect easy to add. The deliberate use of motion blur in painting emerged in the 1890s, when artists began imitating photographic streaking to make motion feel more alive, especially in dance and other dynamic scenes, as described in this history of motion and photographic artifact. That matters because it shows blur isn't a gimmick from modern video culture. It's a long-standing visual cue that people instinctively associate with movement.
A lot of amateur-looking video is too sharp in motion.
You can have perfect focus and still get awkward movement. That's why creators often say a clip looks “off” even when they can't name the problem. They're reacting to motion without enough visual overlap from frame to frame.
Practical rule: If motion in your video feels brittle rather than flowing, don't only check focus. Check how motion was exposed.
If you make educational content, product demos, real estate walkthroughs, podcast clips, or talking-head shorts, this shows up in a few common places:
Professional video often feels expensive because the movement has continuity. Motion blur helps create that continuity.
Cinematic motion feels smooth because each frame carries a little trace of time. That trace is what blur gives you.
Think of two ways to show movement on paper. One is a stack of clean stick figures, each frozen in a different position. The other is paint dragged slightly as the subject moves across the page. The first can feel jerky. The second feels like action is unfolding. Video works the same way.
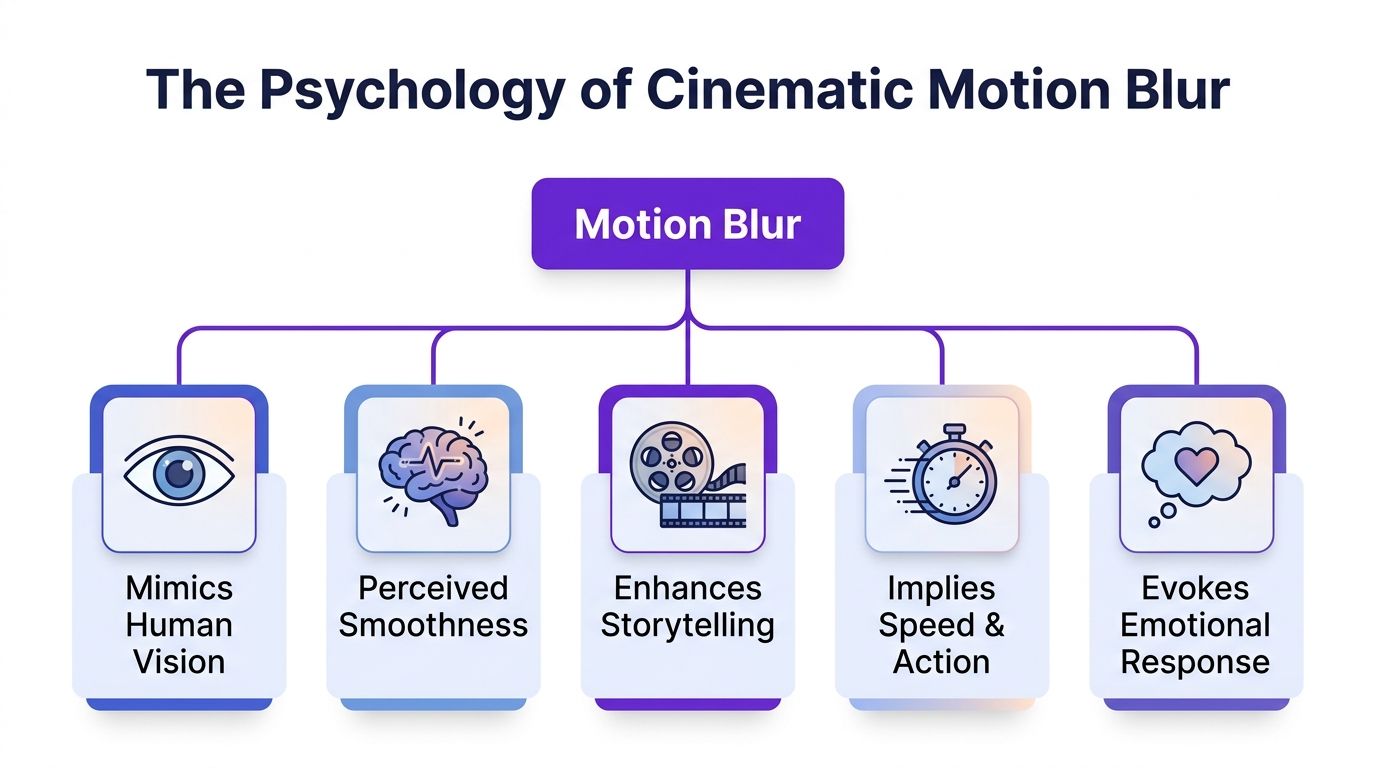
A video isn't motion. It's a sequence of separate frames. What makes it feel like motion is the way those frames connect in your perception. A natural amount of blur softens the jump between positions, so movement feels continuous instead of chopped into slices.
That's why footage shot with a very fast shutter can look unnervingly crisp during movement. Every frame is detailed, but the transition from frame to frame feels abrupt. You're seeing too many frozen instants and not enough temporal blending.
Readers often get mixed up. They hear “cinematic blur” and assume more blur is always better. It isn't.
A useful way to judge it:
| Look | What it usually feels like | Typical problem |
|---|---|---|
| Too little blur | Choppy, harsh, hyper-detailed motion | Fast shutter freezes each moment too cleanly |
| Balanced blur | Smooth, natural, cinematic movement | Motion feels connected |
| Too much blur | Muddy, smeared, hard to read | Motion detail disappears |
The goal isn't blur for its own sake. The goal is readable movement with texture.
Natural motion blur helps the viewer stop noticing the mechanics of the frame rate and start following the action.
Phones often prioritize brightness, stabilization, and sharpness. That can produce footage that looks clean when paused but strange while moving. A face turn, a hand wave, or a quick camera pan can feel overly crisp. On social platforms, that can read as “phone video” even when your topic is excellent.
For a busy creator, this matters because viewers judge production quality quickly. They don't usually say, “The shutter behavior feels unnatural.” They just sense that the clip feels less polished.
Motion blur effect choices shape that first impression.
Professional-looking motion usually comes down to one setting. Shutter speed.
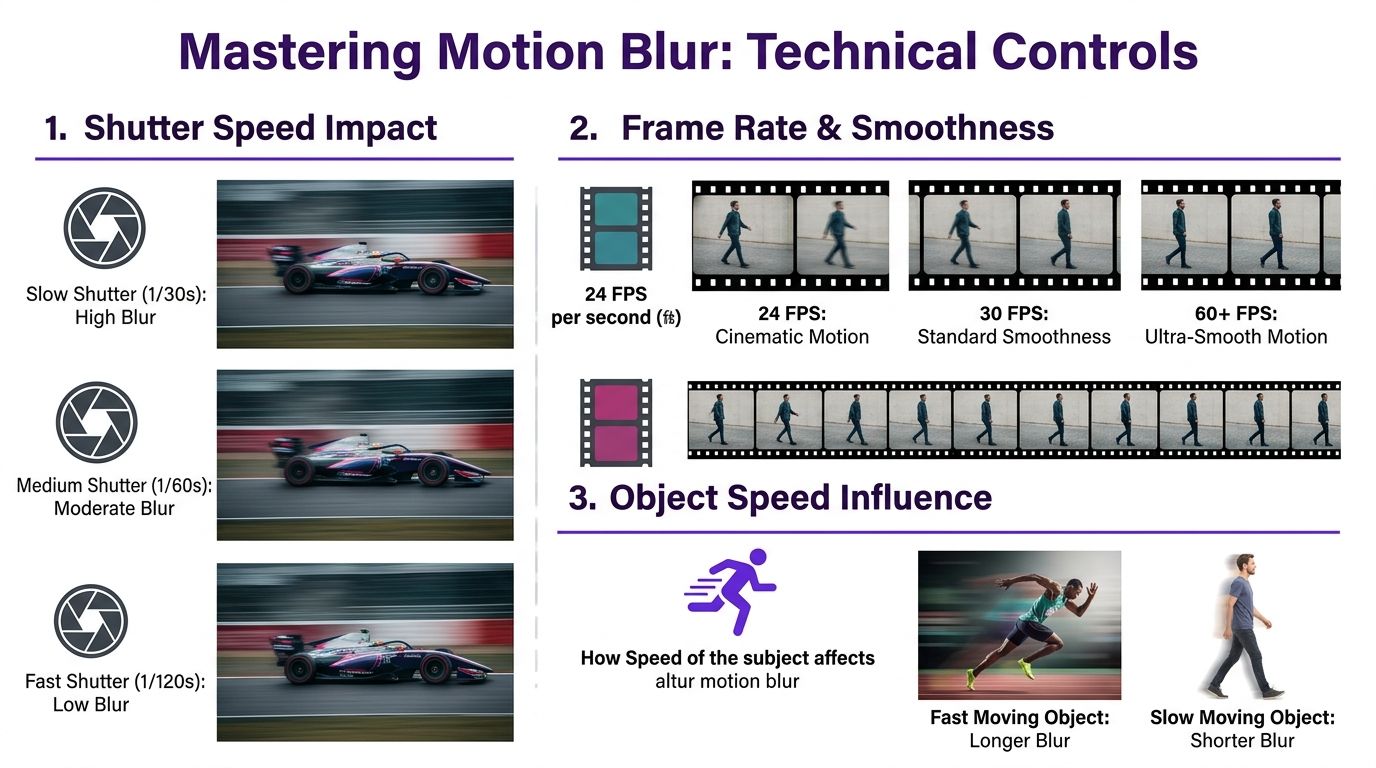
Shutter speed controls how long each frame records light. A longer exposure lets moving subjects leave a trail across the frame. A shorter exposure captures a cleaner slice of time. If your video feels like a stack of sharp photos instead of one flowing moment, shutter speed is often the reason.
These two settings get mixed together all the time.
Frame rate decides how many still images you record each second. Shutter speed decides what each of those images looks like while motion is happening. A useful way to separate them is this: frame rate is the number of pages in the flipbook, shutter speed is whether each page is crisp ink or slightly smeared paint.
That is why two clips shot at the same frame rate can feel very different. As explained in this breakdown of shutter angle and blur behavior, changing shutter speed changes the character of motion inside each frame, even when frame rate stays the same.
Use this mental model while shooting or editing.
For many creators, the practical sweet spot sits around the familiar cinematic baseline. At 24fps, that usually means a shutter near 1/48s or 1/50s. At 30fps, a shutter near 1/60s often gives a natural result. Go much faster and motion starts to feel brittle. Go much slower and detail starts to wash together.
You do not need to treat shutter angle like sacred doctrine. It is merely a shorthand for matching shutter speed to frame rate in a way that produces natural-looking blur.
If that terminology feels abstract, ignore the angle for a moment and focus on what you can see. A faster shutter freezes a hand gesture, a head turn, or a camera pan into separate slices. A slower shutter blends those slices together. The goal is not perfect obedience to a rule. The goal is readable motion that matches the mood of the shot.
That distinction matters even more if you use AI tools after editing.
AI captioning, scene detection, thumbnail pickers, and content analysis often work best when faces, hands, text, and products stay readable in key frames. Too little blur can make motion feel harsh to humans. Too much blur can make automated tools miss expressions, choose weak thumbnails, or struggle with on-screen details. For a solopreneur repurposing one video into shorts, clips, and stills, shutter speed affects both style and downstream automation.
Here is the quick version.
A good test is simple. Wave your hand in front of the lens. If every finger edge stays razor sharp, your shutter is probably too fast for a cinematic feel. If your hand turns into a soft blob, it is too slow for most business content.
Some projects benefit from cleaner motion.
A fitness demo, product tutorial, cooking shot, or screen-heavy explainer may need faster shutter settings so hands, objects, and interface details stay easier to parse. That can also help AI tools extract sharper thumbnails or identify visual moments more accurately.
Other projects benefit from stronger blur. Event recaps, nightlife reels, dance clips, and fashion edits often look better when movement smears a little more. The blur adds energy and hides the mechanical feel of individual frames.
If you want to shape that feeling in post, not just in camera, timing matters. This guide to keyframing blur-related adjustments in Premiere Pro is useful when you want motion treatments to ramp up or ease off across a clip instead of appearing all at once.
In 3D and CGI workflows, the controls may use different labels. Blender and Redshift often tie blur amount to a Shutter or Frame Duration value rather than a simple camera shutter menu. That relationship is explained in this Blender Stack Exchange discussion of shutter and frame duration.
A short visual explainer helps if shutter angle language still feels abstract.
Motion blur becomes more interesting when you stop treating it like a correction and start using it like a storytelling choice.
That doesn't mean every shot should be blurry. It means every shot should have a reason for the amount of blur it has.
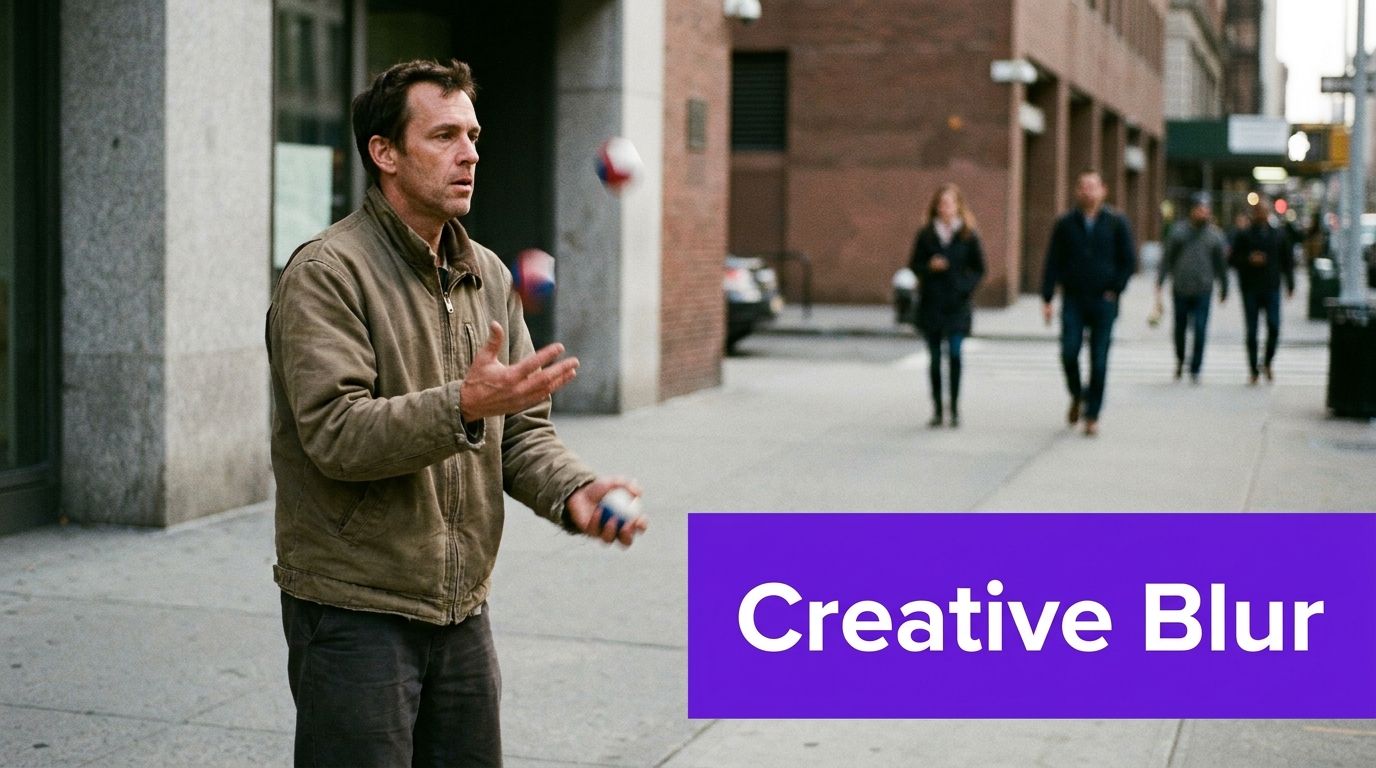
A panning shot is a good example. If you track a moving person while using a slower shutter, the subject can stay relatively readable while the background streaks. That creates focus without using a heavy vignette or graphic pointer. It tells the viewer what matters.
A different use is emotional. Slightly extended blur can make nightlife, live music, dance, and crowds feel vivid and unstable in a good way. It suggests speed, chaos, or excitement. On the other hand, very sharp motion can feel clinical, aggressive, or tense.
It's common for creators to overdo it. They assume that because blur appears in real cameras and real life, adding more of it must improve the result. But realism and usefulness aren't the same thing.
Research in digital media found that motion blur improves visual realism, yet it doesn't significantly improve player experience or performance, as discussed in this paper on blind motion deblurring and related media implications. For creators, the lesson is straightforward. Blur can add style and perceived realism, but that doesn't mean it automatically improves the actual experience.
Key takeaway: Motion blur is strongest when it supports the message. It's weakest when it's added because “cinematic” sounds nice.
Here are three common examples:
A practical creative test is simple. Ask, “Should the viewer feel the movement or inspect the movement?” If they need to inspect it, reduce blur. If they need to feel it, lean into it.
You open your edit, play back a fast hand gesture or a camera move, and something feels off. The motion looks too crisp, almost like a stack of still photos instead of continuous movement. That is usually the moment creators reach for a blur effect.
Post-production can help, but it works best when you use it with a clear goal. Add blur to restore a natural sense of motion, smooth animated elements, or make transitions feel less mechanical. If the footage already has enough blur from the camera, extra blur often turns clean motion into a smeared mess.
A good rule is simple. Use software blur to support the illusion your shutter speed should have created, not to hide weak footage.
Premiere Pro is best for selective blur, not blanket blur across an entire clip. In other words, treat it like adding a brushstroke of paint, not fogging the whole window.
Try this workflow:
This approach is especially useful for text, logos, mockups, and screen replacements. If you want more ideas for building that kind of effects workflow, this guide to video editing with effects is a strong next read.
After Effects gives you more precise control because it understands animated motion paths. That matters when movement is created in software rather than captured in camera.
Use the built-in Motion Blur switch on animated layers first. It usually produces the most believable result for position, scale, and rotation changes. If that still looks too sharp, test Pixel Motion Blur carefully. It can help, but it can also create strange warping around hair, fingers, and thin edges.
Preview frame by frame before exporting. If the blur makes an object look melted instead of moving, back it off.
Final Cut Pro works well when you keep the effect short and purposeful. Many creators get cleaner results by using blur only during transitions or brief bursts of movement.
| Goal | Tool | What to watch |
|---|---|---|
| Softer movement in a transition | Directional blur or built-in effects | Keep the duration short so the shot still feels clean |
| Stylized movement on graphics | Transform animation with blur-like effects | Match the blur direction to the object path |
| Smoothing harsh motion | Subtle blur plus retiming | Start light and check edge detail before adding more |
If you are unsure how much to add, compare one pass with blur and one without. The better version usually feels smoother without calling attention to the effect itself.
Motion blur in thumbnails should suggest speed, not destroy clarity. Smear the background element, streak an arrow, or blur a duplicate of the subject behind the sharp cutout.
Keep the main face, product, or headline crisp. This matters for click-through rate, and it also helps AI thumbnail tools identify the subject correctly if you use automation later in your workflow.
Web motion blur is mostly a design cue. It tells the eye where movement happened.
Use CSS filters and transform animations sparingly on hero sections, banners, or hover states. Too much blur can make a page feel soft and unfinished, especially on mobile screens where every edge already has less room to breathe.
Some motion problems start before editing. Choppy movement, frame drops, and uneven playback can come from encoder settings or recording bottlenecks, not blur choices alone. If your footage looks inconsistent before you add any effect, this guide on troubleshooting OBS encoding issues can help diagnose the capture side.
One last practical check. If your edited blur looks good to your eye but keeps confusing auto-captioning, scene detection, or thumbnail selection tools, reduce it and test again. Human viewers can tolerate a little softness. AI systems often need cleaner edges and more readable frames. For creators repurposing one video into many assets, the best motion blur setting is usually the one that looks cinematic and still leaves enough visual detail for your software stack to read the shot correctly.
Short-form video has changed the blur conversation.
On a large monitor, a little extra motion blur can feel rich and cinematic. On a phone screen during a fast scroll, that same blur can look muddy. And if you rely on AI tools to analyze footage, generate captions, find scenes, or suggest thumbnails, blur isn't just an aesthetic choice. It becomes a data quality issue.
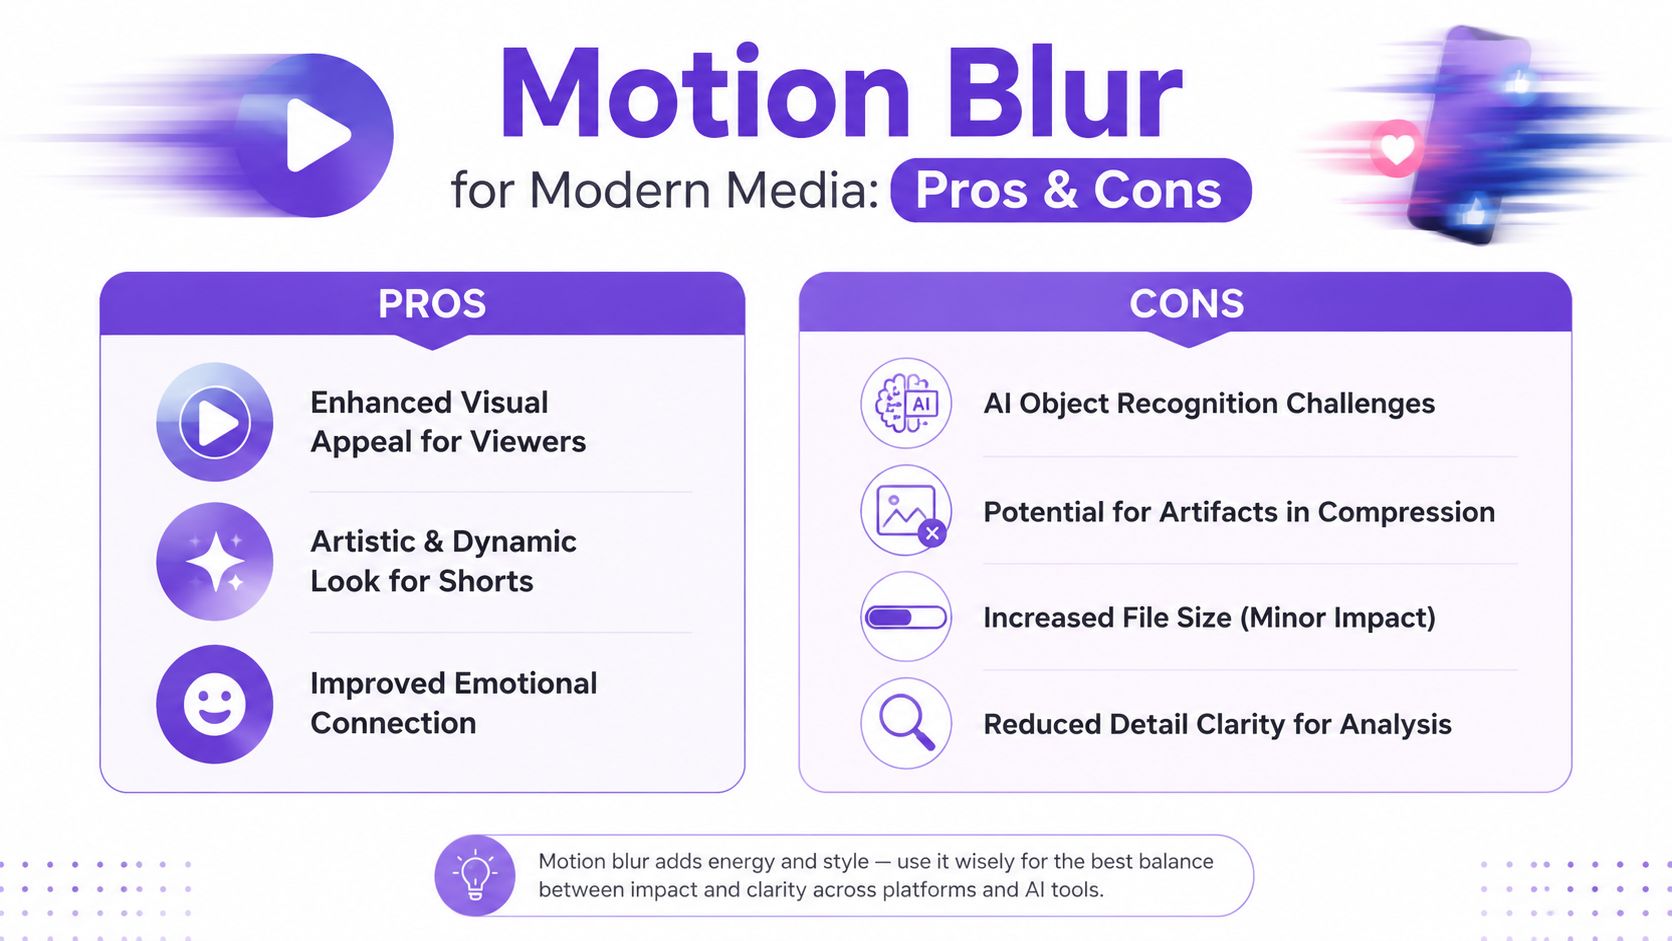
Computer vision systems identify patterns, edges, shapes, and consistent features across frames. When motion blur gets too strong, those features become harder to track. Research summarized in this technical discussion of motion blur and computer vision notes that motion blur degrades feature identification and tracking. For creators, that can affect auto-captioning, scene detection, and thumbnail generation.
That creates a tension many creators never think about. The same blur that makes footage feel more atmospheric can make automated analysis less reliable.
If your videos will feed an AI-heavy workflow, optimize for both humans and software:
If you're comparing tools for clipping and automation, it helps to compare top AI video editors with an eye on how each handles scene analysis and repurposing workflows, not just flashy effects.
A separate part of the workflow matters too. Social editing has its own constraints around readability, pacing, and framing. This guide to social video editing is useful if you're balancing visual style with platform-friendly output.
The best blur for social video is usually the amount that viewers notice emotionally, not the amount software notices technically.
When motion looks wrong, the fix is usually simpler than it seems.
Your shutter was probably too slow for the subject speed, or you added too much blur in post. Reduce blur first on faces, hands, and anything the viewer needs to recognize quickly. Keep stylized blur for transitions or background motion.
You likely captured them with too little motion blur. That often happens with very fast shutter speeds. If you're shooting again, slow the shutter. If you're already in post, use blur sparingly, because fake blur can help the feeling of motion but won't fully recreate natural exposure.
That usually points to software-generated blur struggling to interpret motion. Pixel-based blur and frame interpolation can warp hair, fingers, or objects crossing each other. Mask the effect, lower the intensity, or restrict it to synthetic elements like text and graphics.
Protect cleaner frames. Give your workflow some moments with clear faces, readable objects, and less streaking. AI systems work better when they can detect stable features.
Use this test:
The motion blur effect works best when it's intentional, measured, and tied to the job of the shot.
If you're turning long videos into shorts every week, the hard part isn't just editing. It's keeping motion, captions, thumbnails, formatting, and platform-specific outputs consistent without burning hours on each upload. Taja AI helps you repurpose long-form content into ready-to-publish shorts, clips, captions, thumbnails, blogs, and social posts from one workflow, so you can keep the cinematic polish that matters while scaling content production faster.


We are blessed to work with leading brands & Companies


We try to make easy and simple for every professionals. Get 30 days free trial - No credit card required.


© 2025 Taja AI. All rights reserved.