.jpeg)
TikTok to Text: A Practical Guide for Creators
Learn how to convert TikTok to text the right way. Step-by-step workflow for transcripts, captions, and repurposing with accessibility and accuracy in mind.
5 min read
October 8, 2026

Learn how to flip video in popular editors and mobile apps. Step-by-step guide to horizontal mirrors and vertical flips with quality and privacy tips.
Written by:


You record a clean webcam interview, upload it, and notice something feels wrong. The speaker's gestures look reversed, the logo on their shirt reads backward, and a sign in the background suddenly points the opposite way. The export may be technically successful, but it can still be unsuitable for publishing.
That's why learning how to flip video isn't just about finding a mirror button. You need to identify whether the source is mirrored, choose the correct transformation, preserve the intended meaning, and inspect the finished file in every crop where viewers will see it. The workflow below focuses on those decisions, including the problems that simple tutorials usually skip.
A webcam preview may show a presenter's right hand on the viewer's left, while the recorded file preserves the actual scene. A horizontal flip corrects that mismatch. A vertical flip produces an upside-down image, and rotation changes the frame's orientation. A 90-degree rotation also swaps width and height, potentially turning wide footage into tall footage. Nimb's explanation of video mirroring describes flipping as a geometric transformation rather than ordinary rotation.
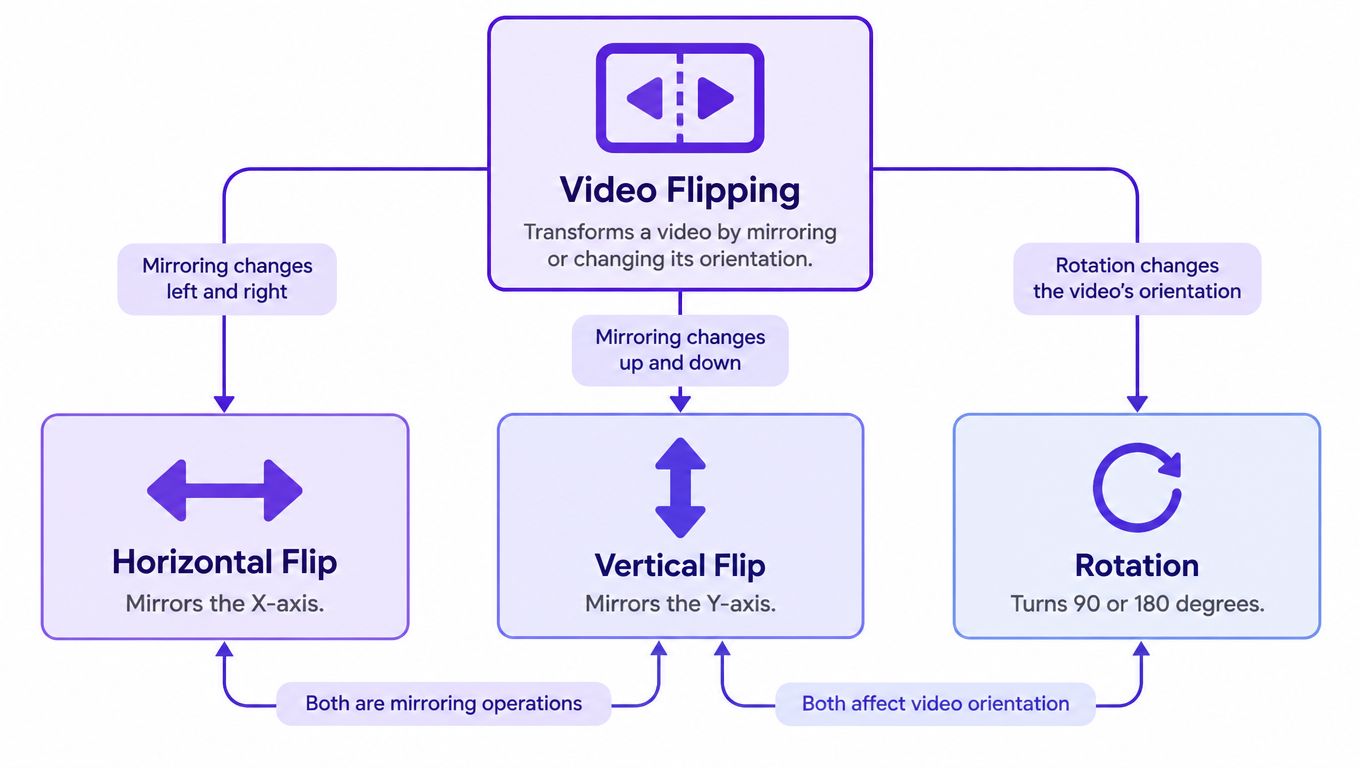
Use a horizontal flip when a webcam or selfie camera captured a mirrored view and the final image should match the actual world arrangement. Choose a vertical flip only for an upside-down effect or a specific visual treatment. Use rotation when the camera was held sideways. These operations change different parts of the image, so selecting the wrong one can reverse the subject's direction, disrupt the composition, or create portrait dimensions when you only wanted a mirror.
Mirroring changes meaning as well as appearance. Text, logos, maps, signage, screen recordings, and directional demonstrations become laterally reversed. A presenter indicating a product on the viewer's right may appear to indicate the left. A real-estate walkthrough can make room directions confusing, and a hand-placement tutorial can become harder to follow.
A flip does not create a vertical video by itself. It preserves the source frame's geometry, so portrait publishing still requires cropping or reframing. Image reversal moved from broadcast and analog television workflows into digital editing, then became common as webcams and real-time streaming made mirrored previews routine.
Practical rule: Confirm whether the source is mirrored before choosing the destination format. Correct the image first, then reframe it.
Pixel-based flipping also requires more processing than a metadata-only change. The editor usually decodes each frame, reflects its pixels, and encodes the result again. In practice, that can take several seconds longer than an operation that leaves the image pixels unchanged. The extra processing matters when handling many clips, but a clear, correctly oriented export matters more than a small time saving.
Desktop editors use different labels, but the underlying action is consistent. Select the clip or the exact range that needs correction, open the transform or properties controls, and choose a horizontal or vertical flip. Adobe distinguishes horizontal flipping, which swaps left and right, from vertical flipping, which turns the image upside down, and allows the effect to apply to a selected segment rather than the entire clip, as described in Adobe's guide to flipping video.
| Editor type | Horizontal flip action | Vertical flip action |
|---|---|---|
| Desktop editor | Select the clip, open Transform or Motion, then choose Flip Horizontal | Select the clip, open Transform or Motion, then choose Flip Vertical |
| Browser-based editor | Upload the clip, select it on the timeline, open Adjust or Transform, then choose horizontal mirror | Upload the clip, select it on the timeline, open Adjust or Transform, then choose vertical flip |
| Mobile-style editor | Select the clip, open Edit or Crop, then choose Mirror or Flip Horizontal | Select the clip, open Edit or Crop, then choose Flip Vertical |
A common mistake is flipping the complete timeline because one camera angle was mirrored. If an introduction uses a normal camera feed and the interview section uses a mirrored webcam, apply the transformation only to the affected segment. This keeps the opening, transitions, graphics, and other angles consistent.
In Premiere Pro, look under the clip's Motion controls. In Final Cut Pro, use the video inspector and transform controls. In DaVinci Resolve, select the clip and adjust the transform settings in the Inspector. Browser editors usually expose the same choice under a simple Mirror, Flip, or Transform button.
For a beginner-friendly overview of broader editing workflows, this video editing guide for agents is useful when you're working with structured recordings rather than isolated clips. You can also compare the basic workflow with this guide to choosing a video editing app for beginners.
Exporting deserves the same attention as the edit. Some tools apply the preview transformation correctly but write orientation metadata that another player interprets differently. Open the exported file in a separate player, confirm the image is mirrored as intended, and check that the dimensions haven't changed unexpectedly.
On a phone, the quickest path is usually to open the clip in the Photos or Gallery app and look for Edit, Crop, or Transform. Some native apps provide a mirror control, while others expose the feature only through a mobile editor. If the native workflow doesn't offer the exact transformation, use a trusted editor such as iMovie, CapCut, Adobe Premiere Rush, or another app that clearly labels horizontal and vertical changes.
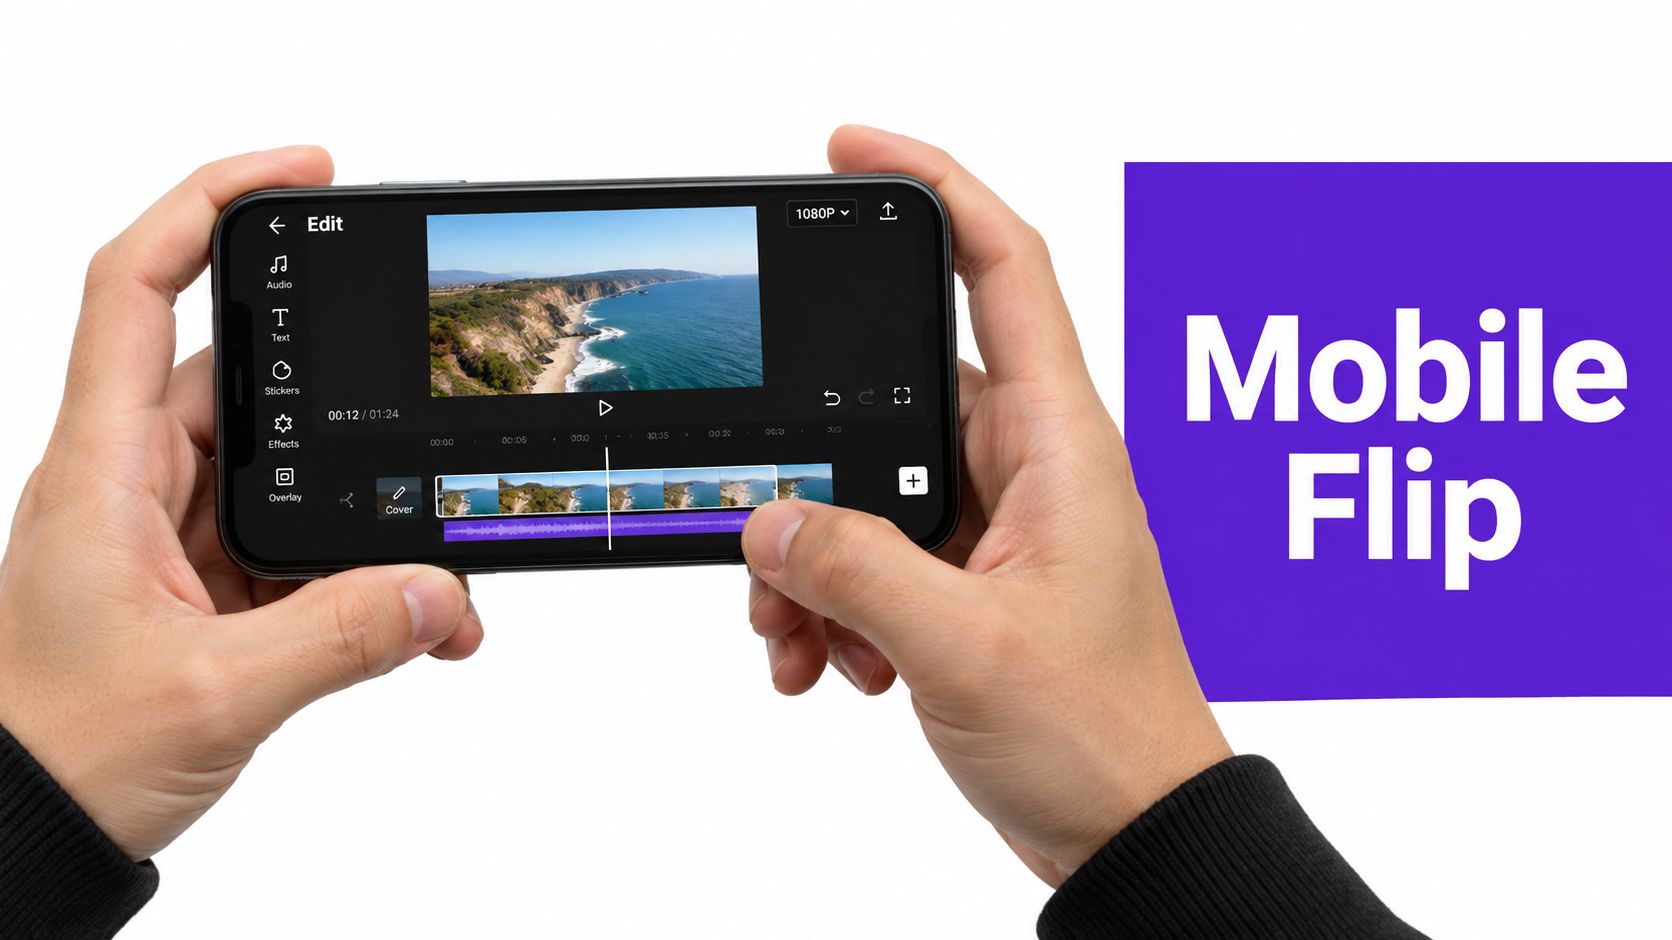
Start with the original clip and make a duplicate if your phone's editor uses destructive changes. Select the video, open the transform controls, choose Mirror or Flip Horizontal for a left-right correction, and preview text before saving. Choose a vertical flip only when the upside-down result is deliberate.
Mobile previews can be misleading because the editing app may display orientation metadata differently from another player or social platform. A consistent advanced path is to export the corrected master first, then create separate portrait or sideways versions from that master instead of repeatedly transforming the same compressed file.
Creators who want a guided Apple workflow can use this practical iMovie tutorial. The principle is the same across devices: make the transformation explicit, export once when possible, and review the rendered pixels rather than trusting the editor's preview.
When several clips need the same correction, FFmpeg gives you a repeatable workflow instead of a sequence of manual clicks. The key distinction is the filter. Use hflip for a left-right mirror, not transpose, because transpose performs a 90-degree rotation.
For a horizontal mirror with audio copied where the container and timestamps allow it, run:
ffmpeg -i input.mp4 -vf "hflip" -c:a copy output.mp4
For an upside-down vertical inversion, use:
ffmpeg -i input.mp4 -vf "vflip" -c:a copy output.mp4
For a 180-degree transformation, combine the filters:
ffmpeg -i input.mp4 -vf "hflip,vflip" -c:a copy output.mp4
These commands follow the filter distinction described in this FFmpeg flipping guide. The video is filtered and therefore needs video encoding, while the audio can remain stream-copied when the output container supports it.
Before running a batch, inspect the source with ffprobe. Check the width, height, frame rate, duration, streams, and any orientation-related metadata. A file may already carry instructions that a player uses to rotate the display, so applying another transformation without understanding those instructions can produce a double change.
Process a short test segment first:
ffmpeg -ss 0 -i input.mp4 -t 10 -vf "hflip" -c:v libx264 -c:a copy test-output.mp4
Review the test for readable text, logos, signs, gestures, and audio sync. If the result is correct, run the full export using the same filter and appropriate video encoding settings.
The filter should match the visual problem, not the button name you remember.
hflipmirrors pixels.vflipturns the image upside down.transposerotates it.
Batch processing becomes especially useful when a long recording must be divided into multiple clips before distribution. Plan the transformation consistently across those pieces, and use this guide to splitting a video into parts when the source needs segmenting before or after the correction.
A mirror fixes the image, but it doesn't solve the distribution format. Vertical video normally uses a 9:16 aspect ratio, while traditional television, cinema, and desktop video commonly use horizontal formats. A flip leaves the aspect ratio unchanged, so a horizontal recording still needs cropping or reframing before it becomes a portrait short.
Mobile viewing makes that sequence important. One industry source reports that smartphones are held vertically about 94% of the time, while only 13% of viewers switch their device horizontally to watch video, according to this comparison of horizontal and vertical video. The same source reports that Snapchat found vertical-video ad completion rates up to 9 times higher than horizontal ads. Those figures are platform- and format-specific, not universal guarantees, but they support a clear editing decision: prepare the asset for the way the audience will view it.
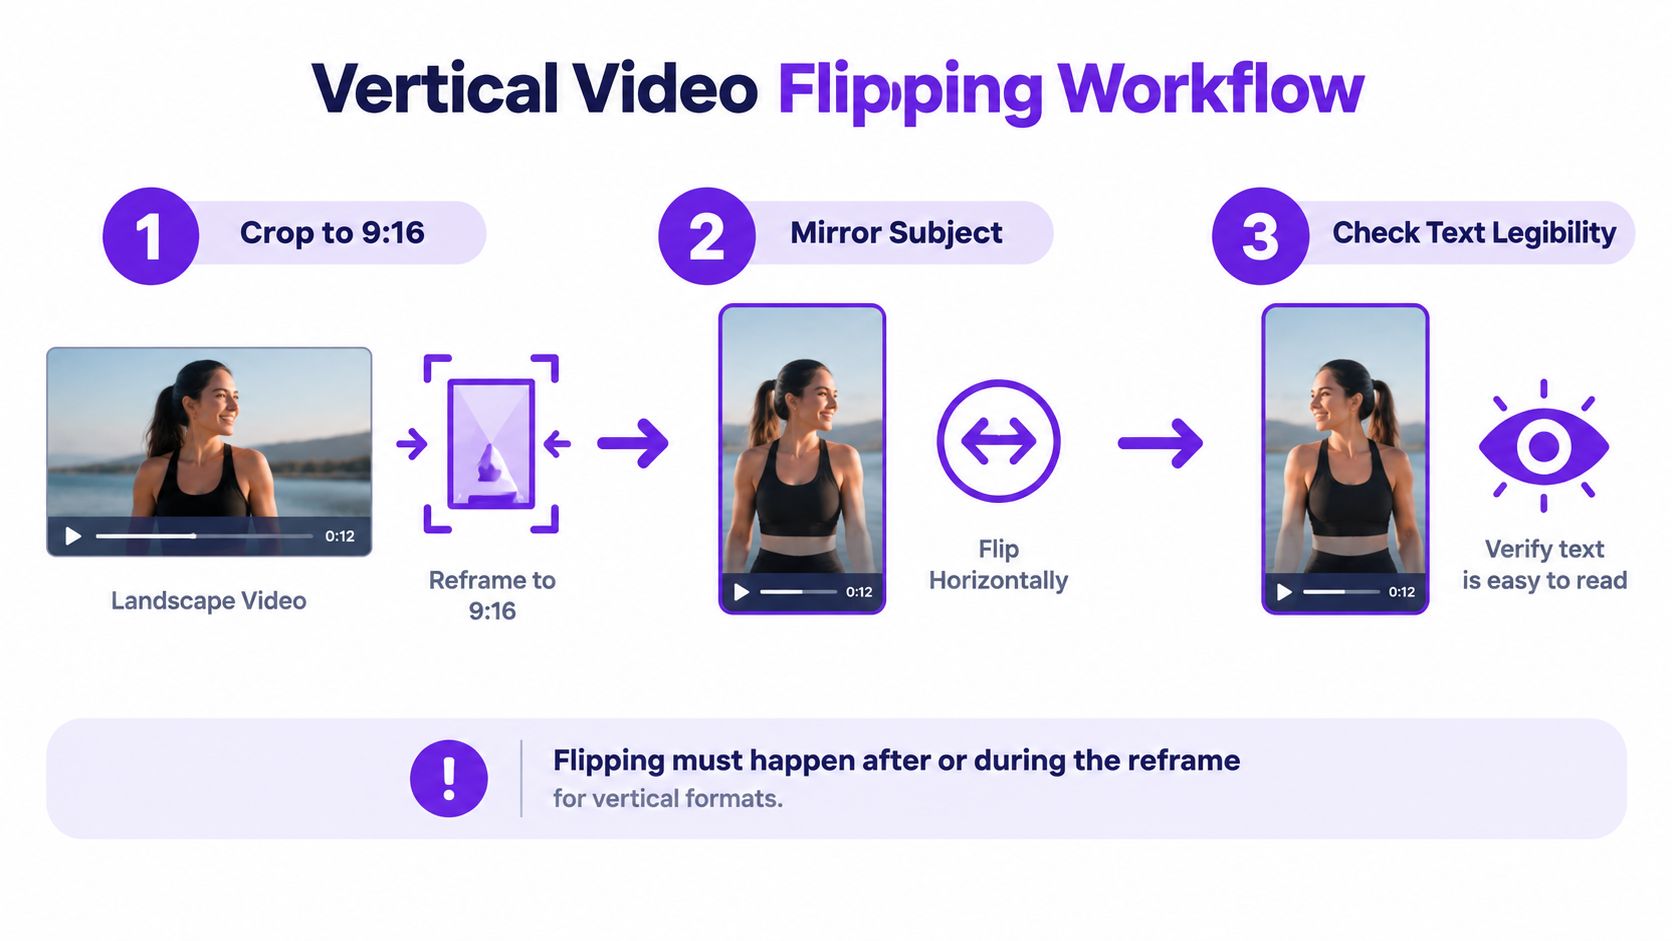
For long-form repurposing, use this order:
Cropping can change the importance of background details. A license plate, private document, face, or location clue that sat near the edge of a wide frame may become prominent in a short-form crop. A successful export therefore isn't automatically a safe or understandable export.
Treat flipping as part of the editorial decision. The question isn't “Did the mirror button work?” It's “Does this corrected, cropped version preserve what the viewer needs to understand?”
The most uncomfortable flipped exports usually aren't caused by a failed button. They happen because nobody reviewed the transformed frame in context. A mirrored logo, reversed slide, unreadable sign, or newly prominent background face can survive a technically perfect render.
Privacy guidance recommends automated detection followed by manual review for motion, occlusion, and low-light cases, as explained in this guide to privacy protection and face blurring. Apply that principle to the finished asset, not just the original. Reframing can shift attention toward details that were peripheral before the transformation.
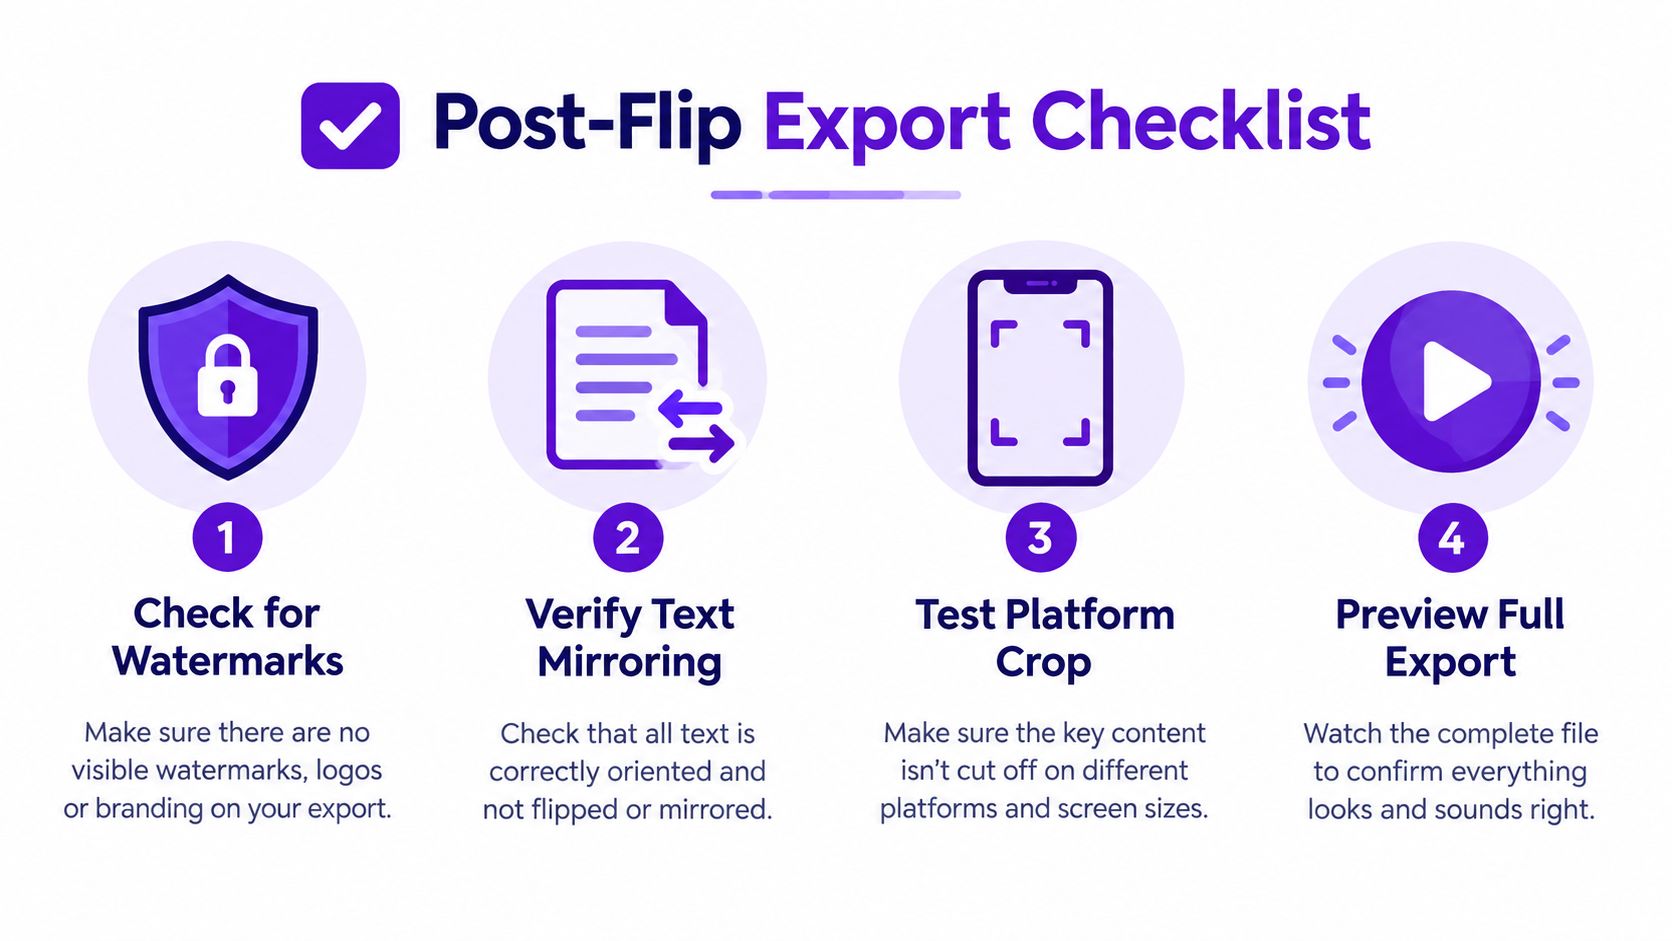
Text and graphics: Read every burned-in caption, lower third, slide, product label, sign, and watermark. If text is mirrored, either regenerate it in the editing timeline or place the text layer above the flipped video so it remains readable.
Faces and private details: Scan the background for faces, license plates, documents, addresses, and screens. Don't review only the center of the frame. Play the full clip because people and objects move into view.
Platform crops: Check each portrait, square, or horizontal version separately. A detail that's safely outside one crop can sit directly behind the subject in another.
Thumbnail and opening frame: Inspect the still image viewers will see before playback. A thumbnail may emphasize a logo, gesture, sign, or face that wasn't obvious during the edit.
Captions and timing: Confirm captions still match the speaker and that the transformed render hasn't introduced timing problems. Readability includes contrast, placement, and whether the words remain semantically correct.
A render is a file. A publishable asset has also passed a privacy, legibility, and context review.
Most failed results have a recognizable cause. Diagnose the behavior you see rather than exporting repeatedly with different buttons.
You likely chose a transpose or rotate control. Replace it with Flip Horizontal for left-right reversal, or use FFmpeg's hflip filter. If the width and height changed, you performed a rotation or a crop rather than a geometry-preserving horizontal mirror.
The source may already contain orientation metadata, and the player or editor may be applying it automatically before your filter runs. A second transformation then produces an unexpected result. Inspect the source metadata, disable automatic rotation when appropriate, and compare the rendered pixels in a separate player. FFmpeg's filter documentation distinguishes transpose operations from ordinary flipping and reinforces why metadata needs inspection.
That's normal for a horizontal mirror. Decide whether the text belongs to the scene or the edit. A physical sign, shirt logo, or product label may need the mirrored video for spatial accuracy, but a title card, caption, lower third, or regenerated logo should usually be rebuilt as a normal overlay.
Filtering changes video processing, and an unsuitable export can disturb timestamps or cause a mismatch between video and audio. Preserve audio with stream copy when the format permits it, use a stable video codec for the output, and check the complete file rather than only the opening seconds.
The editor may have switched export presets, reduced the video bitrate, changed the frame rate, or resized the frame during the transformation. Retain the source dimensions and frame rate unless the destination requires a different output, and avoid repeatedly re-encoding the same file. Create a corrected master, then derive platform versions from it.
The flip didn't cause the crop, but it may have changed which side feels visually dominant. Reposition the subject after mirroring, protect important gestures and products, and inspect the crop at the platform's actual preview size.
Before publishing, validate width and height, presentation timestamps, audio synchronization, captions, burned-in text, and every intended crop. If a clip is headed into an automated repurposing workflow, keep the corrected master clearly labeled so later cuts don't alternate between mirrored and unmirrored versions.
Taja AI turns long-form video into ready-to-publish shorts, clips, captions, thumbnails, blogs, and platform-specific posts, which can reduce the repetitive work after your corrected master is ready. Upload a recording, review the generated assets and crops, then visit Taja AI to start repurposing your videos with a more consistent publishing workflow.


We are blessed to work with leading brands & Companies


We try to make easy and simple for every professionals. Get 30 days free trial - No credit card required.


© 2025 Taja AI. All rights reserved.