.jpeg)
10 Repurpose Examples to Multiply Content Reach
Explore 10 repurpose examples for turning long-form content into clips, posts, blogs, emails, and lead magnets across creator and business niches.
5 min read
September 17, 2026

Transform your content with our guide on video editing with effects. Learn to apply, automate, & optimize effects for captivating videos.
Written by:


Ever stared at a folder of raw video clips and felt that sinking feeling of, "Okay... now what?" If so, you're not alone. The truth is, in today's insanely crowded content world, just hitting record isn't enough. The real magic—the thing that turns a flat recording into a story that actually hooks people—is strategic video editing with effects.
This is your guide to moving past those basic jump cuts and start using visuals that make your audience stop scrolling and actually listen.
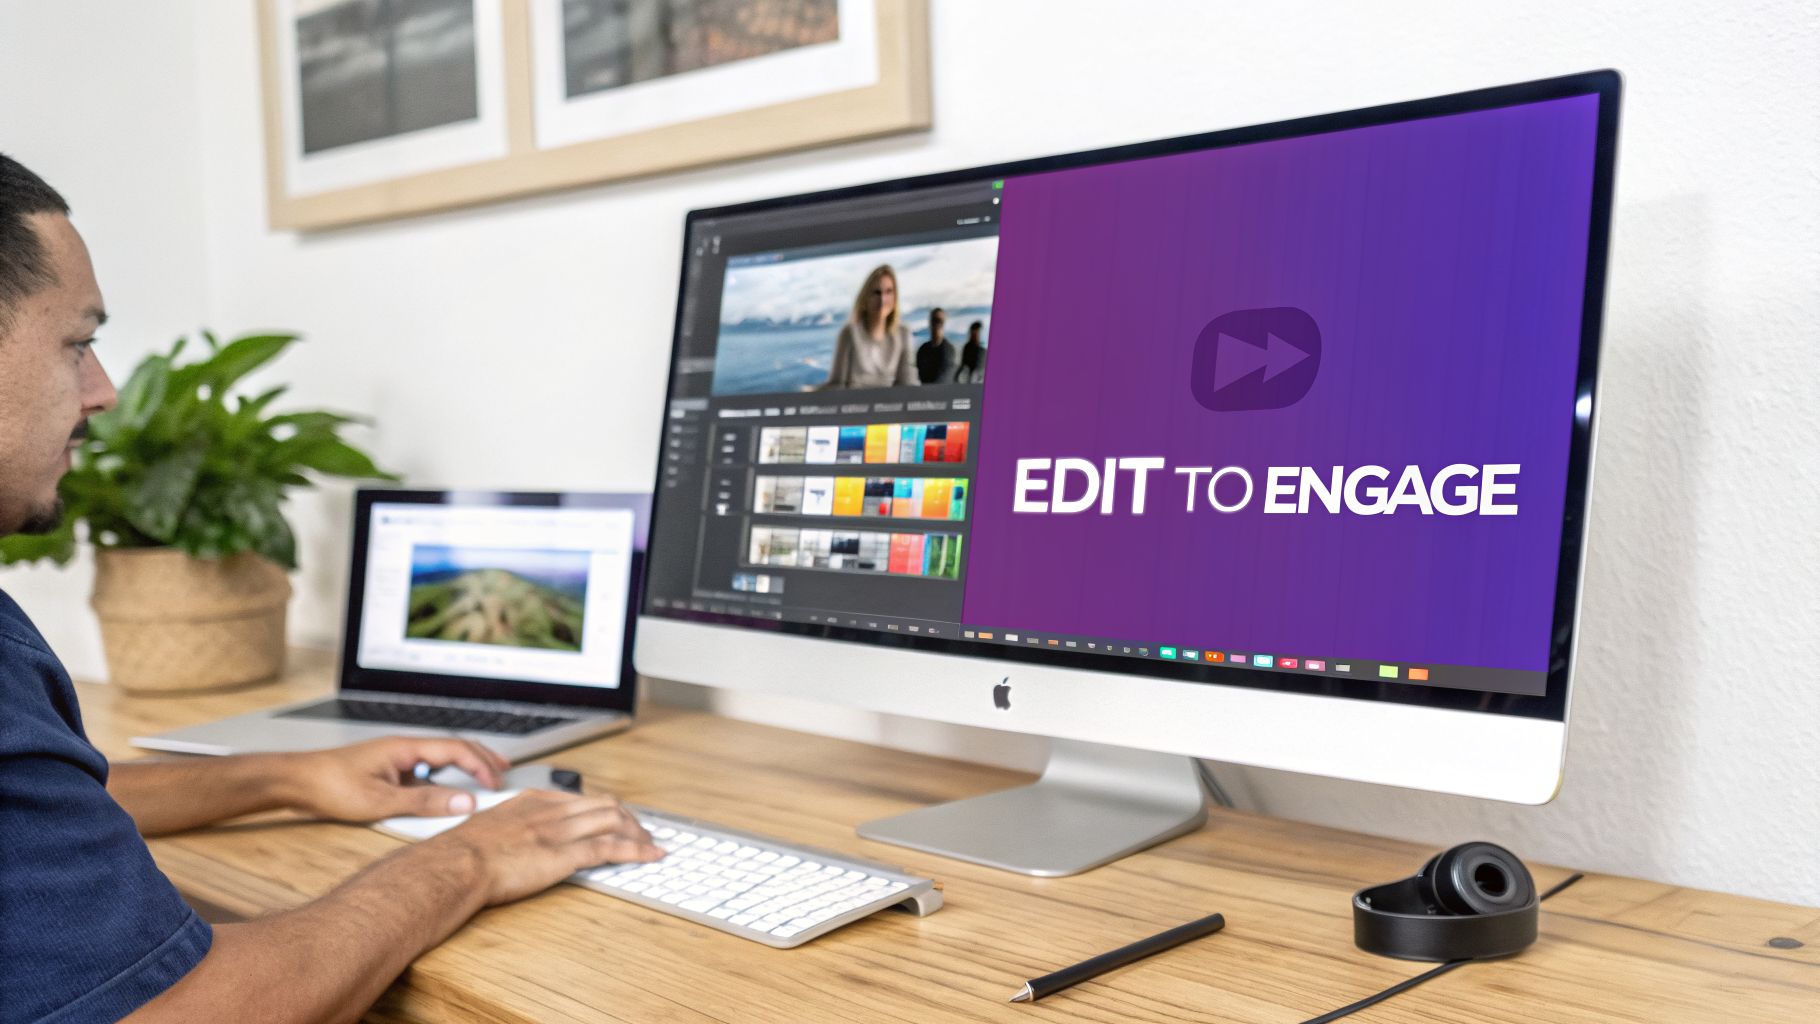
Let's be honest, the whole "raw and unpolished equals authentic" trend is over. Your viewers, whether they're watching a 30-second TikTok or a 30-minute podcast, now expect a certain level of visual polish. Without it, your message gets lost, and their thumb keeps moving.
This isn't about just trimming the start and end of a clip anymore. It's about telling a story visually. The right effects—from a subtle color grade that sets a mood to a quick AI-powered zoom that hammers home a key point—are what keep eyes on the screen and make your content stick.
The demand for this level of polish has completely changed the game. The video editing market itself ballooned to $12.1 billion in 2023, fueled almost entirely by effects-heavy short-form content. Today, over 70% of top videos on platforms like TikTok and YouTube Shorts use dynamic effects, resulting in a 25% higher engagement rate on average.
This explosion has fast-tracked editing technology. We've gone from the manual labor of early film splicing to AI platforms that do the heavy lifting for you. What once took an expert editor days of painstaking work can now be done in minutes. For busy creators, podcasters, and small business owners, this is a massive win.
The core benefit is simple: You can produce high-quality, engaging content consistently without becoming a full-time video editor. Your focus remains on your message, not on mastering complex software.
The goal isn't to just throw flashy graphics at your viewers. It's about using effects with intention. Understanding the importance of video marketing shows how even the most traditional industries now rely on dynamic visuals to connect with customers.
Here’s how the right effects can elevate your content:
Tools like Taja AI are designed to make this process incredibly simple. You can upload a long-form video, and the platform's AI automatically finds the most engaging moments, then applies proven effects like dynamic captions and smart zooms. It turns one recording into dozens of polished clips, ready to publish, freeing you up to do what you do best: create great content.
Ever opened your editing software and felt instantly overwhelmed by the sea of effects, plugins, and presets? Yeah, we’ve all been there.
Here’s the thing: mastering video editing with effects isn’t about knowing what all 500 options do. It’s about building a small, powerful toolkit of core effects and knowing exactly when and how to deploy them for maximum impact.
Let’s cut through the jargon and get straight to what actually works.
Stop thinking of transitions as just fancy wipes or dissolves. When you use them right, they’re a powerful storytelling tool that controls the pace of your video and tells the viewer where to look.
Instead of jarring jump cuts, think about creating a seamless flow. Your two best friends here are the classic J-cut and L-cut.
In a J-cut, the audio from your next clip starts playing before the video switches over. This builds anticipation and pulls the viewer into the next scene. An L-cut does the opposite—the audio from the previous clip lingers over the start of the new one, which is perfect for showing a reaction or creating a reflective moment.
These techniques are ancient in film terms, but they still work. Fun fact: back in 1956 when AMPEX invented the Video Tape Recorder (VTR), it completely changed the game. By 1967, with over 50% of U.S. TV stations using them, editors could finally start layering audio and video without physically splicing film. That was the birth of the J-cut as we know it today.
Color is pure emotion. It’s one of the most powerful, subconscious tools in your entire editing arsenal. This is where color correction and color grading come in, and no, they’re not the same thing.
Color Correction: This is the technical, boring-but-necessary part. It’s about fixing problems. You’re making your footage look natural and consistent, balancing the white balance, exposure, and contrast so that a clip shot in warm indoor light matches the next one shot in cool daylight.
Color Grading: This is the fun part. It’s the creative process of applying a stylistic look to set the mood. Slapping on a high-contrast, desaturated Look-Up Table (LUT) can give your video a gritty, cinematic vibe. A warm, golden-hour grade can make it feel nostalgic and inviting.
Pro Tip: The best color grading is often the kind you don’t notice. Your goal is to enhance the story, not distract from it with a heavy-handed "filtered" look. A consistent color palette across your videos also builds a killer brand identity people will recognize instantly.
To help you decide what effect to use and when, here’s a quick-reference table that matches effect categories with their primary goals and the type of content they work best for.
| Effect Category | Primary Goal | Best For (Content Type) |
|---|---|---|
| Transitions | Pace Control & Story Flow | Documentaries, Interviews, Narrative Vlogs |
| Color Grading | Mood & Emotion | Cinematic Videos, Brand Ads, Music Videos |
| Text & Graphics | Information & Retention | Tutorials, Social Media Clips, Corporate Videos |
| Visual Filters | Emphasis & Personality | High-Energy Edits, Short-Form Hooks, Vlogs |
This table is your starting point. As you get more experienced, you’ll learn how to bend these rules, but for now, it’s a solid foundation for making intentional, impactful editing choices.
In an age where around 85% of social media videos are watched without sound, your on-screen text isn't an add-on; it's essential for keeping people engaged.
Animated captions are the single most important effect for any short-form content you create. Period. They keep viewers hooked when the audio is off and let you emphasize key phrases. Think of the "Alex Hormozi" style captions with bright color changes and emojis—they’re literally designed to be impossible to ignore.
Beyond captions, lower thirds are perfect for introducing a speaker or reinforcing a key point without covering up your entire shot. A clean, branded lower third instantly adds a layer of professionalism and authority, making them perfect for interviews, tutorials, and webinar content. For creators looking to do this at scale, an automated video maker can generate and apply these branded elements consistently across all your clips.
Think of visual filters as the spices in your editing cabinet—a little bit goes a long way. These effects, like glitches, lens flares, or film grain, should always have a purpose.
For example, a super-quick glitch effect can be a great way to emphasize a shocking statement or to transition into a flashback sequence. A subtle film grain overlay can add a touch of organic texture to an otherwise sterile digital shot, making it feel more nostalgic and real.
The key is to use these effects to punctuate a moment, not to decorate the entire video. A single, well-placed effect is way more powerful than a video cluttered with constant visual noise that just ends up distracting your viewer.
Slapping the same video effects on a 30-second TikTok and a 20-minute YouTube tutorial is a recipe for disaster. The high-energy, chaotic style that makes a Short go viral will make your long-form content feel completely unwatchable. If you're not adapting your effects strategy for different video lengths, you're actively turning viewers away.
What grabs someone's attention in three seconds is fundamentally different from what holds it for twenty minutes. You need two totally different mindsets: one for immediate, scroll-stopping impact, and another for sustained, comfortable engagement. Let's break down how to master both.
On platforms like TikTok, Instagram Reels, and YouTube Shorts, your only goal is to stop the scroll. You have less than three seconds to give a viewer a reason not to swipe away. This environment demands a relentless, high-impact approach where the editing itself is a form of entertainment.
Think of it as amplifying your best moments. Here’s what actually works:
For instance, a real estate agent making a Reel shouldn't just pan across a kitchen. They should use a whip-pan transition, a fast zoom on the new marble countertops, and a bold text callout that screams "Brand New Appliances!" It’s about delivering information in the most neurologically stimulating way possible.
When you're editing a longer video—a podcast, a tutorial, a documentary—your goal shifts completely. You're not trying to shock them into watching; you're trying to create a smooth, frictionless experience that makes a 20-minute video feel like it's only 10.
Here, your effects need to be subtle. They should serve the story, not dominate it. Throwing a bunch of flashy transitions and aggressive zooms at a long-form video will just exhaust your audience.
This is where you lean on foundational editing techniques that signal professionalism without being distracting. For a deeper look at how to condense longer recordings, our guide on how to repurpose YouTube videos for Shorts offers proven strategies that can help. The same principles for making content digestible apply here.
In long-form content, the best effects are the ones viewers feel but might not consciously notice. They work in the background to enhance flow and professionalism.
A perfect example is a video podcast. Instead of jarring jump cuts between speakers, a smooth L-cut lets you hear the next person start talking while you still see the previous speaker's reaction. It feels natural and keeps the conversation flowing. This thoughtful approach is what separates amateur YouTube channels from professional-grade productions.
For every creator, there’s a moment of dread. You’ve just wrapped up a fantastic 45-minute podcast recording or client interview, and you know there’s gold buried in there. But the thought of scrubbing through it, finding those perfect snippets, and then spending hours meticulously adding effects to each individual clip… it’s a soul-crushing bottleneck.
This is exactly where the old way of doing video editing with effects dies and a smarter, automated approach takes over. The manual grind is being replaced by AI that actually understands what makes content pop.
Instead of treating every short clip like a brand-new project, the modern workflow starts with that single piece of long-form content. You're not just chopping it up; you're letting intelligence find the magic for you.
The old way was a time sink. The new way is a game-changer.
Here’s how it works with a platform like Taja AI. You upload that one long video, and the AI gets to work. It’s not just making random cuts; it’s analyzing the transcript, your vocal tone, and the visual context to pinpoint the most shareable, viral-worthy moments. It knows where you asked a great question, where you made a powerful statement, and where you dropped a stat that makes people pause.
Within minutes, you get dozens of ready-to-use clips. But here’s the best part: it automatically applies the high-engagement effects that top creators use to hold attention.
This completely flips the script on your workflow. You're no longer a manual editor hunched over a timeline. You're a creative director. Your job is to simply review the AI's work, maybe make a few tweaks to match your personal taste, and hit publish. To really get a handle on how this works, exploring automatic video editing with AI is a must for any creator serious about scaling in 2026.
This flowchart shows the workflow differences between editing short, punchy videos and longer, more narrative-driven content.
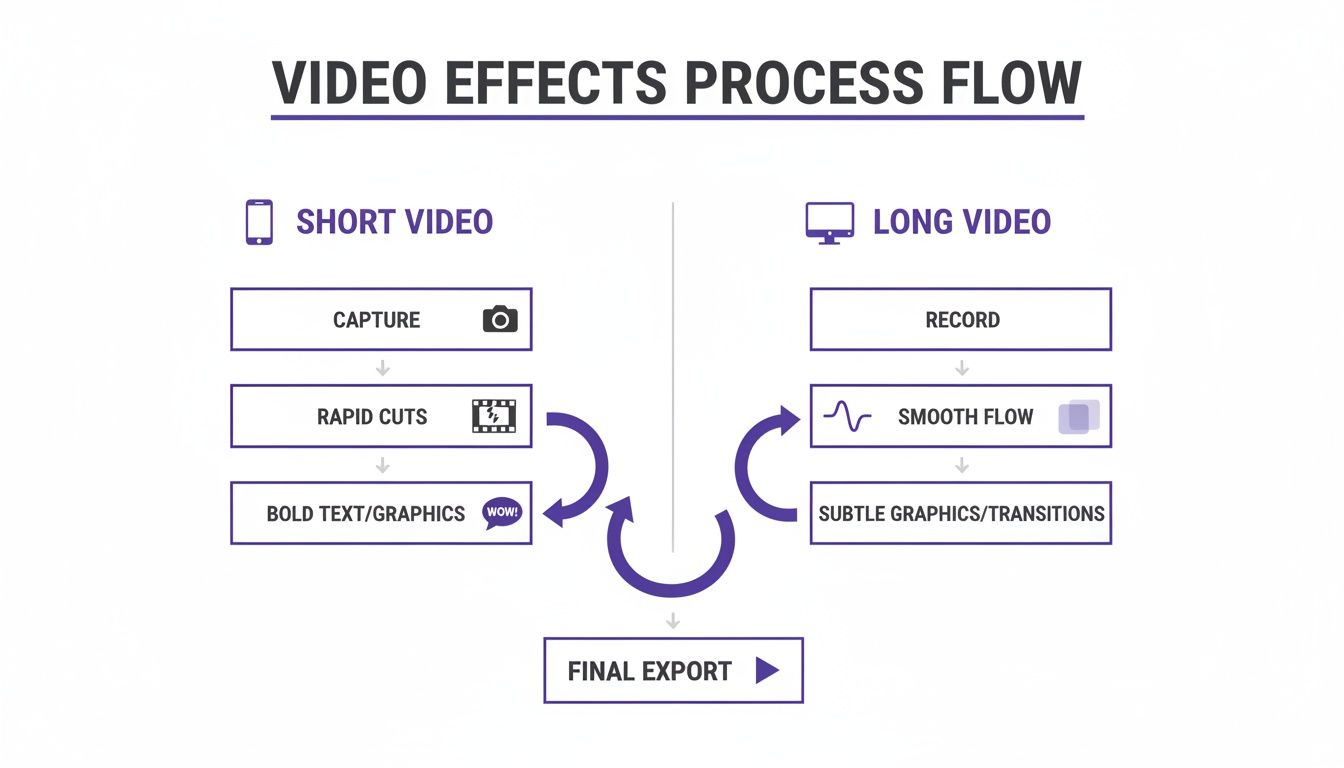
You can see how short-form video demands rapid cuts and bold text for immediate impact, while long-form content needs a smoother, more cohesive flow to maintain engagement over time. AI helps bridge that gap automatically.
Honestly, one of the biggest time-sucks in traditional editing is just trying to be consistent. Applying your brand’s font, color palette, and lower third to 20 different clips is not only boring but also where mistakes happen.
AI automation solves this with batch processing. You set up your brand kit one time—your logos, fonts, and color codes—and the AI applies it perfectly across every single clip it generates. Total brand consistency, zero manual effort.
But it goes deeper than just effects. Tools like Taja AI also give you intelligent suggestions for each clip, generating SEO-optimized titles, descriptions, and relevant hashtags for every platform, from YouTube to TikTok. If you're curious, you can learn more about Taja's ability to find these moments with its auto video highlights generator.
This is the core benefit of an AI-driven workflow: it's not just about speed, but about making smarter, data-backed decisions. It frees creators from the drudgery of repetitive tasks, allowing them to reclaim hours each week while ensuring every clip is polished, professional, and optimized to perform.
Knowing how to use video editing effects is one thing. Knowing when not to use them is what separates the pros from the amateurs. We’ve all seen it: that one video so overloaded with flashy effects that you can’t even focus on the message. It feels cheap, distracting, and frankly, a little desperate.
The good news? The line between enhancing a video and completely ruining it is thin, but the most common mistakes are surprisingly easy to fix once you know what you’re looking for. This isn’t theory. This is your practical guide to spotting those pitfalls and instantly making your videos look more professional.
This is probably the biggest mistake I see. A creator discovers the transitions library and decides to use all of it. In one video. You get a star wipe, then a page peel, then a glitch effect, then a cube spin. It doesn't look creative; it looks like a chaotic sample platter from 1998.
Every time a jarring transition pops up, it yanks the viewer right out of the experience, screaming, "Hey, look at me! I'm an edit!"
What to stop doing: Using more than 2-3 distinct transition styles in a single video. And please, stop using flashy glitch transitions in a serious corporate interview. The tone just doesn't match.
How to fix it: Simplicity is your best friend. Pick a couple of clean, consistent transition styles that match your brand’s vibe and stick with them. Honestly, for most content, a simple cross-dissolve or a smooth film burn is all you need to create a cohesive, professional flow.
Look, most of your videos are being watched on a phone, probably with the sound off. Your on-screen text and captions are non-negotiable. But slapping text over a busy background without a second thought is a surefire way to make people scroll right past.
If your audience has to squint to read what you’re saying, you've already lost. They're not going to try harder; they're just going to leave. The main culprits are always the same: bad color choices, whisper-thin fonts, and zero separation from the video behind the text.
Your text has to be readable in a fraction of a second. The goal is effortless communication, not an eye exam for your viewers.
The fix is all about contrast and clarity.
Use High-Contrast Colors: This is non-negotiable. Light text on a dark background, or dark text on a light one. Never put medium-gray text over a video with a bunch of different colors.
Add an Outline or Background: A simple black stroke (outline) around white text makes it pop against literally any background. If you want a bulletproof method, put your text inside a semi-transparent colored box. It will always be legible.
Choose Bold, Clear Fonts: Save the fancy script fonts for a wedding invitation. For video, you need thick, clean, sans-serif fonts that are easy to read on a tiny screen. Think Montserrat, Poppins, or Bebas Neue.
You just finished editing a video shot in three different locations. The first clip is warm and yellow, the next is cold and blue, and the one after that looks like it was shot on a different planet. This kind of color inconsistency makes your video feel disjointed and immediately cheapens the production value.
Stop treating each clip like its own little island. Applying random color filters or presets throughout your video just creates a visual mess that confuses the viewer’s eye.
The fix? Establish a single, master look for your entire video. Create one color grade—or use one single Look-Up Table (LUT)—and apply it to every clip. Tweak the exposure or white balance on individual clips to match, but keep the overall color story the same. This one step will instantly make your project feel like a cohesive, professional story instead of a random collection of clips.
Visuals are only half the battle. The wrong sound effect can be just as distracting as a bad transition. We’ve all heard it—the constant "swoosh" sounds on every text reveal, or a loud, cartoonish "boing" in an otherwise serious video. It pulls your audience right out of the moment.
Sound should serve the mood, not announce its own presence.
| Mistake | What the Viewer Feels | How to Fix It |
|---|---|---|
| Loud, Abrupt Sound Effects | It feels cheap and creates an auditory shock. | Use subtle sounds that blend in. Lower the volume of your effects so they punctuate, not dominate. |
| Inconsistent Audio Levels | It forces the viewer to constantly adjust their volume. | Normalize all your audio clips to a consistent level (e.g., -6dB) so dialogue, music, and effects feel balanced. |
| No "Room Tone" | Abrupt, dead silence between clips feels unnatural and jarring. | Always keep a layer of ambient room tone or subtle music running underneath your main audio to smooth over the cuts. |
Once you start avoiding these common mistakes, your effects will become more intentional and powerful. The best edits serve the story without screaming for attention, creating a seamless experience that keeps your audience locked in from start to finish.
Jumping into video effects can feel like trying to learn a new language. You know it's a powerful tool, but the learning curve feels steep and you're bound to have questions. Let's cut through the noise. Here are the real answers to the most common questions we see from creators, designed to give you practical advice you can use today.
Start by defining your brand in three words. Is it energetic and bold? Or is it more professional and calm? The answer dictates your entire effects strategy.
An energetic fitness brand, for example, is going to thrive on quick cuts, vibrant text pops, and maybe even a few glitch transitions. But a financial advisor? They should stick to clean, almost invisible dissolves and minimalist graphics that scream authority. Look at what others in your niche are doing, but always filter their tactics through your own brand identity. Don't just copy a trend.
The Goal is a Signature Style: Pick a small, consistent palette of effects that reinforces who you are. When someone sees your video in their feed, they should know it's yours before they even see your name or logo.
Absolutely. Mobile apps like CapCut and InShot have become ridiculously powerful. They offer features like sophisticated keyframing and slick text animations that used to be exclusive to expensive desktop software. You can 100% create professional-looking videos entirely on your phone.
The problem isn't capability; it's scale. Editing one high-quality clip on your phone is one thing. But editing 10 high-quality shorts for the week? That quickly turns into hours of tedious, repetitive tapping on a tiny screen. This is where the workflow completely breaks down for most busy creators and small teams. An AI-powered workflow, on the other hand, can generate and apply those effects to dozens of clips in minutes.
This depends on the format, but for short-form content, the answer is undeniable: animated captions. A massive chunk of social videos are watched with the sound off, so dynamic, easy-to-read captions are non-negotiable. Think of the popular Alex Hormozi style, with strategic color pops and emojis to keep viewers hooked from the very first second.
For long-form content like podcasts or interviews, the game is a little different. Here, your most vital effects are seamless cuts that make conversations flow naturally.
These two simple techniques are what separate professional-looking interviews from amateur ones. They eliminate those awkward pauses that make viewers bored and send them clicking away.
Here's a simple gut check I call the "purpose test." You've crossed the line when your effects distract from your message instead of enhancing it.
Before you add that flashy transition or sound effect, ask yourself: Does this serve a clear purpose? Is it highlighting a key point? Smoothing a transition? Setting a specific mood? If you can't name its job in one sentence, you probably don't need it. Overloading a video with random effects just makes it look amateurish and fatigues the viewer. A limited, consistent set of effects always looks more confident and professional. Remember, the goal is to make your message clearer, not just louder.
Ready to stop wasting hours on tedious editing and start publishing more content? Taja AI turns one long video into weeks of perfectly optimized short clips, complete with high-engagement effects, SEO-optimized titles, and platform-specific posts—all in minutes. Start your free trial today and see how much time you can save.


We are blessed to work with leading brands & Companies


We try to make easy and simple for every professionals. Get 30 days free trial - No credit card required.


© 2025 Taja AI. All rights reserved.