.jpeg)

Content Marketing ROI: A Practical Guide for 2026
Learn how to measure and grow content marketing ROI with practical steps and real examples. Improve your strategy and track results in 2026.
5 min read
September 27, 2026

Elevate your content! Learn how to do a voice over like a pro. Master scripting, recording, performance & editing for captivating videos & podcasts.
Written by:


You spent hours on the visuals. The cuts are clean, the captions look sharp, the hook is strong, and the video still feels flat the second the narration starts.
That usually isn't a camera problem. It's a voice-over problem.
Those who search for how to do a voice over often think they need a better microphone. Sometimes they do. More often, they need to stop sounding like they're reading words off a screen and start sounding like they're talking to one person. That's the difference audiences hear immediately. A polished voice over doesn't come from gear alone. It comes from room control, script design, delivery, and editing restraint.
The good news is that professional-sounding voice over is reachable without a fancy booth or a giant budget. The voice-over market itself shows how broad this work has become. The global industry reached $3.74 billion in 2023, and non-broadcast projects account for 58% of all voice work, which means everyday content like training, explainers, and internal media now make up a huge part of the field, as outlined in the Voices.com rate guide. This isn't some niche reserved for radio people. It's a practical business skill.
A common pattern shows up in small business content. The visuals feel modern, but the voice sounds hesitant, stiff, or strangely detached from what's on screen. Viewers won't say, "The narration lacks natural conversational intent." They'll just leave.
Poor voice-over usually shows up in three ways:
That last point matters more than most creators realize. A voice over carries trust. If the voice sounds boxed-in, distant, or robotic, the message loses authority even when the script is solid.
Practical rule: People forgive simple visuals faster than they forgive strained audio.
Another issue is emotional mismatch. A lot of beginners narrate as if they are presenting to an empty room. Strong voice over sounds like a direct exchange. It has intent behind each line. It lands key phrases instead of flattening everything into one level tone.
Professional voice actors earn serious income because clients aren't just paying for a voice. They're paying for control, interpretation, speed, and reliability. Full-time voice talent often earn $50,000 to $80,000 annually, with top-tier performers exceeding $100,000, and audience response can shift depending on the message. Male voices are reported as 27% more effective for forceful or authoritative messages, while female voices are 31% more effective for soothing or empathetic tones, according to Sheffield Audio-Visual. That doesn't mean one voice is better. It means delivery has a job.
If your content looks good but underperforms, don't start by blaming the algorithm. Start by listening to your own narration with the screen off. If it doesn't hold attention by itself, the viewer can feel that too.
You can spend an hour fixing EQ, noise, and breaths, then lose the take because the underlying problem happened earlier. The room made your voice bounce, the script looked good on screen but felt awkward in your mouth, and your delivery turned into reading instead of communicating.
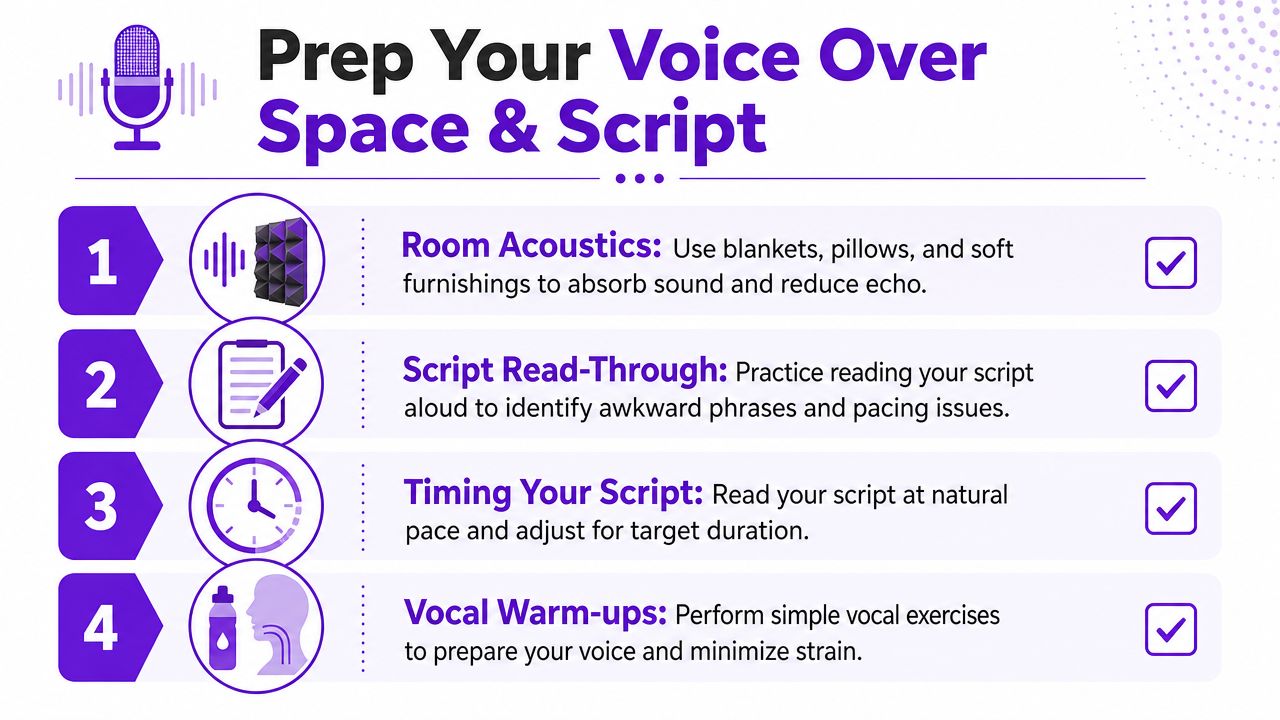
Preparation does more than clean up audio. It changes performance. If the space feels controlled and the script is built for speech, you stop worrying about sounding right and start focusing on what each line needs to do.
Room sound gives you away fast. Viewers may not know why a voice over sounds amateur, but they hear the difference between a dry, close voice and one splashing around a hard room.
A soft room beats expensive gear in a reflective one. Record where fabric, furniture, and soft surfaces already help you.
Do a clap test before the first take. Clap once where you'll stand or sit. If you hear a bright slap or a short ring after it, the room is still too live.
Quiet matters just as much. Fridges, HVAC, traffic, laptop fans, and hallway noise all force harder cleanup later, and heavy cleanup usually strips out the natural texture that makes a voice feel human. Twine's voiceover scheduling guide also recommends building recording time around a quiet, treated environment instead of assuming software will rescue the session.
If you want examples of practical layouts, mic positions, and compact treatment ideas, these home studio voice over setups are useful references.
A strong voice-over script is not an essay with line breaks. It is a speaking document.
Many solopreneurs lose the performance. They write for grammar, then try to sound natural while saying sentences no one would use out loud. Short-form video makes that problem worse because every sentence has to carry meaning fast, and your visuals are already doing part of the work.
Use this checklist while scripting:
That last point gets missed in a lot of tutorials. For reels, shorts, and explainer clips, narration works best when it syncs with the visual beat. A cut, screen change, product demo, or caption reveal should have a matching vocal intention. Sometimes that means shortening a line. Sometimes it means leaving space and letting the visual carry the moment. If you edit in Apple's built-in tools, this matters even more when you're timing narration to cuts in iMovie for short-form video editing.
Read the draft out loud early, not after you've "finished" writing it. Mouth feel matters. If a phrase makes you stumble once, it will keep costing you takes.
A marked-up script helps more than another plug-in.
| Pre-record task | Why it matters |
|---|---|
| Drink water well before recording | Helps reduce dry mouth and mouth noise |
| Read from a screen, not paper | Avoids page noise and keeps pacing steady |
| Do one full performance pass before recording for real | Reveals stiff lines and timing problems |
| Mark breaths, pauses, and emphasis | Keeps delivery intentional |
| Leave room for retakes in your schedule | Better pacing and cleaner choices under less pressure |
Creators often underestimate how long retakes, pickups, and small script fixes add to a session. Adding buffer time protects quality. As noted earlier from the same Twine guidance, rushed sessions also make common problems worse, including saliva clicks and messy edits caused by ad-libbing away from the written structure.
Get the room quiet. Get the script speakable. Then your voice has a chance to sound like it belongs on the video, not pasted on top of it.
You record a strong take, drop it onto the timeline, and somehow it still sounds small. That usually is not a talent problem. It is a setup problem.
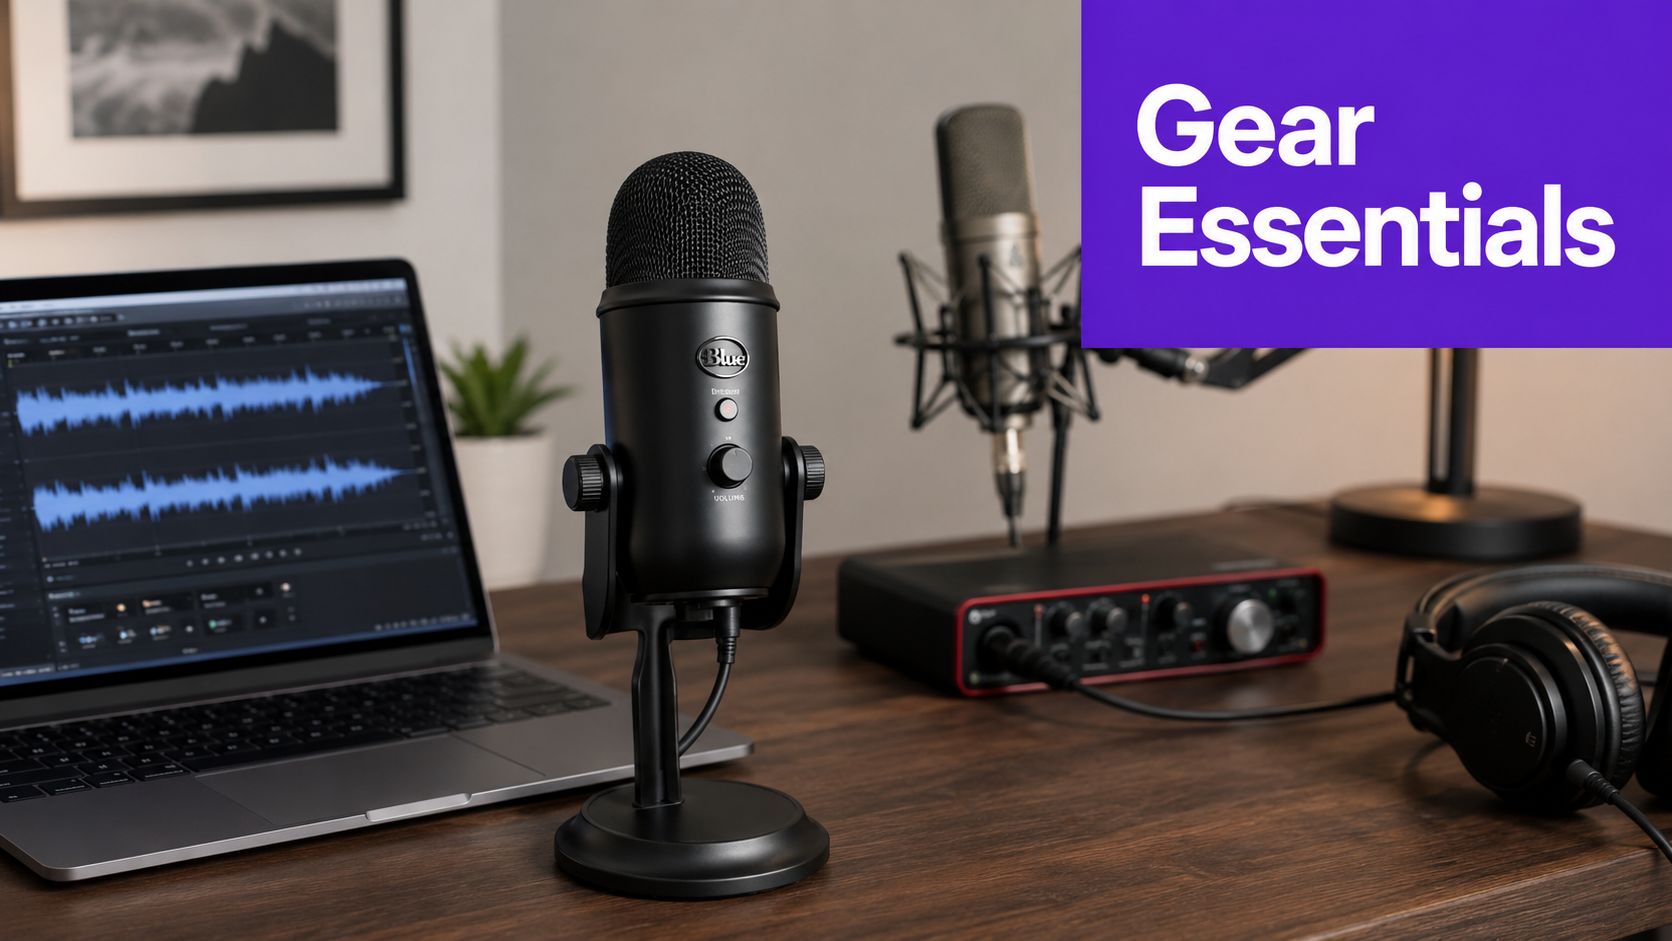
Creators waste money in two places. First, they buy an expensive mic for an untreated room. Second, they install advanced software before they have a consistent recording habit. A modest setup you can run fast will beat a fancy setup you avoid using.
The aim is not owning "pro" gear. It is getting clean, usable audio that matches the energy of the video and lets you stay in performance mode instead of troubleshooting settings.
For solo creators, this is the practical breakdown.
| Level | Mic approach | Best for | Trade-off |
|---|---|---|---|
| Good | USB microphone | Fast setup, solo creators, basic voice-over work | Less upgrade flexibility |
| Better | Entry-level XLR mic with audio interface | Cleaner control and future upgrades | More pieces to manage |
| Best | Treated room plus solid XLR chain | Frequent recording and client-facing production | Higher complexity and cost |
USB mics are a strong choice if you publish often and need low friction. A decent USB mic in a quiet, soft room will outperform a pricier XLR mic sitting in a bright, echoey office. XLR starts making more sense when you record every week, want better gain control, or plan to swap components over time instead of replacing everything at once.
If you are comparing desk layouts, mic placement, and practical upgrade paths, these home studio voice over setups are useful because they show real working spaces, not decorative studio photos.
Software changes more than editing speed. It changes how interrupted your delivery feels.
Audacity is still the easiest recommendation for beginners because it is free, stable, and gets out of the way. Descript works well if you prefer editing from text and want quick revisions for social clips. Adobe Audition earns its keep when audio is a regular part of your business and you want tighter control over cleanup, EQ, and batch work.
That last point matters. More features can pull you out of delivery mode. If every take turns into plug-in decisions, your voice-over starts feeling assembled instead of spoken.
If you also edit your own clips, keep the handoff simple. A lightweight video workflow makes it easier to sync narration to cuts, captions, and on-screen actions, especially in short-form. This guide on how to use iMovie for short-form video editing is a practical starting point if you want to line up voice-over with visuals without adding heavier software.
A quick walkthrough helps if you're building from scratch:
Start with gear that removes excuses, keeps your takes repeatable, and lets you focus on delivery. That is the setup that sounds professional.
Most beginners stall at this point. They think the goal is getting through the script without mistakes. That mindset creates the exact robotic tone they're trying to avoid.
The primary job is delivery.
Data shared in a creator discussion found that 70% of beginners struggle with robotic tones because they focus on accuracy over naturalism, and that top creators often use physical props or look away from the script to mimic the feeling of speaking face-to-face, as discussed in this voice-over natural delivery thread. That lines up with what you hear in practice. The stiffest takes usually come from people trying too hard to be exact.
When you're reading, your brain is tracking sequence, punctuation, and correctness. That pulls attention away from intention.
When you're delivering, your brain is tracking meaning. You know what the line is trying to do. Reassure. Warn. Invite. Clarify. Contrast. The words start serving the message instead of the other way around.
That shift changes everything:
Hold a pen, gesture with your free hand, or briefly look away from the script on key lines. Those tiny physical cues can snap you out of "reading mode."
You do not need to act bigger. You need to become less frozen.
Try these during recording:
If your voice gets flat halfway through, don't immediately assume the script is bad. Often your body has locked up. Reset posture. Loosen your jaw. Start the line again as speech, not recitation.
One of the fastest ways to improve narration is to decide exactly who each line is for. Not "the audience." A person.
A stressed customer needs a different tone than a curious prospect. An internal training video needs a different level of warmth than a fast-moving short-form ad. Once you know who you're talking to, the line starts shaping itself.
This is also where voice training pays off. If you want exercises that build control, resonance, and flexibility, the work around honing actors' vocal instrument is worth studying because it treats the voice like a tool you can train, not a fixed trait you either have or don't.
A few habits almost always make voice over worse.
| Habit | Why it fails |
|---|---|
| Over-pronouncing every word | Sounds formal and unnatural |
| Keeping volume perfectly flat | Removes meaning and emotional shape |
| Chasing "radio voice" depth | Feels fake for most business content |
| Ad-libbing too much | Creates messy edits and inconsistent timing |
| Recording tired and rushed | Makes even good scripts sound lifeless |
Natural voice over is controlled conversation. Not casual rambling. Not theatrical performance. Controlled conversation.
If you want one mindset to keep, use this: don't try to sound impressive. Try to sound clear, grounded, and directed at somebody specific.
A strong take can still fall apart after recording. The usual mistake is trying to "fix" the voice until it stops sounding like a person. Heavy noise reduction, aggressive EQ, and too much compression can make a clear read sound brittle, flat, and strangely small.
Use a repeatable chain and keep your edits conservative.
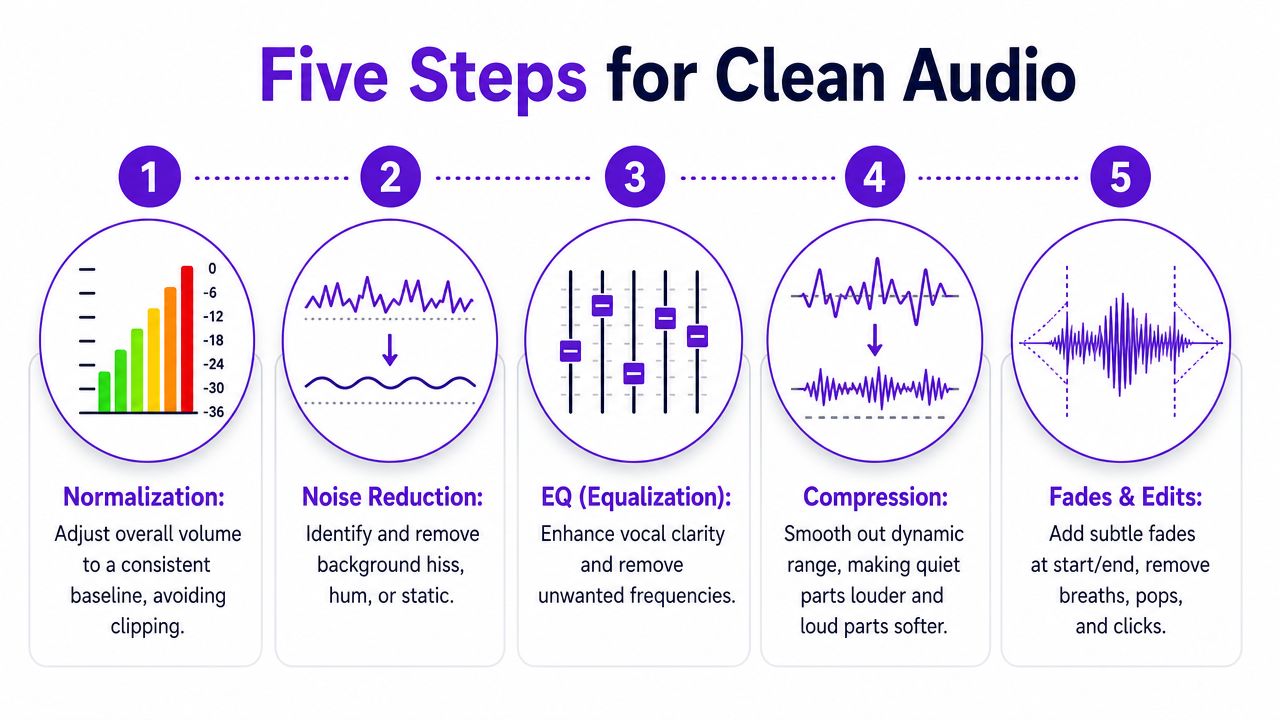
Clean audio starts before the first plugin. Leave enough headroom so louder phrases do not clip, record in mono for a single voice track, and keep an uncompressed master file. If the raw take is distorted, noisy, or recorded with low volume, editing becomes damage control.
I learned this the hard way. A slightly dull recording is usually recoverable. A clipped, overprocessed one rarely is.
Follow the same order every time so you can judge what each move is doing.
Level the clip first
Get your recording into a consistent working range before adding processing. That gives you a stable starting point and makes the next decisions easier.
Reduce noise carefully
Remove the distractions, not every trace of room sound. If noise reduction adds swirly artifacts or makes consonants smear, you pushed it too far.
Clean up with EQ
Cut rumble, tame harsh frequencies, and leave the rest alone. Voice-over for short-form video does not need a hyped "radio" sound. It needs clarity on phone speakers.
Compress lightly
Compression should smooth the performance, not flatten it. A little control helps the voice sit steadily against music and visuals. Too much makes every sentence feel pinned in place, which hurts the natural pacing you worked on in the previous section.
Edit the details
Add short fades, remove clicks, trim awkward gaps, and keep breaths that support the rhythm. If a breath makes the line feel human and connected, keep it. If it pulls attention, cut it.
If you can hear the processing, there is a good chance you did too much.
If you want another reference point for cleanup decisions, these Get Up Productions podcast editing tips are useful because they focus on preserving intelligibility instead of polishing the life out of the track.
This is the part many voice-over guides skip. Clean audio is not only about the waveform. It is about whether the line lands at the right visual moment.
A pause that sounds natural on its own can feel slow once captions, jump cuts, or B-roll are on screen. A tightly edited line can also feel rushed if the visual needs an extra beat to register. Check timing early, not only at export. For short-form content, I often trim silence more aggressively between ideas but leave a touch more space before the key visual reveal or the line that carries the hook.
If the original clip has music baked in and the voice needs cleaner separation before you re-edit it, this guide on how to remove background music from a video can save time.
Do three checks before you call it finished.
The goal is a voice track that feels present, controlled, and easy to follow. Clean audio should support delivery, not draw attention to the editing.
You finish a solid read, export it fast, upload it, and the voice suddenly sounds thinner, quieter, or slightly out of sync with the cut. That usually is not a performance problem. It is an export problem.
Keep one clean master first. Export WAV if you can. If you need smaller files, use MP3 at 192 kbps or higher, as noted earlier in the recording setup guidance. Archive the master before you make platform-specific versions. That one habit saves rework later.
Creators waste time here by making every file the same. Different destinations need different outputs, and forcing one export across all of them usually creates extra fixes downstream.
| Destination | Best practice |
|---|---|
| YouTube videos | Export a high-quality master and sync in the video editor |
| Podcasts | Keep loudness and tone consistent across episodes |
| Short-form social clips | Prioritize clarity on phone speakers and manageable file size |
| Client delivery | Send a clean master plus a compressed version if requested |
Save export presets. Use a naming format you can scan in two seconds. Keep folders boring and predictable. That is how repurposing stays efficient once one script turns into a full video, three shorts, and a podcast clip.
A lot of weak voice-over work falls apart here. The audio merely narrates what the viewer already sees.
For short-form video, the stronger move is usually to let the picture handle the action while the voice handles the meaning. If the visual shows you packing orders, the voice should not say, "I'm packing orders." It should explain what changed, what went wrong, what surprised you, or why that moment matters. That shift is what makes a voice-over feel delivered instead of read.
I learned this late. A literal script feels safe on the page, but it rarely performs well on screen. The best short-form reads create a gap between what the eye gets and what the ear gets. That gap creates curiosity, pacing, and payoff.
Use the voice-over for jobs like these:
If you want a repeatable system for scripting, recording, editing, and repurposing without losing track of assets, build a documented video production workflow for recurring content.
Your export settings protect sound quality. Your repurposing choices determine whether the voice earns its place in the video.


We are blessed to work with leading brands & Companies


We try to make easy and simple for every professionals. Get 30 days free trial - No credit card required.


© 2025 Taja AI. All rights reserved.