.jpeg)

How to Do Auto Captions on Instagram for Reels That Pop
Learn how to do auto captions on Instagram for Reels, Stories and feed videos — enable, edit, fix errors and make captions readable every time.
5 min read
September 19, 2026

Learn how to crop videos on YouTube with desktop editors, online tools, and mobile apps. Step-by-step guide for Shorts, landscape, and batch workflows.
Written by:


You've got the export finished, the framing feels slightly off, and now the question is whether you need to crop it, trim it, or rebuild the whole thing for Shorts. That's the part most creators hit after upload, because YouTube makes post-upload editing easy enough to find, but not easy enough to understand at a glance. The fix depends on what you're trying to change, and that distinction matters more than the button you click.
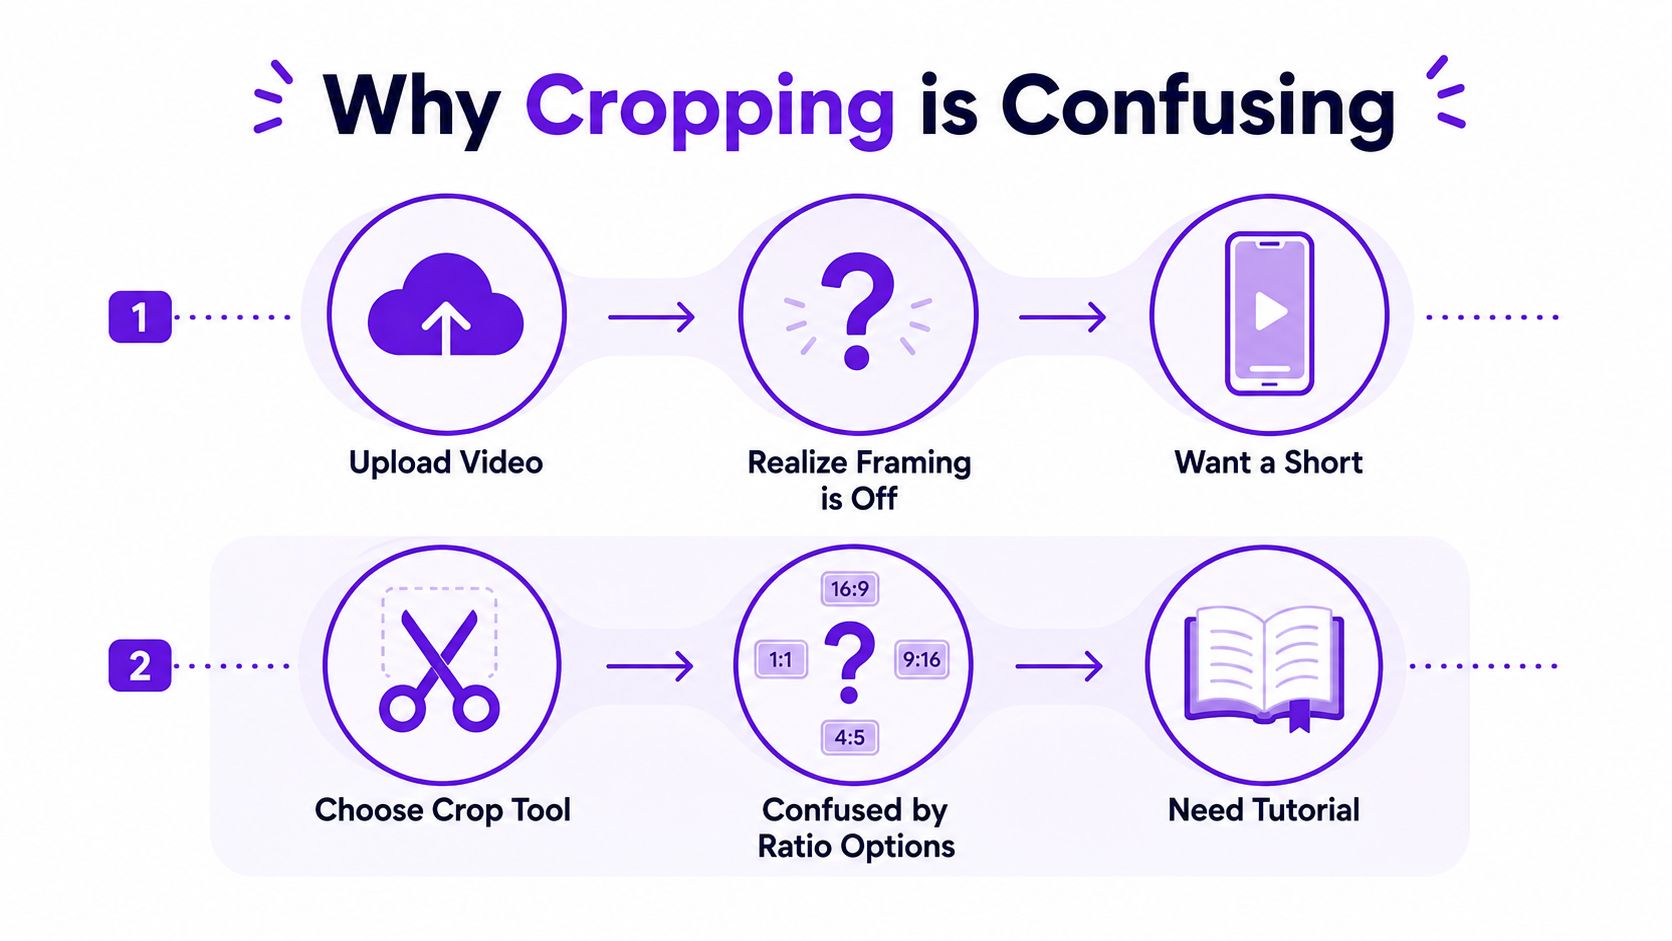
A creator usually searches how to crop videos on youtube after one of three frustrations. The first is visual, the speaker is sitting too low in frame, the top of the head is clipped, or the background is distracting. The second is structural, a long recording has dead air, a bad intro, or a sponsor read that should've been removed. The third is repurposing, because a wide-format interview needs to become a vertical Short without looking awkward.
Those three jobs get mixed together because people use the word “crop” for all of them. In practice, they're different actions. Trimming changes time. Cropping changes what part of the image you see. Re-rendering gives you a new export built for a new format.
YouTube Studio can help with the time-based part. The path is Content → Editor → Trim & cut, and YouTube's editor uses a blue box to keep the section you want and a red box for a new cut. You confirm the edit by clicking Save, and YouTube says the change may take a few hours to apply. That workflow is useful if you want to remove the beginning, middle, or end of a video without uploading a new file, and the original upload's URL and analytics workflow stay intact in the process (YouTube Help).
Practical rule: if the problem is timing, YouTube Studio can handle it. If the problem is framing, it can't.
That's where a lot of tutorials go sideways. They show the Studio menu, and readers leave thinking YouTube has a real crop tool. It doesn't, at least not for repositioning the visible frame inside the upload. The built-in editor is a trim and cut tool, not a visual reframer. If you want the subject higher, wider, centered, or reoriented for Shorts, you need external editing software.
That distinction also matters for creators who care about legacy uploads. A cut made inside Studio preserves the upload workflow you already have. A desktop crop gives you a new composition, which is what you need when the original frame doesn't fit the job. For a quick reference on ratio choices across short-form platforms, this aspect ratio guide for TikTok is useful alongside YouTube planning.
A clean way to think about it is simple. If you need to delete time, use Studio. If you need to reframe the picture, use a desktop editor. If you need both a new frame and a new format, export a fresh version instead of forcing one upload to do everything.
YouTube's editor can trim, but it can't crop the image, so a desktop editor is where the work happens. The good news is that most creators don't need anything exotic. They need a tool that imports fast, gives easy access to crop controls, exports cleanly, and doesn't add friction when the upload is ready.
Here's the short version I'd give a client who just needs to fix framing and move on.
| Desktop Editor Comparison for Cropping YouTube Videos | |||
|---|---|---|---|
| Editor | Price | Watermark on Free Tier | Best For |
| Shotcut | Free | No watermark | One-off crops and lightweight edits |
| DaVinci Resolve | Free tier available | No watermark on the free tier | Creators who also color-grade or want deeper control |
| Adobe Premiere Pro | Subscription | No watermark | Teams already inside Adobe workflows |
Shotcut is the low-friction option. It's light, it gets out of the way, and it's fine when you only need to import a file, crop to the right ratio, and export. If you're editing corporate or client-facing pieces and want a straightforward workflow reference, corporate video tips for Brisbane can also help frame how polished the final output should feel.
DaVinci Resolve makes more sense when cropping is only one part of the job. If you're adjusting color, audio, and delivery in the same pass, it saves you from bouncing between apps. Premiere Pro is the familiar choice for teams that already live in Adobe, especially when asset handoff and shared habits matter more than subscription cost.
The right editor is the one you'll actually open every week. Fancy features don't help if the crop takes fifteen minutes longer than the upload.
For Mac users, the crop workflow is no different in principle, but interface familiarity matters. If you want a practical Mac-specific walkthrough, this crop guide for Mac is a good companion reference.
One more factor matters more than brand loyalty. If your team already edits social content in one place, stay there. Changing editors just to crop a frame is usually wasted effort unless the current tool is making export quality or aspect ratio handling painful.
The clean workflow is the same across competent editors. Start by importing the source file, open the Crop or Transform panel, then adjust the frame with corner handles or a preset ratio. After that, preview the result before export. That preview step is where most bad crops are caught, because the frame can look fine in the editor and still fail once captions, UI, or a face edge hit the final output.
The single most common mistake is cropping too aggressively. A centered talking head might survive a tighter frame, but a webinar slide, a lower-third caption, or a presenter who moves off center won't. Keep the key subject visually centered before you commit, and watch for anything that lives near the edges, especially faces, subtitles, logos, and on-screen interface.
If the crop hides a face, trims a caption, or cuts off a control menu, the crop is wrong even if it looks “clean.”
For standard YouTube long-form, the safe default is 16:9, with 1920×1080 or 1280×720 commonly used for uploads, and MP4 is the usual export format for broad compatibility (Wondershare crop guide). If you're making Shorts, the target is 9:16. That ratio choice matters more than any flashy effect, because the platform and the viewer both expect vertical framing to feel intentional.
A practical export checklist helps avoid the usual mistakes:
The sequence is boring, but that's why it works. Import, crop, preview, export. Anything else is usually just extra clicking with no payoff.
Sometimes the best crop workflow is the one that doesn't demand a download. If you're clipping on a laptop between meetings, editing on a phone, or making one Short from one recording, browser tools and mobile apps can be enough. They're especially useful when the goal is speed, not a perfect multi-layer edit.
Online tools are fine for quick reframing jobs, but they usually ask you to upload the file, wait for processing, then download it again. That extra round trip is tolerable once. It gets annoying fast if you're doing it every week. Mobile apps are similar, they're fast to open and easy to understand, but advanced features often sit behind subscriptions.
The workflow stays the same whether you're on desktop or mobile. Choose the source clip, set the ratio to 16:9 or 9:16, move the crop area so the subject stays inside the safe frame, and export to a format that YouTube accepts cleanly. The difference is in control. Desktop apps give you more precision, while phone tools favor convenience.
For creators who want a direct path from longer video to vertical clip, this guide to creating YouTube Shorts is a useful companion. It's especially relevant if you're turning interviews, podcasts, or webinars into short-form assets without rebuilding everything from scratch.
The trade-off is simple. If you only need to crop one clip for a Short, a mobile app can be enough. If you're batch-producing content, the upload-download loop from browser tools starts costing more time than it saves. That's when a desktop editor wins, even if the learning curve feels a little steeper at first.
Turning a 16:9 YouTube video into a 9:16 Short is harder than a simple crop, because the original frame was usually built for width, not height. A presenter can look fine in the center of a wide frame and still become awkward once the vertical crop cuts off shoulders, hands, or half the face. That's why Shorts often look polished or broken with very little middle ground.
The first approach is a hard crop. You center the visible frame, fill the vertical canvas, and accept that some side content disappears. This works when the subject is mostly static, like a talking head that stays planted in one spot.
The second approach is smart reframing. You move the crop over time with keyframes or use face tracking so the subject stays inside the vertical frame as they shift. That matters for interviews, walkthroughs, and any clip where the speaker moves, leans, or gestures across the shot. Without that adjustment, you get the awkward half-face Shorts that make a clip feel rushed rather than edited.
Here's the simplest rule I use:
For one-off mobile work, apps like CapCut can be enough if you only need to reframe a clip quickly. Taja's built-in editor also supports vertical short creation and cropping as part of its repurposing workflow, which can be useful when you're moving one long recording into several short outputs without hand-editing each cut.
If the subject is walking, turning, or pointing to an object off to the side, don't guess. Reframe it deliberately, then preview the vertical result on a phone-sized screen. A crop that looks acceptable on a desktop monitor can feel cramped on mobile, and Shorts are judged there first.

Cropping is useful when it removes friction. It fixes a bad frame, restores a centered subject, or turns a horizontal recording into something that feels native in vertical feed spaces. That's the easy win. The harder judgment call is whether the crop is improving the content or just making it smaller and tighter.
A brand-new upload with bad framing is the safest case. Fix it before it ships. An evergreen video with comments, watch history, and search value is different. YouTube says edits in Studio may take a few hours to apply, and the original upload's URL stays in place, so the operational continuity is useful, but the composition still changes what viewers experience. If the source video already has lasting value, a crop that damages context can do more harm than leaving it alone.
A vertical Short from a standard video sits in the middle. Cropping is often fine there, but the better choice is sometimes a new vertical export rather than forcing the original clip to do double duty. That matters for interviews, education, and solo creator channels where the source recording may be reused across platforms. If the original frame was designed for widescreen, a separate vertical cut usually looks more intentional than a repurposed crop.
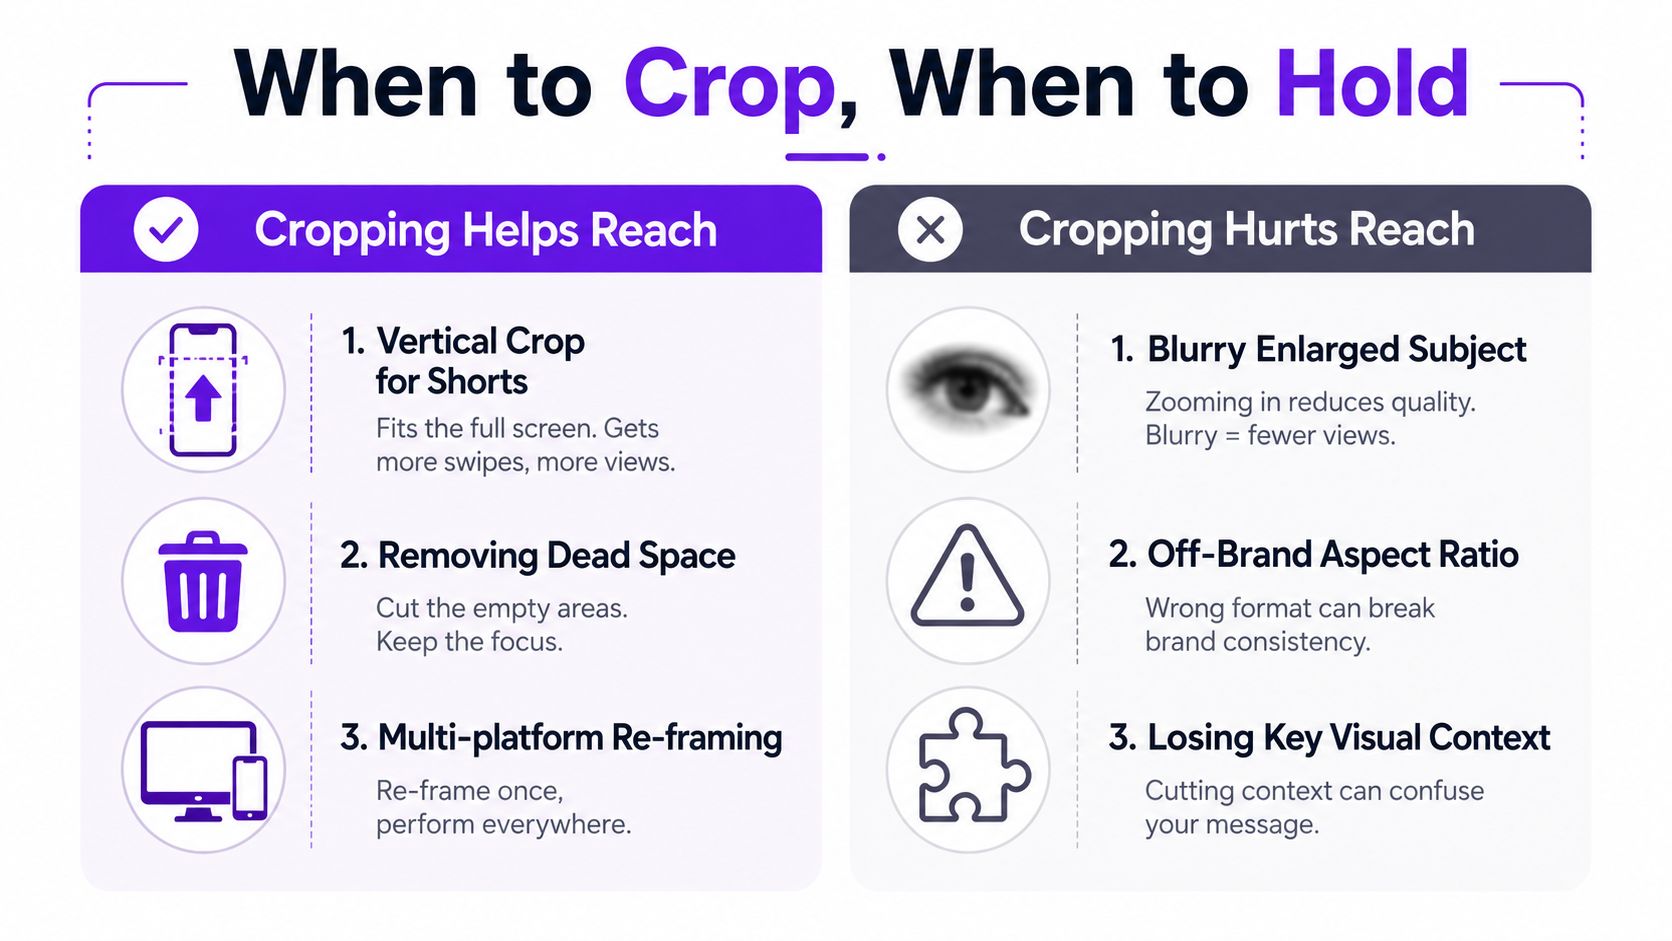
The decision is straightforward once you strip out the noise.
That's the same reason a separate vertical version often performs better in practice than a stretched or awkwardly cropped clip. The viewer can feel whether the video was designed for the format or squeezed into it after the fact. In repurposing work, that difference is the whole game.
Most crop problems fall into a few repeatable failures. Black bars show up when the clip was changed to a new ratio but not scaled to fill the canvas. Blurriness usually means the export settings or source quality weren't respected. And subjects get cut off when the crop looked fine in the editor but was never checked in a vertical preview.
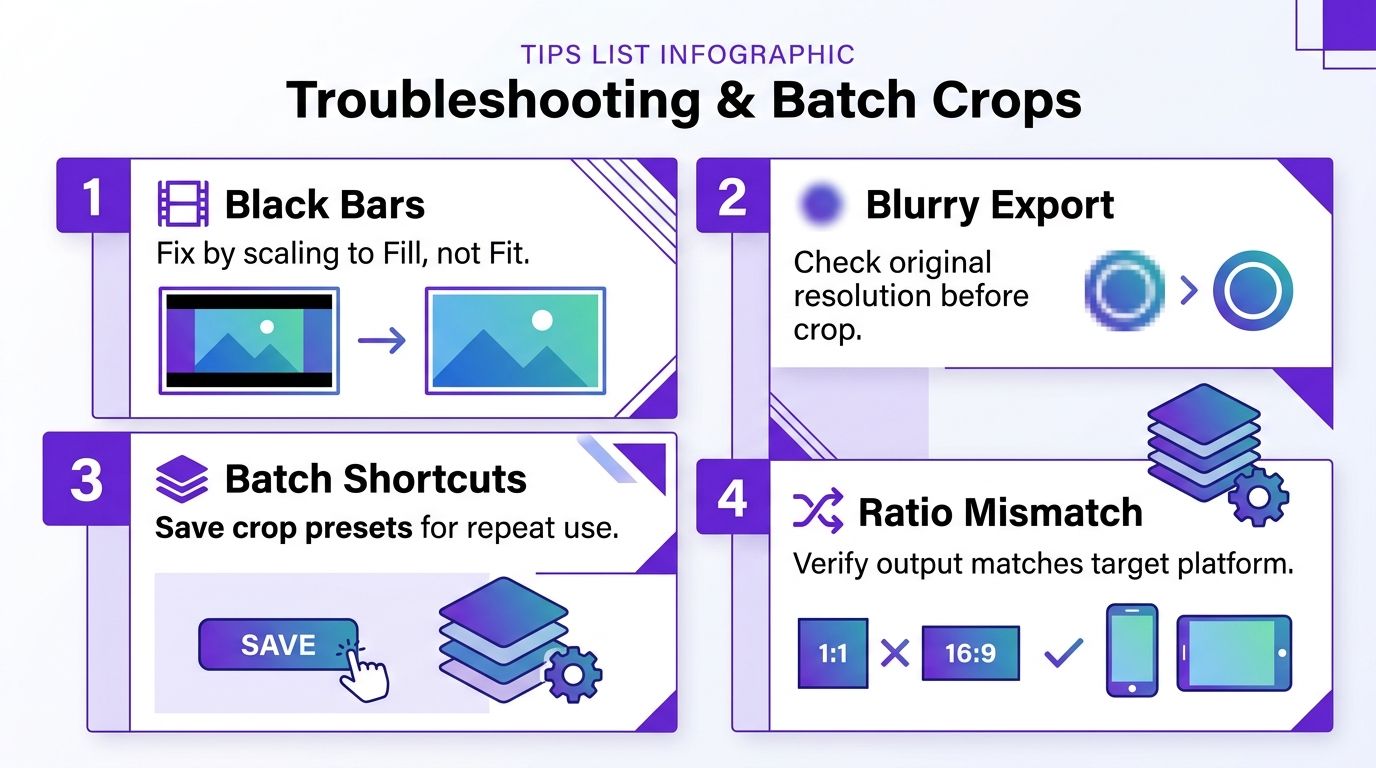
If black bars appear, the crop usually needs to fill, not just fit. If the export looks soft, check the source resolution first, then the export codec and format. If the subject disappears at the top or bottom, the crop is too tight or the framing was never tested on a vertical screen.
The fastest way to avoid repeat work is to save your crop choices. Keep presets for 16:9 and 9:16 if your editor allows it, then reuse the same framing style for recurring content. That helps a lot when you're clipping podcasts, interviews, webinars, or talking-head updates every week.
For teams that process the same source file over and over, automation becomes less of a luxury and more of a sanity saver. Taja's workflow can generate short-form assets from a single upload, which is useful when the primary bottleneck isn't editing skill but repetition. A tool like that doesn't replace judgment, but it can reduce the amount of hand-cropping you do on every version of the same video.
Batch work should remove decisions, not multiply them. Save the ratio. Save the preset. Verify the result once.
The last check is always the same. Open the crop on a phone-sized preview, confirm the subject is still centered, and make sure the output matches the platform you're publishing to. That one habit keeps bad crops from becoming part of your weekly workflow.
If you want a faster way to turn one YouTube upload into multiple usable versions, Taja AI can help by repurposing long videos into shorts, clips, captions, and platform-specific posts from a single upload. It's built for creators who need clean vertical outputs without rebuilding every cut by hand, which makes it a practical fit for this exact workflow.


We are blessed to work with leading brands & Companies


We try to make easy and simple for every professionals. Get 30 days free trial - No credit card required.


© 2025 Taja AI. All rights reserved.