.jpeg)

How to Make a Highlight Reel That Actually Performs
Learn how to make a highlight reel that hooks in the first three seconds, keeps viewers watching, and converts across YouTube, TikTok, and Instagram.
5 min read
October 3, 2026

Learn how to use a video splitter online to trim long videos into perfect clips for social media. This guide covers the best workflow and export settings.
Written by:


You've probably got a long recording sitting on your desktop right now. A webinar, podcast episode, listing walkthrough, client interview, sermon, training, or Zoom replay. You know there are strong moments inside it, but turning one long file into a week or month of short clips feels like manual labor.
That's where a good video splitter online changes the workflow. Instead of opening heavy desktop software just to make basic cuts, you can upload the source, mark the clean moments, split fast, and export only what you need. The advantage isn't just saving a few clicks. It's building a repeatable system for repurposing long-form content into social-ready assets without turning editing into a full-time job.
A lot of people pick the wrong tool by searching for “free” first. That usually leads to hidden watermarks, weak timeline controls, or an export process that forces more cleanup than the split itself.
The better filter is simpler. Pick the tool that matches your normal footage, your device, and the kind of output you publish most often.
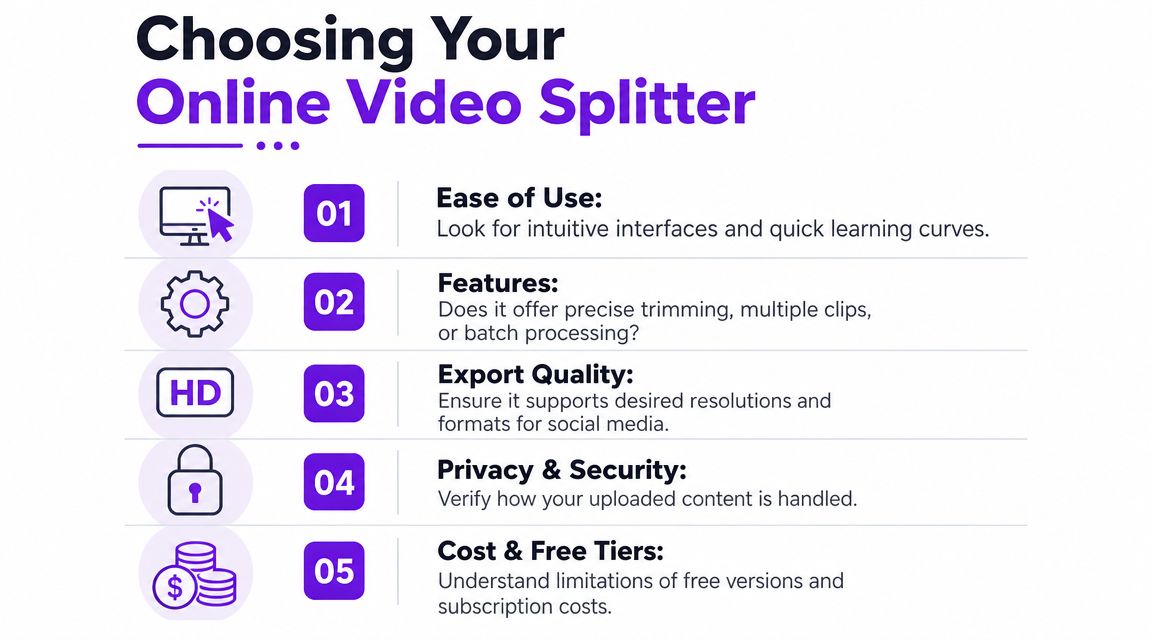
If your source files come from multiple places, format support matters immediately. Some tools list compatibility with more than 15 formats, including .avi, .mp4, .mov, .mkv, and .wmv, which covers a wide range of camera, screen-recording, and social exports, as shown on Bandicut's video splitter page.
That matters more than most feature lists suggest. A tool can look polished and still become useless if it chokes on a client's MOV file or an older AVI archive.
For splitting, the timeline is the product. Fancy templates don't help if you can't place the playhead exactly where a sentence starts or ends.
Use this checklist when you evaluate a browser splitter:
Practical rule: If you can't understand the timeline in the first few minutes, that tool will get expensive in time even if it's free in dollars.
If you're a solo creator clipping one talking-head video at a time, nearly any solid browser editor can work. If you're a social manager handling client footage, you need something more predictable.
That's also why it helps to keep a short list of adjacent resources, not just editors. A roundup of essential tools for influencers is useful when your workflow includes scripting, design, scheduling, and analytics alongside clipping.
For teams repurposing long videos into multiple shorts, an AI-assisted option like this AI clip maker guide is worth reviewing because the bottleneck usually isn't just splitting. It's deciding which moments deserve to become standalone clips.
A browser tool is supposed to remove friction. If it creates new friction, skip it.
Common red flags include:
| What to check | Why it matters |
|---|---|
| Watermark policy | Free exports can become unusable for client or brand content |
| Upload behavior | Slow uploads kill momentum on long files |
| Export options | Limited output formats create extra conversion steps |
| Segment management | Weak clip organization turns one file into a mess |
A good online splitter doesn't need to do everything. It just needs to do the boring part cleanly, fast, and without damaging your footage or your process.
Every interface looks a little different, but the core method is basically the same across mainstream browser tools. The most reliable workflow is consistent: upload the source file, place the playhead precisely on the timeline at the cut point, use the split command, and export each resulting segment, which aligns with the workflow described by Clideo's split video tool.
That consistency is useful because once you understand the logic, you can switch tools without relearning the job.
Here's the workflow I trust for almost any browser-based splitter.
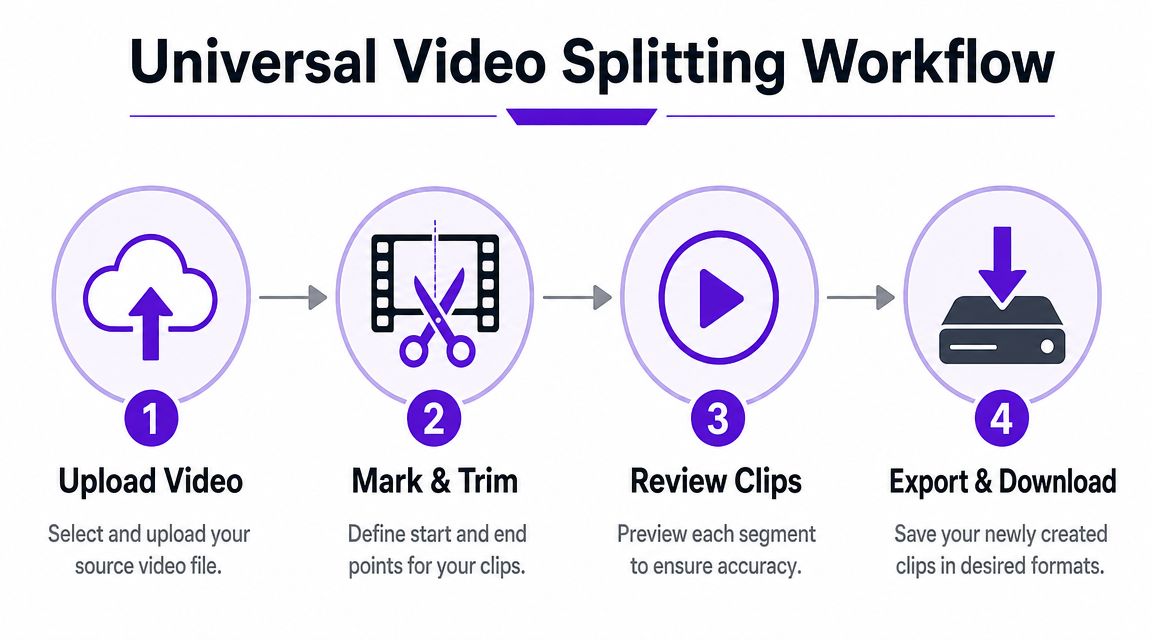
Upload from your device or cloud storage, then wait until the editor is responsive. A lot of cutting mistakes happen because people start dragging the playhead before the timeline has fully rendered.
If the video is long, scrub through a few moments first. You want to know whether the editor responds smoothly before you start making cuts.
A quick visual demo can help if you prefer to see the process in motion.
Beginners often lose quality and pacing. They split where the waveform or thumbnail “looks close enough,” then wonder why the exported clip starts mid-word or includes an awkward inhale.
Use the playhead slowly. Move frame by frame if the editor allows it. If there's a keyboard shortcut such as S, use it once the marker is exactly where the transition should happen.
The split itself is easy. Precision comes from how carefully you place the playhead before you click anything.
Also keep the distinction clear:
Those sound similar, but they lead to different results on the timeline.
After the first cut, play the end of the first segment and the beginning of the next one. Don't trust the visual cut alone.
Look for:
A short clip with a strong hook often starts slightly earlier than you first expect. A clean social cut usually needs enough setup to make the payoff understandable.
Some tools keep every split segment available. Others require you to isolate one clip, delete the unwanted portions, and then export that piece. That's why review comes before export, not after.
When I'm working through a long recording, I label clips by idea instead of timestamp. “Client objection answer” is easier to manage later than “Clip 4 final final.”
If your goal is platform-ready publishing and not just rough extraction, a practical next step is learning the editing choices that make social posts hold attention. This guide to social video editing workflows is useful once you've got the raw clips out of the source file.
A clean split can still produce a weak post if the export settings are wrong. This can make a lot of repurposed content look like recycled content. Wrong shape, soft resolution, odd codec choice, or a file that uploads fine but looks compressed in-feed.
Browser splitters became mainstream when tools such as Adobe Express and Kapwing standardized a simple browser workflow of upload, split, and download, and Adobe notes support for videos up to 1 hour long on its documented workflow, as summarized through Kapwing's online splitter reference. That convenience is real. But the default export button still isn't always the right final choice for short-form distribution.
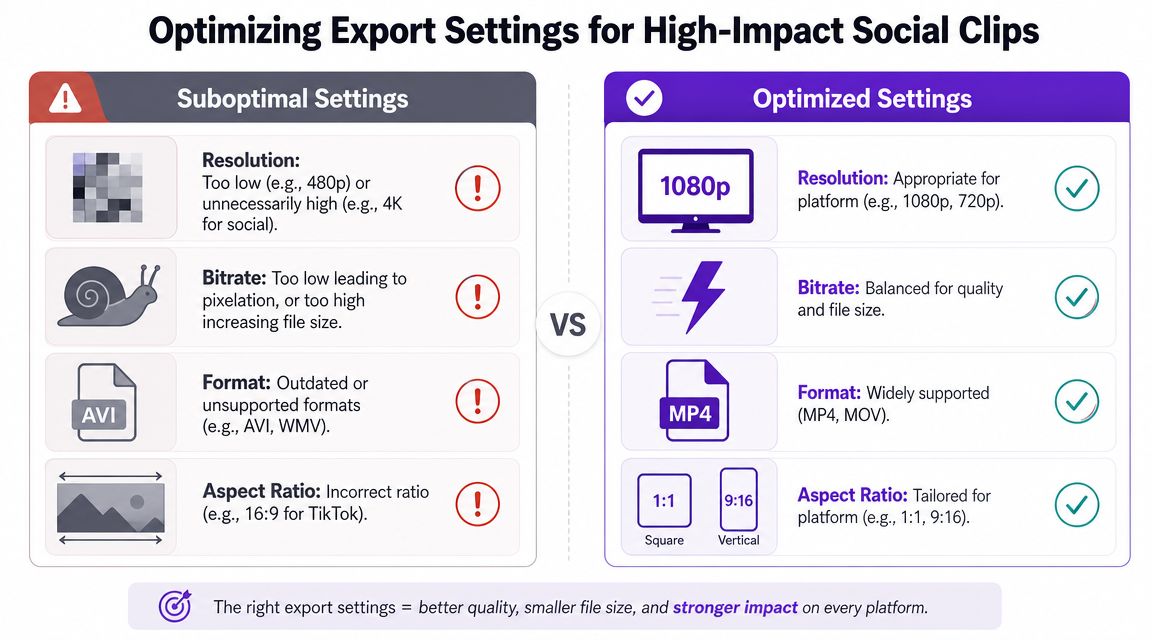
You don't need a complicated export matrix. A simple quality ladder works better.
| Level | What it means |
|---|---|
| Good | MP4 export, clear image, platform-compatible dimensions |
| Better | Vertical framing for short-form feeds, strong clarity, consistent output across clips |
| Best | Platform-shaped export, deliberate framing, readable text space, and a file that doesn't need another conversion pass |
For most creators, MP4 is the safest default because it plays nicely across platforms and tools. If your source was horizontal, think carefully before posting the split as-is to vertical feeds. A good quote can still underperform if the framing feels native to YouTube but awkward on Shorts or Reels.
Three export choices matter more than everything else:
Editing judgment matters here: a clip that is technically clean but framed wrong for the feed still feels off to the viewer.
If you want a deeper breakdown of how formatting affects delivery and platform fit, this guide on how to optimize short-form video performance is a useful companion to the export side of the process.
Time is often wasted making export decisions from scratch every time. Don't.
Set one default preset for your normal social clip workflow, then only change it when the platform or source footage demands it. If Instagram is part of your publishing mix, this breakdown of Instagram video format requirements is handy for keeping output consistent before you upload.
The point isn't maximum technical complexity. It's reducing rework. The best export setting is the one that gives you a clean file the platform accepts without another edit pass.
If you're using a video splitter online just to make one clip from one recording, you're leaving most of the value in the source file.
Most tutorials stop at “cut here, download there.” That's useful, but it's small thinking. The more practical question for creators and small teams is how to turn one recording into a repeatable publishing system. As VEED's video splitter page highlights, the need has shifted from one-off clipping to batch splitting and repurposing as short-form content continues to dominate attention.
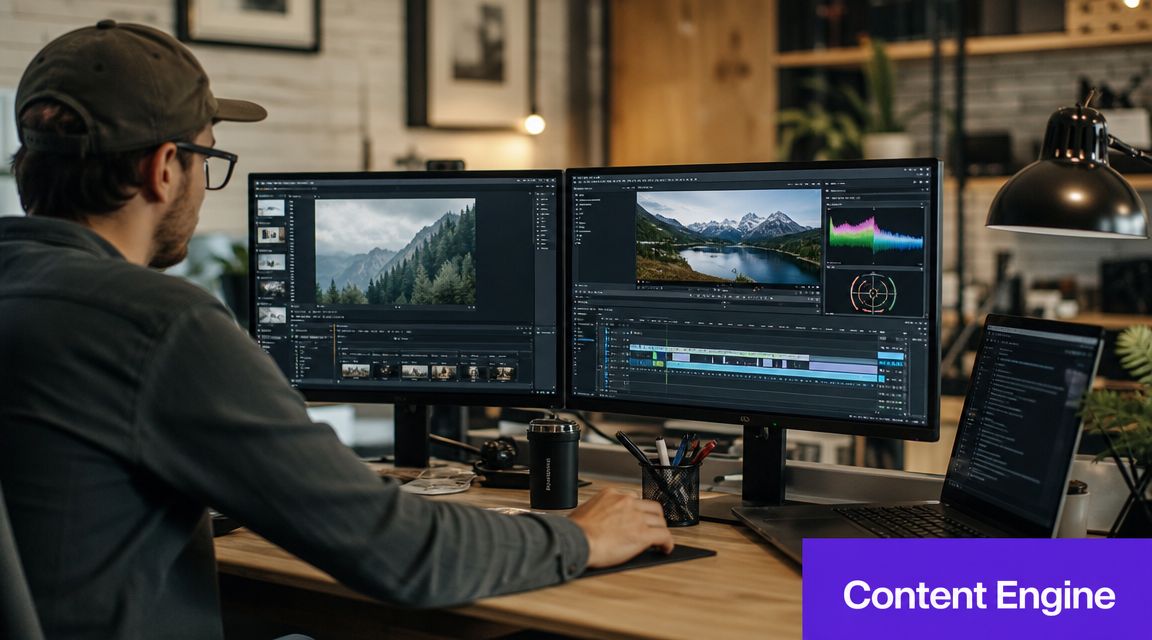
One webinar can produce multiple content types if you look at it correctly. Not every useful segment needs to be a polished “viral” moment.
From a single long-form recording, you can usually extract different categories of assets:
That shift changes how you split. You stop hunting for only one highlight and start harvesting usable moments across the whole session.
The most efficient workflow I've seen uses multiple passes through the same file.
First pass, mark every promising moment. Second pass, split and name the segments. Third pass, choose which clips deserve captions, reframing, thumbnails, and platform-specific packaging.
That approach is much more sustainable than trying to fully edit each clip the moment you find it.
A content engine works because selection, cutting, packaging, and publishing are separate jobs. When you do all four at once, everything slows down.
For teams building a real repurposing workflow, this overview of smart content repurposing is a useful complement to basic splitting. The editing task is only one piece. The operating system around it matters just as much.
This is the point where AI tools become useful, not because they replace judgment but because they reduce repetitive labor. If a tool can help identify candidate moments, create short clips, generate captions, or prep platform-specific variants, that removes hours of sorting and packaging.
One option in that category is Taja AI, which turns long-form video into clips and additional repurposed assets from a single upload. That's a different use case from a bare-bones splitter, but it fits the same pipeline once you move from isolated edits to systemized output.
The main mindset shift is simple. Don't ask, “How do I get one clip from this video?” Ask, “How many publishable assets can I pull from this recording before I move on?”
Browser-based editors are fast when the job fits the tool. They're frustrating when people expect them to behave like full desktop post-production software.
The biggest limitations are practical, not mysterious. Upload size, browser memory usage, and re-encoding time regularly affect browser-based splitters, and vendors often recommend processing long videos in smaller chunks because client-side workflows still depend on your local device resources, as noted by Split-Video.
This usually comes from placing the split based on the thumbnail strip instead of actual playback. You export the clip and hear a chopped consonant, a half-breath, or a dead pause at the front.
Fix it like this:
A good clip starts cleanly and lands cleanly. That's more important than shaving off every fraction of a second.
That usually points to re-encoding. Some online tools are built for convenience, not pristine file handling. If they reprocess the footage aggressively, the result can look flatter or blurrier than expected.
Use a simple test process:
That small test saves a lot of regret on longer projects.
Don't run the entire file first and hope the export is clean. Test one short segment and inspect the result before committing.
Even “no-upload” or in-browser tools can hammer your machine because the processing still has to happen somewhere. If your system is already juggling a giant source file, multiple tabs, and a screen recorder in the background, the editor can bog down fast.
The workaround is usually operational, not technical:
That's especially helpful for interviews, webinars, and podcasts where each section can stand alone anyway.
This happens when filenames are vague, segments get mixed up, or the output format doesn't match the next step in your publishing process.
A few habits prevent that:
| Bad habit | Better move |
|---|---|
| Naming files by random version numbers | Name by topic or hook |
| Exporting everything at once without review | Check one or two finished clips before batch export |
| Treating all segments as keepers | Delete weak clips early |
| Using one tool for every editing need | Use the browser splitter for cuts, then move to the right tool for packaging |
A video splitter online works best when you ask it to do one job well. Cut cleanly. Export reliably. Hand off the clip to the next stage.
If you're ready to go beyond manual cutting, Taja AI is built for the next step. It takes long-form video and turns it into shorts, clips, captions, thumbnails, blogs, and platform-specific posts from one upload, which makes it useful when simple splitting isn't enough and you need a repeatable repurposing workflow.


We are blessed to work with leading brands & Companies


We try to make easy and simple for every professionals. Get 30 days free trial - No credit card required.


© 2025 Taja AI. All rights reserved.