.jpeg)

Convert Video to Blog Post for More Traffic
Learn to convert video to blog post with transcription, SEO structuring, editing and republishing tips that turn recordings into traffic.
5 min read
October 16, 2026

Master every Instagram video format. Our 2026 guide covers Reels, Stories, and Feed specs to optimize your content for maximum engagement and reach.
Written by:


When you get the Instagram video format wrong, viewers notice immediately. The video looks awkward, important parts get cropped out, or worse, it’s surrounded by ugly black bars. It screams "amateur," and it kills your engagement before your hook even has a chance to land.
Getting the specs right is the first step to creating content that looks professional and actually performs on the platform. Let's break it down.
Navigating the specific requirements for Reels, Feed posts, Stories, and Ads can feel like a chore, but it's not something you can afford to guess on. Each placement has its own set of rules designed to give viewers the best possible experience on their phones.
When you nail the format, your video takes up the maximum amount of screen real estate. That’s a huge factor in grabbing and holding someone's attention while they’re scrolling. This guide is your one-stop shop for all the essential specs you need to know.
To make things easy, here’s a quick-reference table that breaks down the most critical technical details for every major Instagram video placement in 2026. Bookmark this and use it as your final checklist before you export and upload.
| Video Placement | Aspect Ratio | Resolution (Pixels) | Recommended Length | Max File Size |
|---|---|---|---|---|
| Instagram Reels | 9:16 (Vertical) | 1080 x 1920 | Up to 90 seconds | 4GB |
| Feed Video Post | 4:5 (Vertical) | 1080 x 1350 | Up to 60 minutes | 4GB |
| Instagram Stories | 9:16 (Vertical) | 1080 x 1920 | 60 seconds per clip | 4GB |
| Video Ads | 9:16 or 4:5 | 1080 x 1920 or 1080x1350 | Varies by placement | 4GB |
As you can see, getting these specs right ensures your video looks polished and professional every time you post.
This diagram gives you a quick visual of how those aspect ratios look in practice for Instagram's main video placements.
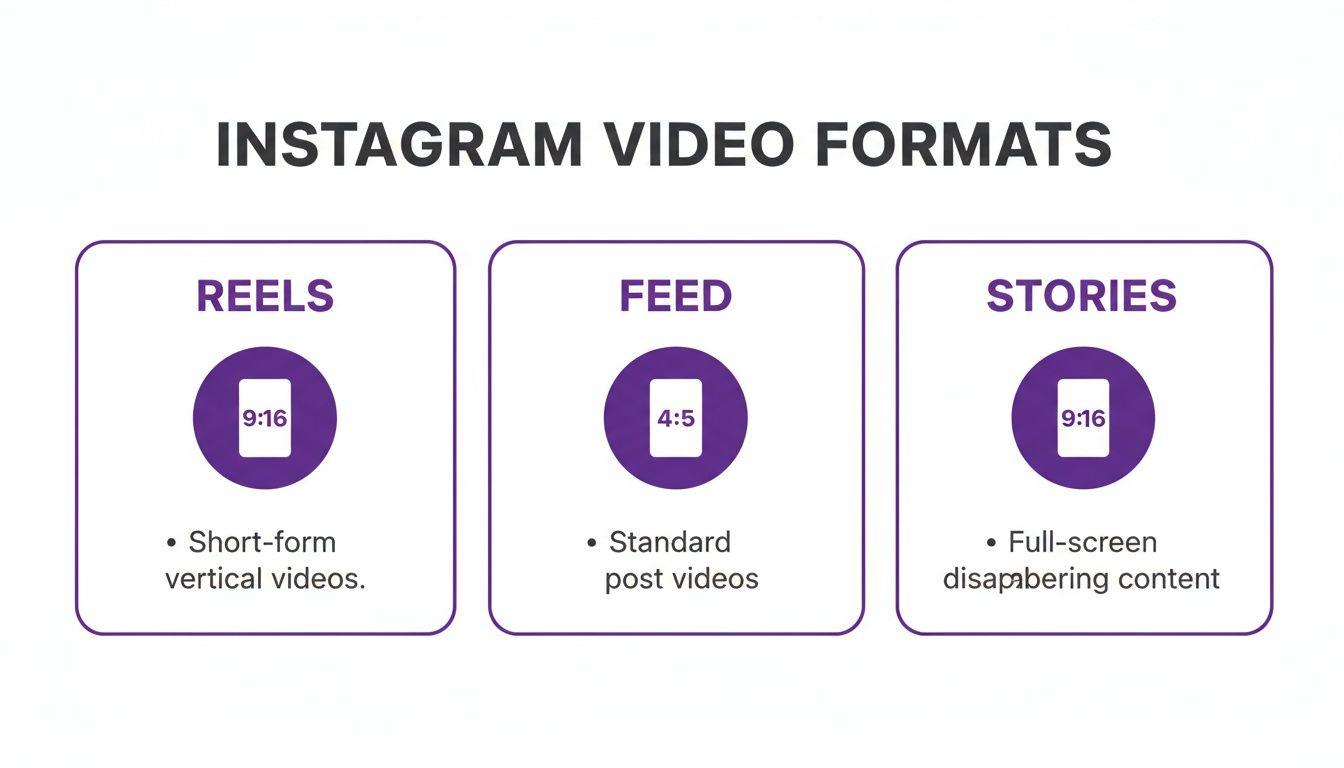
The big takeaway here is that vertical video is king. Both Reels and Stories are designed for the full-screen 9:16 experience, while the recommended 4:5 Feed format also prioritizes vertical screen space over the old-school square or horizontal look.
Getting the Instagram video format right does more than just avoid awkward cropping—it directly impacts how your video performs. The algorithm favors content that fits seamlessly into the native viewing experience.
Key Takeaway: When you upload a video in the correct aspect ratio and resolution, it provides a more immersive experience for the viewer. Instagram is more likely to push that seamless content to a wider audience.
Look, I get it. If you're a busy creator, manually resizing and reformatting every single clip is a soul-crushing task. It’s tedious and eats up hours you could be spending on creating your next great video.
This is exactly where automated tools become a game-changer. Instead of getting bogged down in an editing timeline, you can use software that intelligently reformats your long-form content into perfectly optimized clips for every placement. You can learn how Taja AI can generate Reels from your existing videos, saving you a ton of time while ensuring every post meets Instagram's exact specs. It takes all the technical guesswork out of the equation so you can get back to creating.
Instagram Reels have completely changed the game. They went from a simple add-on feature to the single most important engine for discovery and audience growth on the platform. Unlike pretty much every other video placement, Reels are built specifically to be served to people who don't follow you yet, making them absolutely essential for reaching new audiences. To win, you have to master the specific Instagram video format that Reels demands.
This format is built for one thing: an immersive, full-screen mobile experience. If you stray from these technical specs, you risk your video being awkwardly cropped, compressed into a blurry mess, or just flat-out ignored by the algorithm. Nailing them is the first step toward creating content that looks professional and actually has a shot at going viral.
Look, if you want your Reels to show up correctly and get a fair shot from the Instagram algorithm, you have to get the technical details right from the jump. These aren't just friendly suggestions; they're the foundational rules for quality.
When you dig into the performance data, you see some fascinating trends. The ideal specs for Reels include a maximum file size of 4GB and frame rates between 23-60 FPS. But here's the interesting part: research shows that Reels between 60-90 seconds often pull in the highest engagement, sometimes getting more than double the views of much shorter clips. This proves Reels are becoming a destination for deeper content, with 53% of all Instagram ad placements running on the format by Q4 2025, cementing its importance for both reach and monetization.
Just hitting the technical minimums isn't enough to guarantee success. The Reels that really take off all follow a few best practices that drastically improve the viewer experience and signal quality to the algorithm.
Audio is absolutely critical. Using trending audio or creating your own original sounds can give your Reel a massive visibility boost. The algorithm often promotes videos that use popular sound clips, exposing your content to a much wider audience browsing that specific audio track.
Pro Tip: Always, always design your Reels to be understood with the sound off. A huge chunk of users scroll with their phones on silent, so on-screen text and burned-in captions are essential for getting your message across.
Another key piece is the "safe zone." Instagram's interface—the caption, your username, the engagement buttons—all sit on top of the bottom and right sides of the screen. You have to keep any vital text or visuals away from these areas, or they'll get completely covered up.
Understanding the format is one thing, but applying it effectively is a whole different ballgame. Here are a few practical ways businesses are using Reels right now:
Repurposing longer content is also a powerhouse strategy. For instance, you can take a 20-minute YouTube video and, with a tool like an AI video generator for Instagram Reels, pull out several high-impact clips. This approach saves a ton of time and ensures your content is perfectly formatted to grab maximum engagement on the platform.
While Reels are your best bet for reaching new faces, your in-feed videos are where the real relationship-building happens. These are the posts that land directly in the main feed of your existing followers, making them the perfect tool for delivering value and nurturing your community.
The good news? Unlike the rigid 9:16 format for Reels, feed posts give you a lot more breathing room. But just because you can post different formats doesn't mean you should.
You’ve got three main choices here:
If you want to maximize your impact, you should be aiming for a 4:5 aspect ratio with a resolution of 1080 x 1350 pixels. Every time. No exceptions.
This taller format makes your video dominate the screen as people scroll, making it almost impossible to ignore. It creates a much more immersive experience right there in the feed, without forcing anyone to tap into a full-screen view. That small bit of friction you just removed is huge for keeping eyeballs on your content.
A 16:9 landscape video, on the other hand, forces Instagram to shrink your content and slap ugly bars above and below it. It just feels out of place on a vertical-first platform. Even the 1:1 square format, while better, still leaves screen space on the table that a 4:5 video would have claimed.
Key Insight: The entire point of an in-feed video is to stop the scroll and deliver your message instantly. A 4:5 format does this better than anything else by maximizing your visual footprint and making it easier for your followers to engage.
Okay, beyond the aspect ratio, there are a few technical specs you need to nail to avoid a blurry, pixelated mess. Get these right, and your uploads will look clean and professional every time.
| Specification | Recommendation | Why It Matters |
|---|---|---|
| Video Length | 1 second to 60 minutes | This gives you the flexibility for deeper content than Reels, like tutorials, interviews, or detailed explanations. |
| Max File Size | 4GB | A massive file size allowance means you can upload high-quality video without having to over-compress it beforehand. |
| Video Codec | H.264 | This is the web standard. Using it guarantees your video will play smoothly for everyone on Instagram. |
| Frame Rate | 30 FPS (Frames Per Second) | A 30 FPS rate looks smooth and natural on the platform. Anything more is usually overkill for feed posts. |
Following these guidelines ensures your video looks as crisp as you intended, which directly impacts how your most loyal followers perceive your brand's quality.
The Instagram feed is a ruthless environment. You have, at most, three seconds to grab someone’s attention before they swipe away forever. The first three seconds of your video are absolutely critical. They need to be visually captivating and instantly communicate the value someone will get by sticking around.
Your video's thumbnail (or cover image) is just as important. This is the static image people see before your video even starts playing. A high-quality, intriguing thumbnail can be the single deciding factor between a scroll-past and a play.
Never just let Instagram pick a random frame from your video. Always create a custom cover that’s clear, engaging, and accurately teases the content. Think of it as the headline for your video—it needs to make people so curious they can't help but tap.
If Reels are for landing new eyeballs and Feed posts are for keeping your existing audience warm, then Instagram Stories and Live are where you build real, unfiltered connections. This is your brand’s behind-the-scenes pass—raw, immediate, and designed for in-the-moment interaction.
Getting the instagram video format right for Stories is dead simple, but absolutely critical. It’s all about creating an immersive, full-screen experience that commands attention. Anything less just feels lazy.

The technical specs for Stories are practically identical to Reels, and for good reason—they both aim for that full-screen, can’t-look-away immersion. The platform is built around vertical video, and if your content isn't, it’s going to stick out like a sore thumb.
Yes, you can string together multiple 60-second clips to tell a longer story, but the real key is making each individual segment stand on its own. For a complete teardown of the dimensions and safe zones, this Ultimate Guide to Instagram Story Specs is a great resource.
But here’s what really matters. The true power of Stories isn't in the specs; it’s in the stickers.
Stickers for polls, Q&As, quizzes, and sliders aren't just fun little add-ons. They're direct invitations for your audience to engage. Every single tap signals to the algorithm that your content is valuable, which in turn boosts its visibility to more of your followers.
Think about it. A brand can use a poll to let customers vote on a new product design. A creator can drop a Q&A sticker for a quick "ask me anything" session, forging a much stronger community bond. It's direct, two-way communication.
Instagram Live dials that immediate connection all the way up. When you go live, your followers get a notification, and your profile picture jumps to the front of the Stories bar with that pulsing "Live" ring. It creates a powerful sense of urgency that pre-recorded content just can't replicate.
A smooth stream starts with solid prep. Make sure you've got a strong, stable internet connection and decent lighting and audio. The format is definitely more raw and forgiving, but nobody’s sticking around for a pixelated stream with terrible sound.
Here's a real-world example: A real estate agent goes live from an open house. They can walk viewers through the property in real time, answer questions from the comments as they roll in, and create a sense of presence that a slick, pre-recorded video tour just can't touch. That authentic interaction builds trust and generates qualified leads straight from the platform.
You spent hours editing the perfect video. The cuts are seamless, the color is gorgeous, the audio is crisp. Then you upload it to Instagram, and… it looks like absolute garbage. Pixelated, blurry, and the audio is slightly out of sync. Sound familiar?
That’s not Instagram hating you. That’s what happens when you feed its aggressive compression algorithm the wrong kind of file. All your hard work can be undone in that final export step. Getting the instagram video format right starts inside your video editor, long before you even think about hitting "upload."
Think of your export settings as the final quality control checkpoint. This is where you tell Adobe Premiere Pro, Final Cut Pro, or DaVinci Resolve exactly how to package your video so Instagram can process it cleanly. Get this right, and your videos will look sharp every single time.
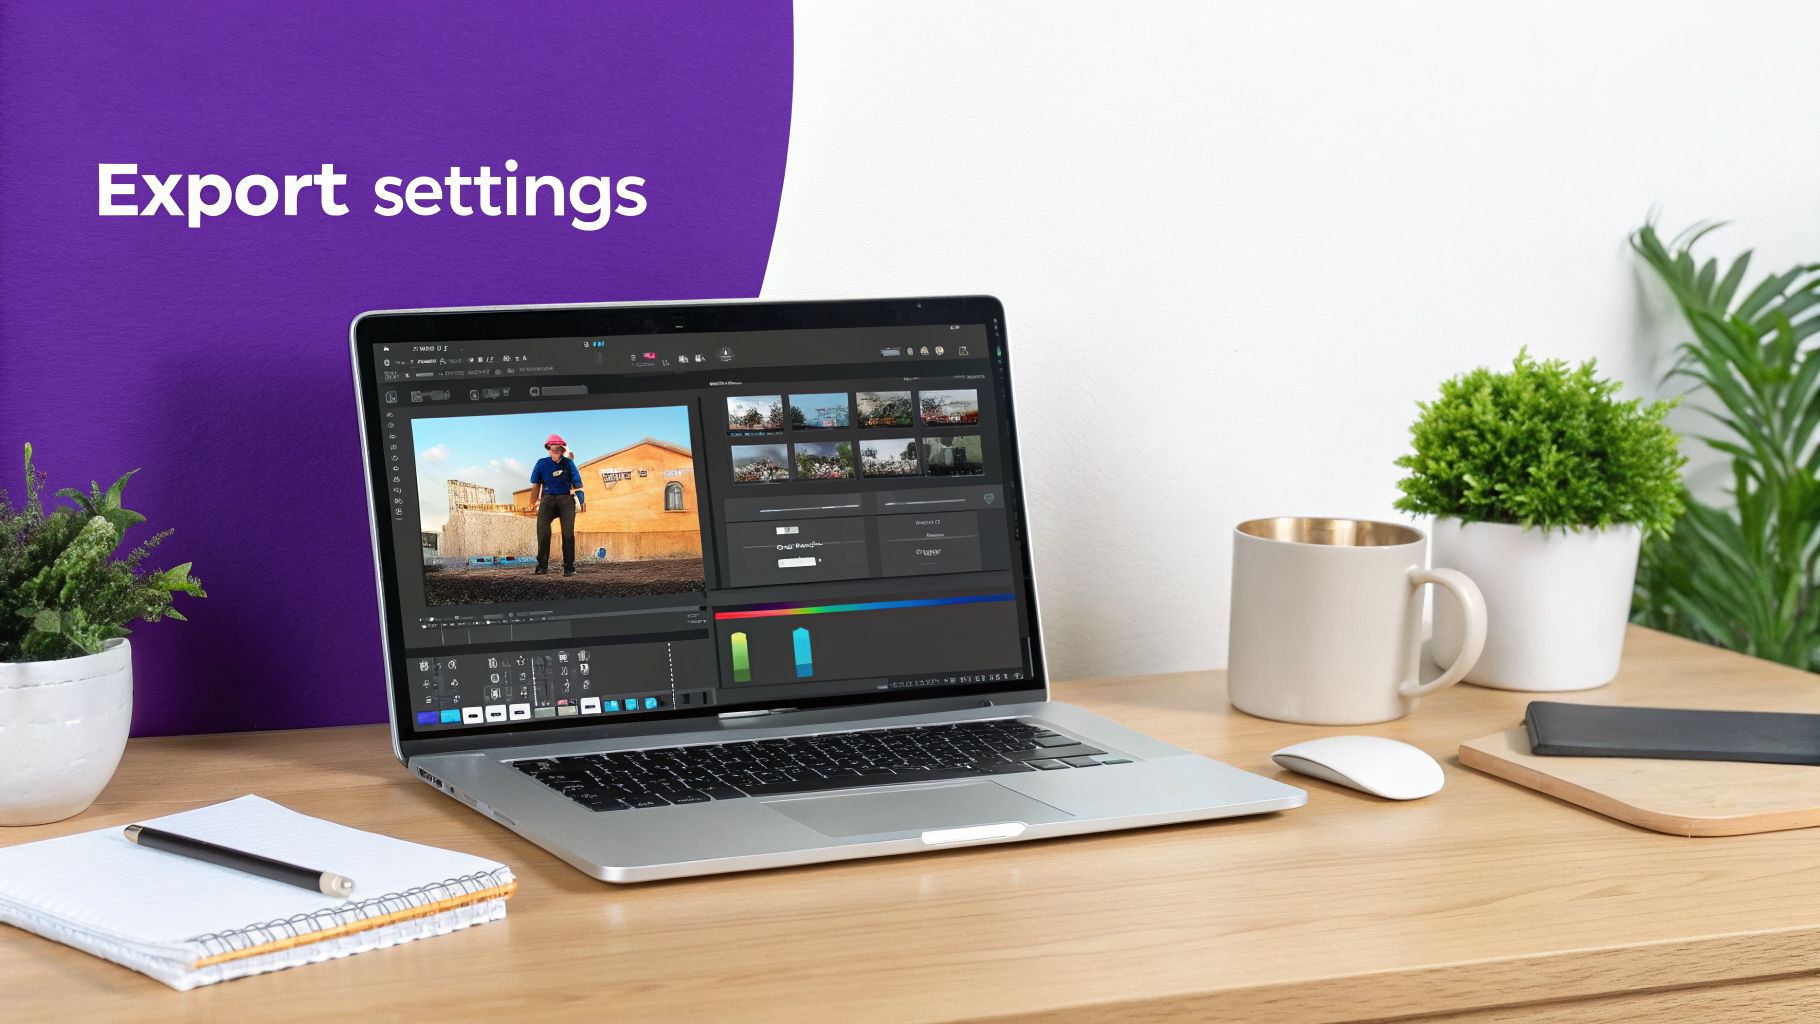
When you open that export window, a few key settings are non-negotiable for a crisp upload. These are the ones that determine whether your video looks professional or like it was filmed on a potato.
Video Codec H.264: This is the universal standard for web video, period. The H.264 (or AVC) codec is the only one you should be using for Instagram. It hits that perfect sweet spot between high quality and a manageable file size, ensuring your video plays smoothly on just about any device.
Frame Rate (FPS): Stick to 30 FPS (Frames Per Second). It provides that smooth, natural look viewers expect on social media. While you might be tempted to use 60 FPS for fast-action shots, 30 FPS is the reliable standard for Feed posts, Stories, and most Reels, and it helps keep file sizes in check.
Audio Codec AAC: For your audio, AAC (Advanced Audio Coding) is your best friend. It delivers excellent sound quality at lower bitrates, which is exactly what Instagram prefers. Make sure to set the sample rate to 44.1 kHz for the best compatibility.
To really dig in and solve those nagging compression problems, understanding the optimal export settings for Instagram is a game-changer. Getting these details right is what separates the pros from the amateurs.
Okay, let's talk about bitrate. This is easily the most misunderstood setting, but it has the single biggest impact on your final video quality. It directly controls how much data your video file contains, which affects both file size and how sharp it looks.
Key Insight: A higher bitrate means better quality, but a file that’s too big will get brutally compressed by Instagram. A lower bitrate means a smaller file, but you risk that blocky, pixelated look. The goal is to find the sweet spot.
For a standard 1080p video, a target bitrate between 10-15 Mbps (Megabits per second) is a fantastic starting point. This gives Instagram's algorithm enough data to work with, which helps minimize that fuzzy look that plagues so many uploads.
| Setting | Recommendation | Why It Matters |
|---|---|---|
| Bitrate Encoding | VBR, 1-pass | Variable Bitrate (VBR) is smart; it adjusts the data rate based on how complex each frame is, which optimizes your file size. 1-pass is more than enough for social media and exports way faster. |
| Target Bitrate | 10-15 Mbps | This is the money zone for 1080p video. It keeps quality high without creating a massive file that Instagram will just crush anyway. |
| Maximum Bitrate | 20 Mbps | Setting a cap prevents data spikes in really complex scenes from making your file unnecessarily huge. It’s a great safety net. |
Even with all the right settings dialed in, a few common mistakes can still trip you up at the finish line. Watch out for these pitfalls.
By running through this checklist, you're taking back control over how your final video looks. For creators who want to skip the technical headaches entirely, a powerful video maker can automate all these settings, letting you focus on making great content instead of tweaking export windows.
Look, we've all been there. You spend hours getting your export settings just right. The video looks perfect on your computer. Then you upload it to Instagram, and it’s a pixelated, cropped, out-of-sync mess. It's frustrating, but nine times out of ten, these problems are completely fixable.
The issue almost always comes down to a mismatch between your video file and what Instagram's compression algorithm is expecting. When you feed it a video in a non-standard Instagram video format, the platform gets aggressive. It recompresses, reformats, and basically butchers your file to make it fit, killing your quality in the process. Once you know what triggers this, you can diagnose and fix these problems in minutes.
Blurry or pixelated video is easily the most common complaint. This is what happens when Instagram over-compresses your video, stripping out visual data to shrink the file size. Some compression is just part of the game, but you can definitely minimize the damage.
Here are the usual suspects:
If you’ve checked all these and your video still looks blurry, try exporting with a slightly higher bitrate. This gives Instagram’s algorithm more information to work with, which can often preserve more of the original quality.
Key Takeaway: The best defense against Instagram's aggressive compression is to give it a high-quality file that already meets its preferred specs. The less work the algorithm has to do, the better your video will look.
Seeing ugly black bars on the top and bottom or sides of your video is a dead giveaway: your aspect ratio is wrong for that specific placement. For instance, if you upload a wide 16:9 landscape video to Reels, Instagram will slap black bars on it to fill the tall 9:16 screen. It looks lazy, and it kills engagement.
If you’re running into audio sync problems—where the sound is out of step with the video—the culprit is almost certainly your frame rate. A variable frame rate (VFR), which is common on phones and in screen recordings, can completely confuse video editors and Instagram's uploader. Always convert your clips to a constant frame rate, like 30 FPS, before you even start editing. This will save you a world of headache.
Even after diving into a complete guide, a few questions always pop up. I get it. Here are the quick, no-fluff answers to the things creators and marketers get stuck on most often.
For pure, unfiltered reach and getting in front of new audiences, it’s not even a debate: 9:16 vertical video (1080x1920 pixels) for Instagram Reels is king. The algorithm is built to push Reels to people who have no idea who you are.
But, if you want to nurture the community you already have, a 4:5 in-feed video (1080x1350 pixels) is a powerhouse. It dominates the screen in the main feed, stops the scroll, and is perfect for delivering deeper value to your existing followers.
Blurry video is almost always a sign that Instagram’s compression algorithm had a fight with your file—and won. To avoid this, you need to hand the platform a file it loves from the get-go.
First, never upload a low-res video. Always export with at least 1080p resolution. Second, stick to the universally accepted H.264 codec. Finally, give Instagram more data to work with by setting a high video bitrate. I aim for 10-15 Mbps; it results in a much cleaner final product after their algorithm is done with it.
Technically, yes, you can post a 16:9 video to your feed. But honestly, you really shouldn't.
Instagram will slap huge black bars above and below it to make it fit, shrinking your video and making it look tiny and out of place in the vertical feed. It’s way less engaging. For Reels or Stories, it’s a complete non-starter—it shatters the full-screen, immersive experience those formats are built for.
Think of it like this: Reels are your discovery engine. They’re short, vertical videos (up to 90 seconds) designed for pure entertainment and grabbing the attention of people who don't follow you yet.
Feed videos are for your community. They can be much longer (up to 60 minutes) and show up primarily to your existing followers. This makes them the perfect tool for building relationships and delivering more detailed, in-depth content that your core audience will appreciate.
Ready to stop wrestling with formats and start creating content? Taja AI automatically transforms your long-form videos into dozens of perfectly formatted clips, captions, and posts for Instagram, TikTok, and more. Scale your reach and get started for free at Taja.ai.


We are blessed to work with leading brands & Companies


We try to make easy and simple for every professionals. Get 30 days free trial - No credit card required.


© 2025 Taja AI. All rights reserved.