.jpeg)

10 Hashtags for Music to Boost Discovery
Find the best hashtags for music by genre, platform, mood, and trend, plus practical ways to mix broad and niche tags for stronger discovery.
5 min read
October 5, 2026

Learn how to make a video file smaller for email or social media. Our 2026 guide covers the best free tools and methods to reduce size without losing quality.
Written by:


You export a video, drag it into Gmail, Slack, PowerPoint, or an upload form, and hit a wall. The file is too large, the upload crawls, or the platform rejects it outright. That's usually the moment people start clicking random “compress video” tools and hoping nothing looks terrible afterward.
A better approach is to make one smart decision before you touch any setting. Ask where the file is going. A clip for email needs a different treatment than a master file you'll archive, and both are different from a video headed to YouTube or Instagram. Once you make that call, shrinking the file gets much simpler.
The usual scenario looks the same across teams. A founder records a product demo. A real estate agent exports a property walkthrough. A coach finishes a webinar replay. The edit is done, the message is solid, and then the file won't send.
That frustration gets worse because most advice on how to make a video file smaller is too generic. It tells you to “compress it” without helping you choose the right workflow. That's how people end up re-encoding the same file three times, losing quality each round, and still missing the upload target.
The practical fix is to stop treating compression like a single button. It's a choice between speed, control, and workflow fit.
Here's the version I trust in real production work:
Practical rule: Don't start with the tool. Start with the destination.
That one shift saves time. It also keeps you from over-compressing footage that looked fine before you tried to “optimize” it.
Large video files usually come down to four settings: resolution, frame rate, bitrate, and codec. Once you know which one is inflating the export, you can shrink the file without blindly wrecking quality.
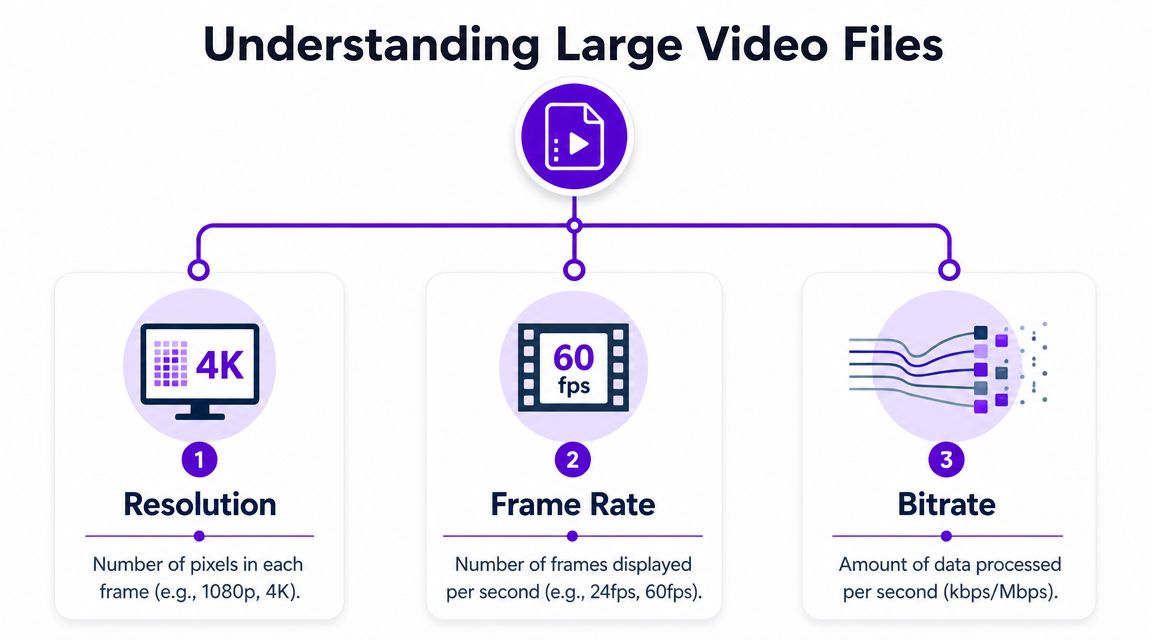
Resolution is the frame size of the video. More pixels means more image data to encode and store.
Adobe's guidance on reducing video size points to the same core adjustments editors use every day: lower the resolution, reduce bitrate when appropriate, and drop frame rate if the footage does not need it. It also recommends smaller export presets such as 1080p or 720p for lighter files (Adobe's video size reduction guidance).
That is why moving from 1080p to 720p often has a bigger impact than people expect. If the final destination is a phone screen, embedded webpage, or internal review link, that trade-off is often invisible to the viewer and very visible in file size.
Frame rate is the number of frames shown each second. Higher frame rates can improve motion smoothness, but they also increase the amount of video that has to be encoded.
For talking-head videos, slide presentations, tutorials, webinars, and many screen recordings, 24 or 30 fps is usually enough. I only push higher when motion is the point, such as sports, gameplay, or fast product footage. Reducing frame rate on the wrong clip can make movement look choppy, so this is a content decision, not just a compression trick.
Bitrate is the amount of data allocated to each second of video. It has a direct effect on file size and a huge effect on perceived quality.
This is the lever I check first when a video is already at the right resolution. Too low, and you get softness, macroblocking, and ugly motion artifacts. Too high, and the export gets heavier without a meaningful visual gain, especially after a platform recompresses it anyway.
If your source is long and the problem is upload limits rather than export settings, splitting the file can be smarter than pushing bitrate too low. A browser-based video splitter for long uploads can solve the delivery problem without forcing extra quality loss across the whole project.
A lot of editors still use "format" to mean everything, but container and codec are different parts of the file. The container is usually something like MP4 or MOV. The codec is the compression method inside it, such as H.264.
For modern sharing, efficiency and compatibility matter more than habit. TechSmith recommends MP4 for smaller, shareable files and notes that MOV and AVI are often better kept earlier in the editing process. Adobe also recommends H.264 as the fallback when you do not have a platform-specific export preset (TechSmith on reducing video file sizes).
Use these four levers to diagnose the file before you compress it again:
| Factor | What it changes | When to lower it |
|---|---|---|
| Resolution | Number of pixels per frame | When the viewing context does not need full size |
| Frame rate | Number of frames per second | When motion is simple and smoothness is already acceptable |
| Bitrate | Data allocated per second | When quality looks fine but the file is still too heavy |
| Codec/container | Compression efficiency and compatibility | When the export format is outdated or inefficient for web delivery |
That is the part many guides skip. Smaller files do not come from one magic tool. They come from choosing the right setting to change, and leaving the rest alone.
Sometimes you don't need a workflow. You need a result before the meeting starts.
That's where browser-based compressors make sense. You upload the file, choose a target like file size or quality, wait for the process, then download the smaller version. For a short social clip, a quick internal demo, or a file that just needs to fit through email, they're often the fastest route.
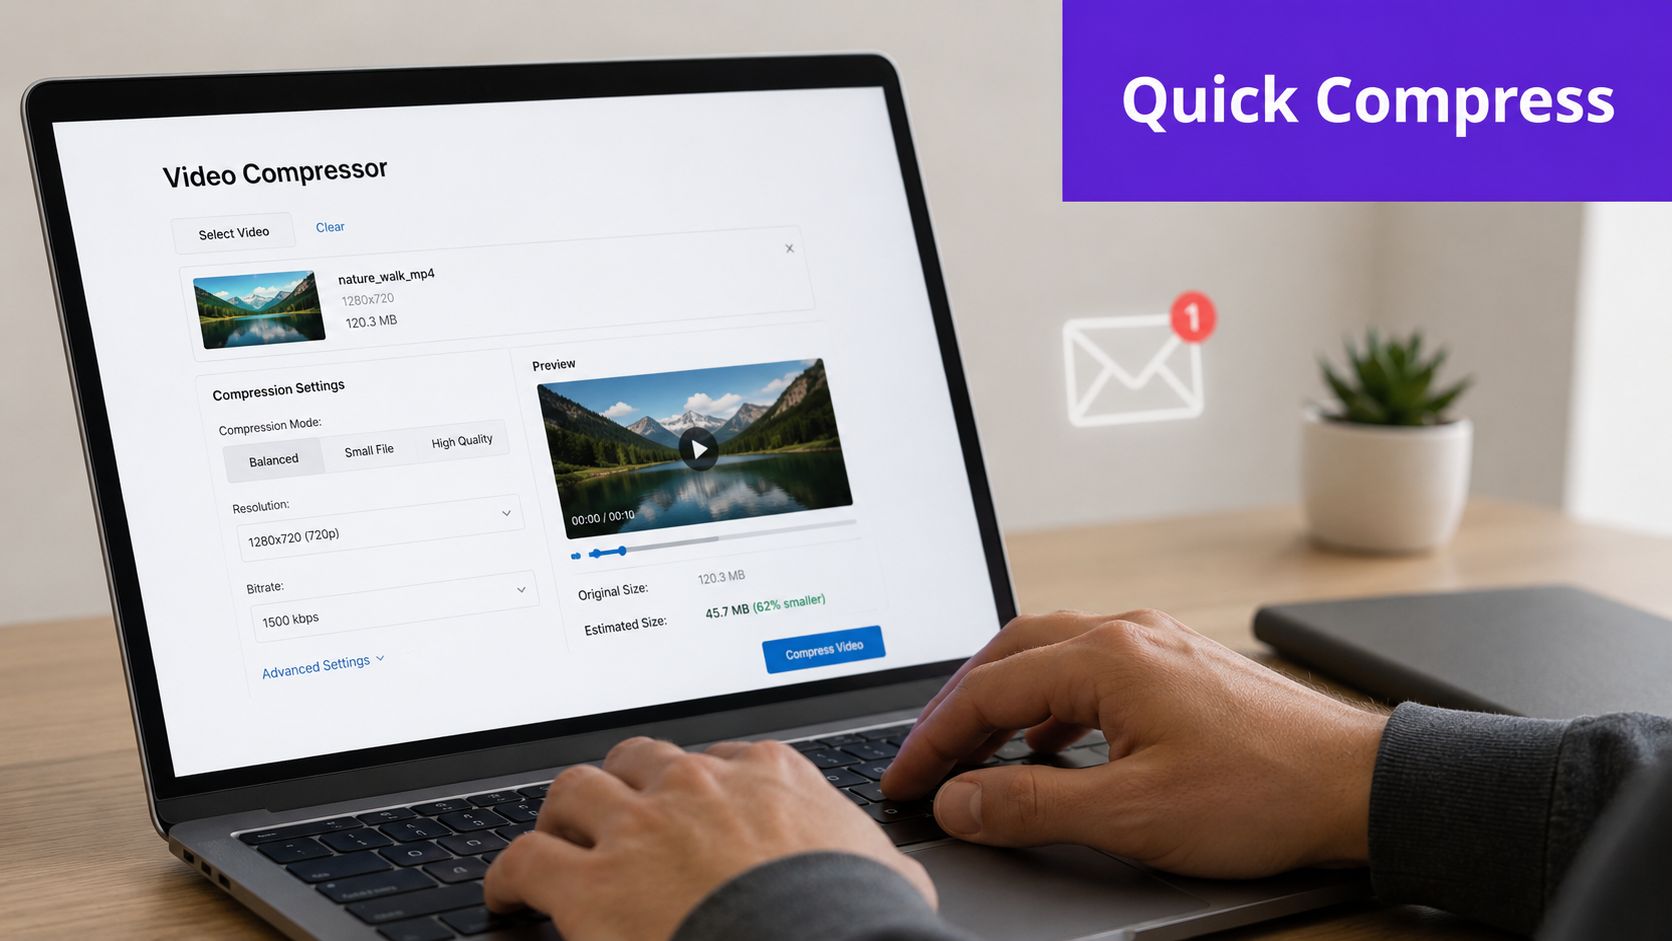
FreeConvert reflects a common modern approach by letting you compress to a desired file size or quality level and supporting formats like MP4, FLV, and MKV. Riverside's compressor supports MP4, MOV, AVI, MKV, WEBM, and other common formats, and also lets users target either file size or quality. That's useful when the job is simple and the main question is “make this smaller fast,” not “help me tune an encoding workflow.”
Online compressors are a good fit when:
If the actual issue is that one long file should be broken into smaller chunks before compression, a browser tool like this online video splitter workflow can be the cleaner first step.
For one-off jobs, convenience usually beats perfection.
Online tools aren't magic. They usually expose only a few controls, and many free options put limits on file size, speed, or output quality. Some also add friction around downloads or nudge you toward paid tiers for larger jobs.
The bigger issue is privacy and ownership. If the file includes client footage, internal training, legal material, or unreleased campaign content, sending it through a browser-based service may not fit your process.
Use online compression when the clip is disposable, public-facing, or low risk. Move to desktop tools when the file matters.
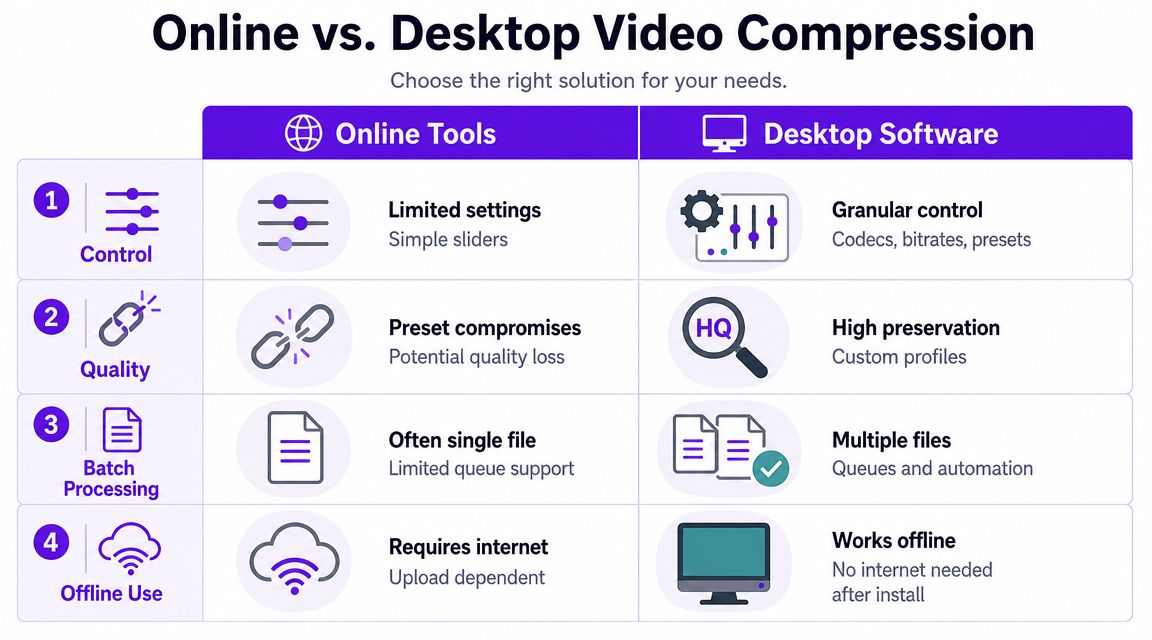
If you compress video more than occasionally, desktop software is where the guesswork ends. You get stable exports, more settings, better quality control, and no need to upload source files to someone else's server.
HandBrake is the tool I'd recommend first because it solves the core problem. It gives you enough control to make a file meaningfully smaller without forcing you into professional post-production complexity.
For precise control, dedicated transcoders like HandBrake commonly use a Constant Rate Factor workflow. In the cited tutorial, the practical recommendation is to open the source, choose MP4/H.264, keep the frame rate the same as the source, enable web optimization, and set the quality slider around RF 20 to 23 before encoding. That range is presented as a workable sweet spot between visual quality and file size, and the same source warns that going below 25 fps can make motion appear choppy (HandBrake tutorial on CRF-based compression).
That's a better method than chasing a target file size blindly. Instead of telling the encoder “make this exactly small,” you tell it “preserve this level of quality efficiently.”
Use this when you want a reliable default:
Load the source file
Start with the exported master, not a video that's already been compressed multiple times.
Choose MP4 and H.264
This keeps compatibility broad and avoids format weirdness during sharing.
Keep frame rate aligned with the source
Don't lower it automatically unless you have a reason.
Turn on web optimization
This helps for web delivery and hosted playback.
Set Constant Quality around RF 20 to 23
Start in that range, test a short segment if the footage is motion-heavy, then encode.
Trim before export if needed
Removing dead air, extra intros, and unused endings is one of the easiest ways to reduce size because you're encoding less video.
Later, if you want to find your ideal video editor, that matters too, because some editing apps make it easier to export cleaner masters before you even open HandBrake.
Here's a simple comparison of what you gain on desktop:
| Need | Online tools | Desktop software |
|---|---|---|
| One-off compression | Good | Good |
| Repeatable quality | Limited | Strong |
| Batch jobs | Weak | Better |
| Sensitive files | Riskier | Safer |
| Fine control | Minimal | Strong |
A useful walkthrough can help if you're on Apple hardware and want app-specific options. This guide to video compression software for Mac is a solid next read.
A quick visual demo helps if you want to see the workflow before trying it yourself.
FFmpeg is what you use when you want compression to become part of a system instead of a manual task. It's not the friendliest option at first glance, but once you've run a few commands, it stops feeling intimidating.
The appeal is simple. It's fast, scriptable, and precise. If you regularly export the same kind of clips, FFmpeg lets you reuse the same command every time.
Here's a practical example for turning a source file into a web-friendly MP4, scaling it down to 1080p if needed:
ffmpeg -i input.mov -vf "scale='min(1920,iw)':-2" -c:v libx264 -crf 23 -c:a aac output.mp4
What each part does:
-i input.mov points to the source file.-vf "scale='min(1920,iw)':-2" limits width to 1080p-class output while preserving aspect ratio.-c:v libx264 uses H.264 for broad compatibility.-crf 23 applies a quality-based compression target.-c:a aac uses a common audio codec for sharing.That command won't cover every edge case, but it's enough to handle a lot of normal business video.
If you repeat the same export settings every week, a saved FFmpeg command is faster than any menu.
FFmpeg makes the most sense when:
If your source files are often MOV and you want a format-specific walkthrough before building commands, HypeScribe's guide on MOV compression is a useful companion resource.
A lot of bad compression happens because people assume smaller is always better. It isn't. The right question is whether the file should be compressed now, or whether you should leave more quality intact and let the destination platform handle delivery.
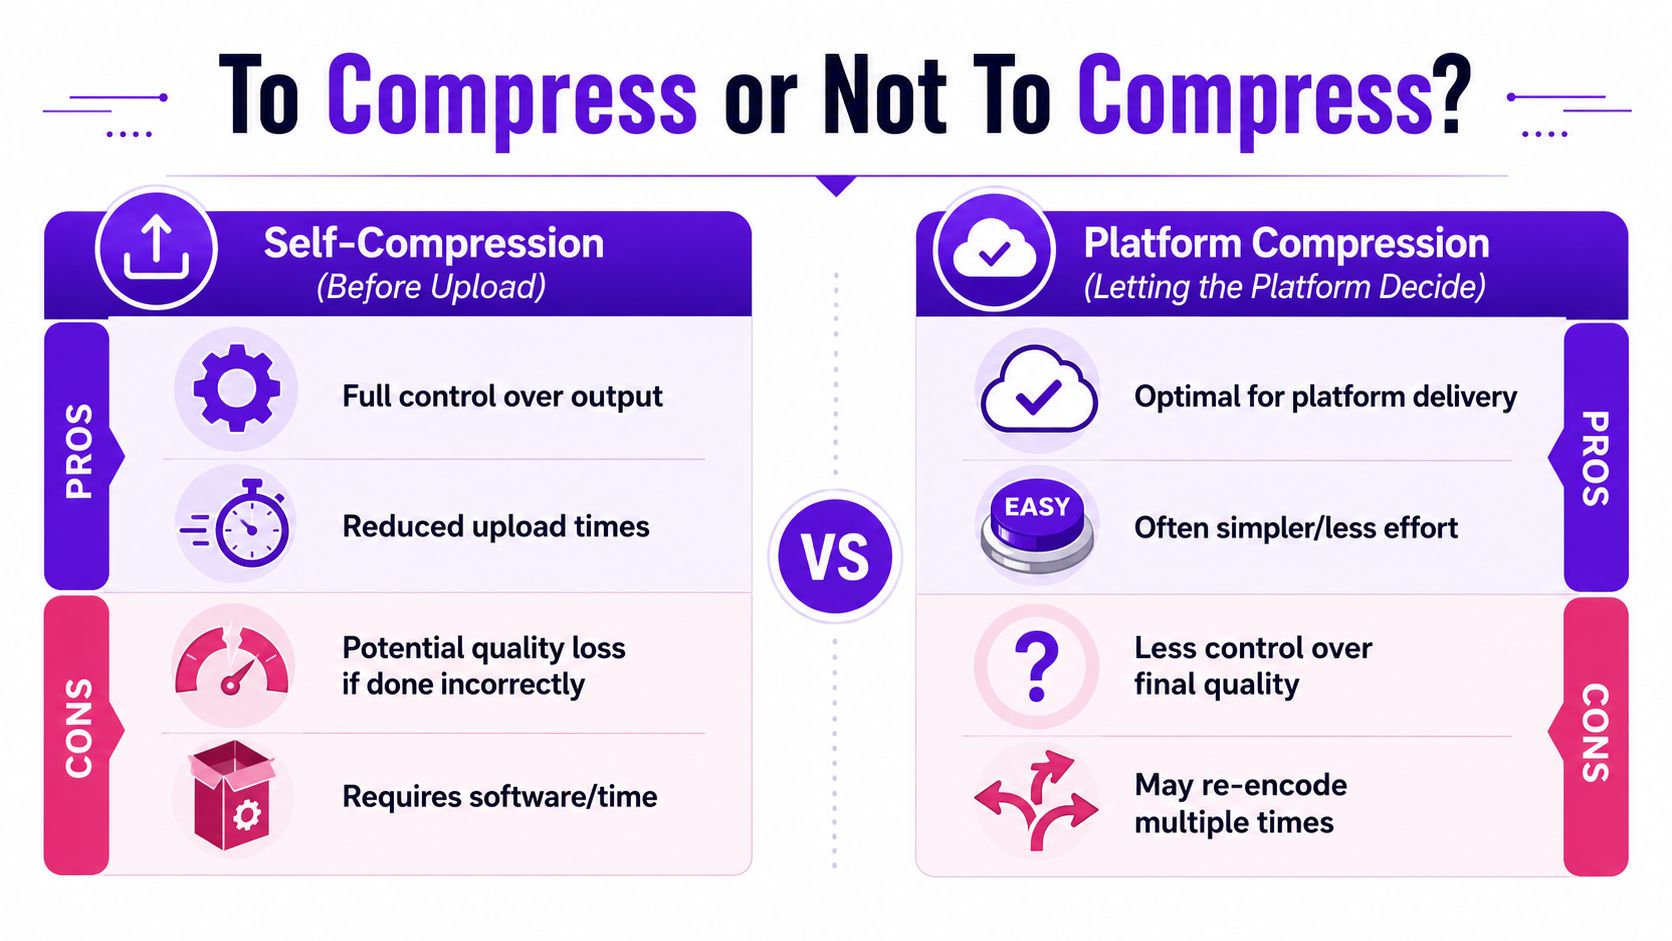
If you're emailing a clip, dropping it into Slack, embedding it in a presentation, or storing a lightweight version for quick access, pre-compression makes sense. In those cases, the delivered file is the thing people will use.
Microsoft's guidance for PowerPoint is a good reminder that compression is a trade-off, not a free win. It notes that compressing media can save disk space and improve playback, but it can also remove embedded subtitles and alternate audio tracks. That's why aggressive pre-compression can be counterproductive when you may need those features later (Microsoft's media compression guidance).
YouTube, Instagram, TikTok, LinkedIn, and similar platforms already re-encode uploads for delivery. If you heavily compress the video first, the platform may compress that already-compressed file again. The result can be softer footage, more visible artifacts, and less room for the platform to make a clean encode.
That doesn't mean “upload anything at any quality.” It means avoid crushing the file more than necessary before the platform gets it.
Use this rule of thumb:
If your workflow revolves around publishing rather than file transfer, choosing solid upload tools matters as much as compression settings. A practical overview of YouTube upload software can help there.
The best compression decision is often a publishing decision, not a codec decision.
Usually not. A video file like MP4 is already compressed, so putting it in a ZIP often saves little or nothing. Zipping a video file is different from compressing its content. If you need the file to shrink, re-encode it, cut the runtime, lower the resolution, or reduce the bitrate.
MP4 with H.264 is still the safest default for web delivery. It plays almost everywhere, uploads cleanly, and gives a good balance of quality, compatibility, and file size.
If you know your audience or platform supports newer codecs, H.265/HEVC or AV1 can produce smaller files at similar quality. The trade-off is slower encoding and, in some cases, weaker compatibility. For fast publishing and fewer surprises, H.264 usually wins.
Target quality if the platform does not impose a strict limit and visual fidelity matters. That usually gives better-looking results because the encoder can spend more bitrate on hard scenes and less on easy ones.
Target file size if you have a hard cap, such as email, messaging apps, LMS uploads, or client portals. In those cases, the destination sets the rule, so your job is fitting inside it with the least visible damage.
Fast motion stresses compression. Sports clips, handheld footage, screen recordings with lots of changes, and busy textures all need more data to stay clean. If the bitrate is too low, you will see smearing, blockiness, or muddy detail first in those moments.
The fix is usually straightforward. Raise the bitrate, use a better codec if playback support allows it, or reduce resolution before you crush the bitrate further.
Yes. TimeSkip's YouTube compression guide is a useful companion if your main question is how much to compress before uploading to YouTube.
The best method depends on the job. Use an online compressor for a one-off send that needs to happen now. Use desktop software if you want predictable quality and preset-based exports. Use FFmpeg if you need repeatable batch workflows or tighter control over bitrate, codec, and automation.
For YouTube, Instagram, and other major platforms, restraint usually gets better results than aggressive pre-compression. Export a clean delivery file, then let the platform handle its own transcode.


We are blessed to work with leading brands & Companies


We try to make easy and simple for every professionals. Get 30 days free trial - No credit card required.


© 2025 Taja AI. All rights reserved.