.jpeg)
10 Best Instagram Reels Maker Tools for Creators in 2026
Compare 10 Instagram Reels Maker tools for editing, vertical templates, captions, and publishing, with honest limits and use cases for 2026.
5 min read
October 15, 2026

Get the complete 2026 LinkedIn video specifications for feed posts, ads, and Live. Avoid errors with our guide to formats, size limits, and aspect ratios.
Written by:


You export a polished video, upload it to LinkedIn, and get a failure message instead of a post. That usually isn't random. It's almost always a mismatch between the file you created and the format LinkedIn accepts for that placement.
That mismatch gets worse when one video is supposed to do several jobs. A feed post has one set of rules. A paid ad has another. A mobile-first clip needs different framing than a desktop-first webinar excerpt. Most guides stop at listing specs. That's not enough when you're trying to publish without re-exporting the same file three times.
LinkedIn video specifications matter because they shape both acceptance and performance. File size affects whether the upload works. Codec choice affects whether playback fails. Aspect ratio changes how much screen space your video gets on mobile. Caption treatment determines whether the message survives muted autoplay.
The usual pattern is simple. You edited for quality, exported a large file, and assumed LinkedIn would compress it. Then LinkedIn rejected it, stalled during processing, or rendered it poorly.
In practice, upload failures usually come from one of a few avoidable problems:
Practical rule: If LinkedIn rejects a file, assume the export settings are the problem before assuming the platform is broken.
What trips people up is fragmentation. LinkedIn doesn't have one universal video workflow. It has different technical limits depending on how the video is being used. If you're repurposing a podcast, webinar, listing walkthrough, client testimonial, or founder update, those differences matter more than the edit itself.
The fix is to treat upload specs as part of strategy, not as a final checklist after the creative work is done.
You export one clean master file, upload it to LinkedIn, and assume you're done. Then the same file that works in the feed fails an ad review, blows past a paid placement size limit, or looks weak on mobile because the framing was built for desktop.
That is why a quick reference table matters. Not as a checklist you glance at after editing, but as a production filter you use before anyone exports the final file.
| Specification | Organic Feed Video | Video Ad | LinkedIn Live |
|---|---|---|---|
| File size | Up to 5 GB | Up to 200 MB | Not file-based in the same way as uploads |
| Duration | 3 seconds to 15 minutes on desktop, 10 minutes on mobile | Up to 30 minutes | Uses live streaming workflow rather than standard upload |
| Container | MP4 recommended | MP4 required for cross-channel safety | RTMP-based setup through streaming software |
| Video codec | H.264 (AVC) recommended | H.264 required | Set in encoder or streaming tool |
| Audio codec | AAC or MPEG-4 accepted, AAC recommended | AAC is the safe choice for ad exports | Managed through live encoder |
| Resolution range | 256×144 to 4096×2304 | Depends on ad creative format, but keep exports platform-ready and compressed | Determined by encoder and live workflow |
| Aspect ratio | 1:2.4 to 2.4:1 | Varies by ad creative, with mobile-first options often needing separate formatting | Usually widescreen live framing |
| Frame rate | 10 to 60 FPS | 30 FPS or less | Controlled in encoder |
| Bit rate | 192 Kbps to 30 Mbps with 5,000 to 8,000 kbps often the practical range for standard 1080p | Must be managed aggressively to stay under ad size limits | Determined by encoder and connection stability |
The constraint is placement, not just format.
Organic feed video gives publishers more room. Ads do not. A file that looks excellent as an organic post can still become unusable once you need to fit paid limits, alternate aspect ratios, and stricter delivery requirements. Live is a separate production path, where encoder settings and connection stability matter more than upload settings.
Teams lose time when they edit once, export once, then try to force the same asset into every LinkedIn slot.
A better approach is to decide upfront which of these three outcomes you need:
That decision changes your workflow early. It affects aspect ratio, compression, caption placement, and whether a single export is realistic.
For teams repurposing webinars, podcast clips, customer interviews, or founder updates, this table is less about memorizing numbers and more about preventing rework. Tools like Taja help by organizing those format decisions before publishing, which is far easier than troubleshooting failed uploads after the content is already approved.
A common LinkedIn failure looks like this: the file exports cleanly, plays fine on your machine, then stalls during upload or posts with softer quality than expected. In organic feed video, the issue usually is not the edit. It is the export choice.
Organic posts give you more room than ads, but that room can hide bad habits. Teams often export the highest resolution their editor allows, keep the original frame rate, and assume LinkedIn will sort it out. The platform usually accepts the file. The result is often heavier processing, slower uploads, and less predictable playback on mobile devices.
For organic native video, LinkedIn supports long-form uploads, large files, and a wide resolution range, as noted earlier in this guide. The practical takeaway is simpler. Use the most stable format combination and size the file for feed viewing, not for archive quality.
If the goal is a reliable post with minimal upload friction, use this baseline:
This combination works because it aligns with how LinkedIn handles standard feed playback. It also makes repurposing easier later. If a clip performs well organically and you want to turn it into a campaign with Market With Boost's paid LinkedIn solutions, starting from a controlled MP4 master creates fewer conversion problems than starting from an oversized export.
Higher resolution does not automatically improve feed performance.
For a webinar clip, founder update, or customer soundbite, 1080p usually gives the best balance of sharpness, processing speed, and manageable file weight. Pushing a simple talking-head video to the platform maximum rarely creates a visible gain in-feed, especially on phones. It does create larger files, longer upload times, and more chances for compression artifacts after LinkedIn re-encodes the video.
Aspect ratio matters just as much as pixel count. A wide horizontal frame can work for desktop-heavy audiences, but a vertical or square crop often takes up more screen space on mobile and makes the opening seconds easier to notice in the feed. That decision belongs at the edit stage, not at upload.
The same video can look nearly identical to viewers while exporting at very different file sizes.
For standard 1080p feed video, moderate compression usually holds quality well. Overshooting the bit rate inflates the file without producing a meaningful visual improvement after platform processing. That matters if you are publishing at scale or handing off multiple versions for approvals. Lighter masters move faster through review, upload faster, and are easier to reuse.
A good operating rule is simple: export for the screen where the video will be watched.
Organic feed allows longer uploads than many teams need. That does not mean a longer cut is the stronger post.
Feed video earns attention in the first few seconds. If the setup is slow, the allowed duration does not help. For educational clips and interview excerpts, trim to the point where the value is clear immediately, then decide whether the full-length version belongs elsewhere. Taja helps here by turning one source asset into feed-ready variations before publishing, which is far more efficient than fixing rejected or underperforming videos after approval.
A LinkedIn ad can fail after the organic version worked perfectly. The usual reason is simple. Paid placements follow tighter technical limits, so a file that looks fine in the feed can still be rejected in Campaign Manager.
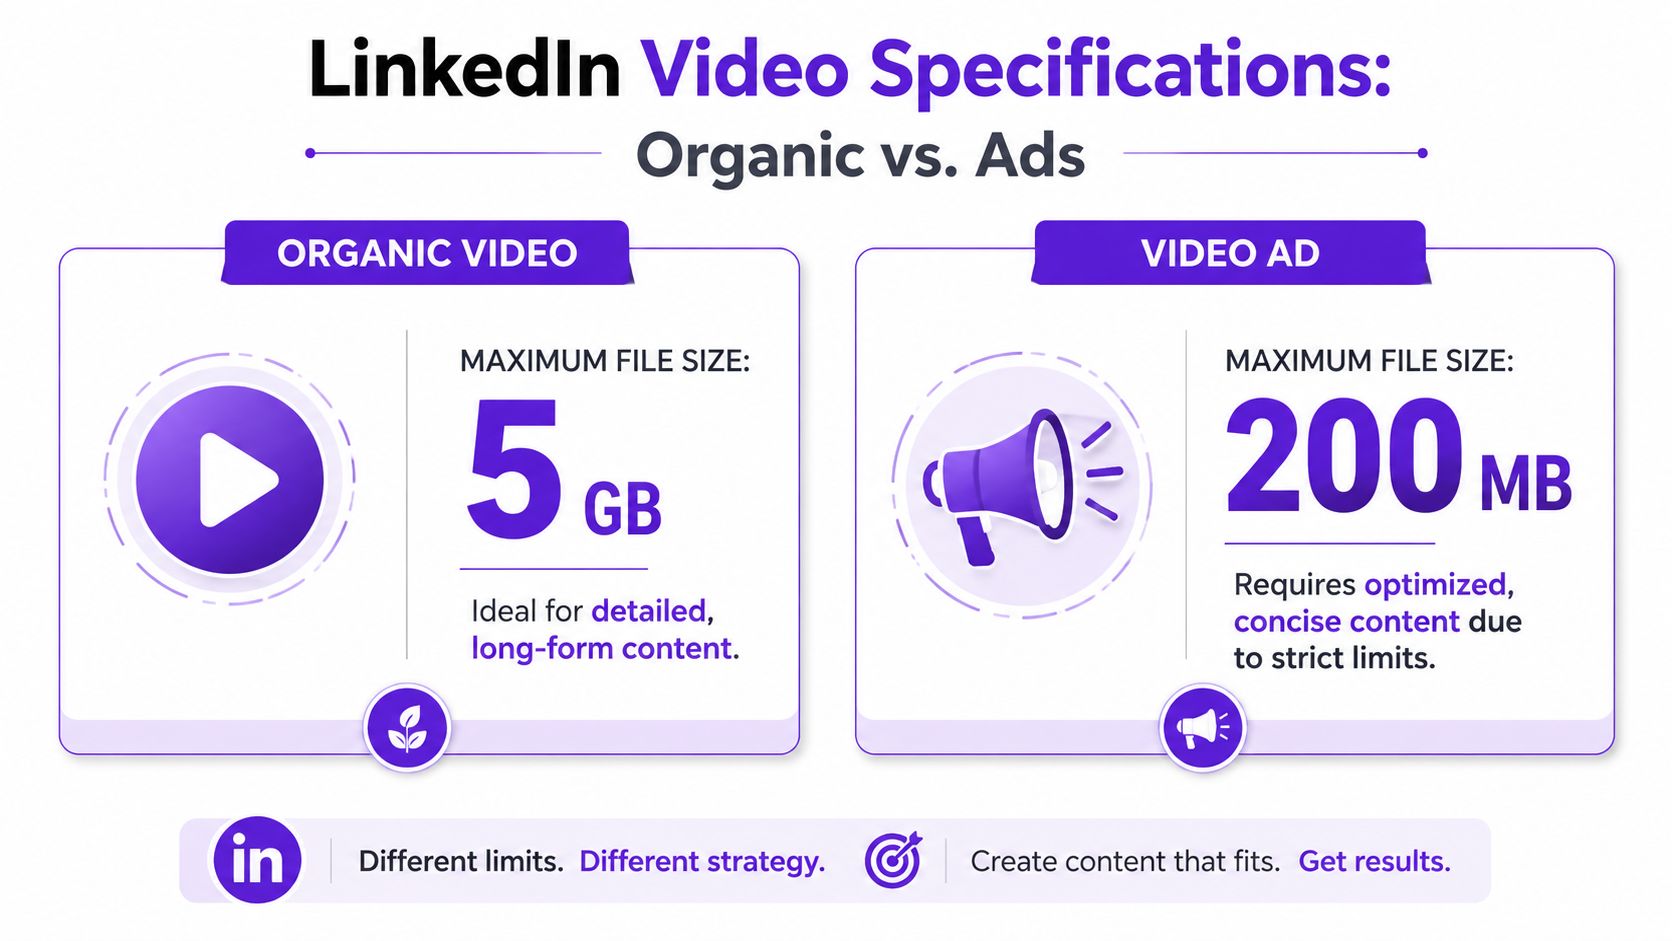
The two specs that create the most trouble are file weight and frame rate. Organic posting gives you more room. Paid video needs a much lighter export and stricter motion settings. That changes how you should prepare the asset long before upload day.
Teams often edit a polished master for organic distribution, approve that version, and only then create the paid cut. That sequence causes preventable problems.
A long HD export can still be too large for ads. A timeline built at a higher frame rate can also carry settings that do not fit paid requirements. If compression happens at the last minute, text softens, captions lose clarity, and product shots pick up visible artifacts.
The operational mistake is treating the ad file as a smaller copy of the organic post. It is a separate deliverable with its own constraints. The better workflow is to decide upfront which assets are for awareness, retargeting, or conversion, then export each one to match the placement.
Start with the ad objective, because that influences both runtime and framing. A short remarketing clip usually needs faster pacing and larger on-screen text than a broader awareness asset. If the audience will see the ad on mobile, square or vertical often holds attention better than a horizontal crop reused from another channel.
Then control the export settings directly:
This is also where production workflow matters. If your team publishes one master and then manually resizes, trims, and re-exports every paid variation, errors multiply fast. Taja is useful because it helps turn a source video into platform-specific versions without forcing the team to rebuild each ad creative by hand.
If you need support beyond file prep, Market With Boost's paid LinkedIn solutions are a useful reference because they treat LinkedIn ads as a channel with its own creative and technical rules, not as boosted organic content.
A walkthrough of ad-related setup can help if you're troubleshooting export decisions mid-process:
Live content follows a different logic. You're not preparing a file for upload. You're preparing a stream that has to stay stable from the first second to the last.
That changes what matters. Instead of obsessing over container formats and re-exporting clips, you're dealing with encoder settings, scene setup, microphone routing, lighting, and connection reliability. Tools like OBS, StreamYard, Vimeo, and Restream usually sit between your camera feed and LinkedIn.
LinkedIn Live typically relies on an RTMP-based setup through approved streaming software or a streaming service. In practice, that means you need to configure the stream in the encoder, test your scenes, confirm your audio path, and verify that the output looks clean on both desktop and mobile before going live.
A few operating rules matter more than fancy production:
Short, vertical LinkedIn content should be treated as its own format, not as an adaptation of content created for a wider view. The pacing, framing, text placement, and headline treatment all change when the viewer is on a phone and moving quickly through the feed.
That usually means:
If the original edit was built for webinars, demos, or screen-sharing, a direct crop often fails. On mobile, too much detail turns into clutter. The best short vertical LinkedIn edits simplify the frame and make the point faster.
Live rewards stability. Short mobile video rewards clarity. They're both “video,” but they don't ask for the same production choices.
Aspect ratio isn't a formatting footnote. It changes how much of the feed your video occupies and how easy it is to ignore.
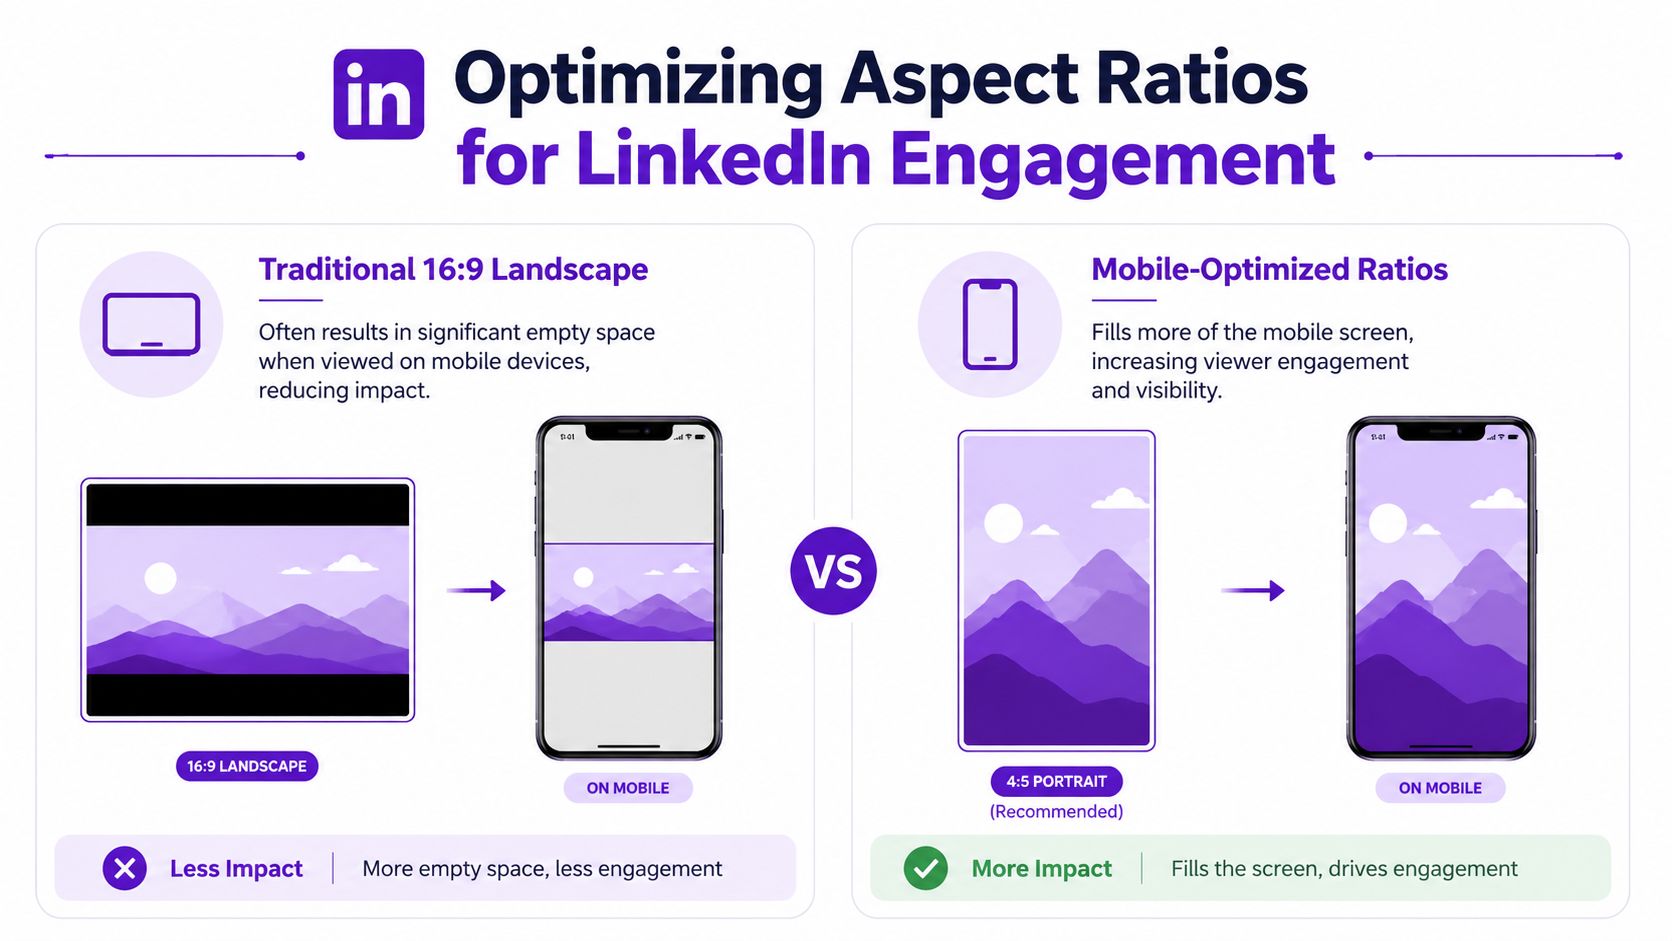
While 16:9 remains a standard choice, recent best practices say vertical 9:16 is recommended for mobile-first content and is harder to scroll past because it fills more of the screen. The same source notes that 75% of mobile videos are watched without sound, which makes the combination of vertical framing and burned-in captions especially important, according to this mobile-first LinkedIn video discussion.
Horizontal video is still useful. It works well for:
The problem isn't that 16:9 is wrong. The problem is using it by default when the audience is likely to discover the content on a phone.
On mobile, a vertical or near-vertical frame takes up more visual space. That gives you more room for a face, headline text, and caption area before the viewer decides whether to keep watching.
That's why 9:16 and 4:5 often outperform generic horizontal edits in practical feed environments. They don't just “fit mobile.” They dominate more of the screen.
A smart decision framework looks like this:
| Format | Best use case | Common failure |
|---|---|---|
| 16:9 | Screen demos, interviews, presentations | Too much empty space on mobile |
| 4:5 | General feed clips, education, promos | Text can get cramped if overdesigned |
| 9:16 | Mobile-first talking head, shorts, direct-to-camera clips | Weak if the edit was just cropped from landscape |
If you're adapting one source file into several versions, it helps to use a dedicated resizing tool instead of manually guessing crop zones. Adjust media for LinkedIn from RenderIO is useful for testing how different frames will hold up before you commit to final export.
A good aspect ratio doesn't just avoid cropping. It supports the way the message is consumed.
Captions do two jobs at once. They improve accessibility, and they protect comprehension when autoplay starts with the sound off.
On LinkedIn, that matters because many viewers are in work settings, commuting, or skimming their feed without audio. If your video requires sound to make sense, you're asking the viewer for more effort than most will give.
You have two main caption approaches.
SRT captions are uploaded as a separate subtitle file. They're useful when you want a cleaner visual frame and platform-supported subtitle behavior. They're also better when you need to edit wording without re-exporting the full video.
Burned-in captions are embedded directly into the video image. They're often the better choice for short social clips because they guarantee the text appears exactly where and how you designed it.
Here's the practical trade-off:
Good captions are not tiny transcript strips at the bottom of the frame. They're designed for skimming.
Focus on:
If you're also working on framing, choose correct video dimensions before finalizing caption placement, because text that looks fine in a wider aspect ratio may collide with a tighter crop in portrait.
For teams that need a practical walkthrough on subtitle workflows, this guide on how to add subtitles to videos is a useful reference.
You export a video, upload it, and LinkedIn throws back a vague processing error. Or the file uploads, then performs badly because the framing that looked fine on desktop becomes unreadable on mobile. In practice, upload problems usually come from one issue: the export was built for a different destination than the one you chose on LinkedIn.
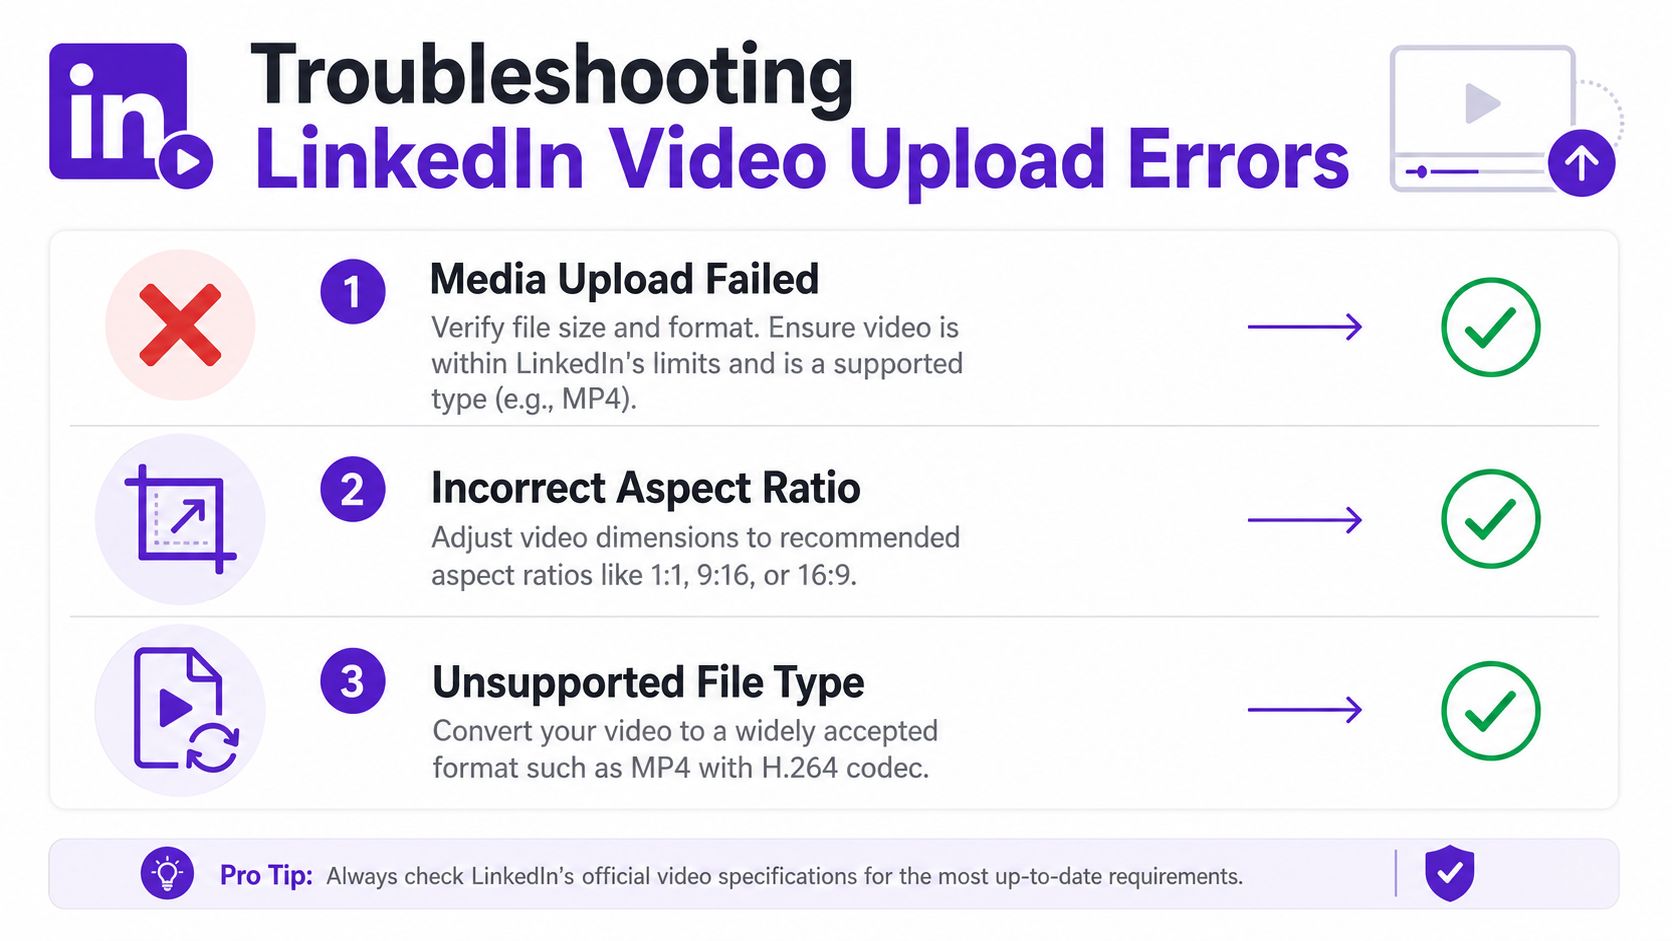
The recurring mistake is treating one master file as universal. Organic posts, paid placements, and mobile-first clips often need different exports. That is where teams lose time. They troubleshoot after the failure instead of matching the file to the placement before upload.
If LinkedIn says the file could not be processed, start with the export settings.
The common culprits are familiar:
The reliable fix is to create a fresh export in MP4 with H.264 video and AAC audio. Avoid uploading files that have been downloaded, converted, recompressed, and renamed across multiple tools. Every extra handoff increases the chance of a bad encode.
This usually happens because the team exported a master file, not a distribution file.
A practical check before upload:
If file weight is the blocker, this guide on how to make a video file smaller without wrecking readability gives a practical compression workflow.
This is the mistake teams miss.
LinkedIn accepted the video. The problem is that the packaging does not fit the feed. A widescreen webinar excerpt may be technically valid and still fail because text is too small on phones. A vertical clip may upload cleanly and still lose key visuals to aggressive cropping. Captions can sit too low and compete with interface elements.
Watch for these failure patterns:
That is why video specs are not just a compliance checklist. They are a distribution decision. The right export gets the file accepted. The right format, crop, and compression choices give the post a chance to hold attention once it lands in the feed. Tools like Taja help by turning one source asset into placement-aware versions, which cuts down on preventable upload errors and saves teams from rebuilding the same video by hand.
Manual repurposing breaks down fast. One long-form recording might need to become a feed post, a vertical short, a square excerpt for broader reuse, and an ad-ready variation with stricter compression. Managing all of that by hand is possible. It's just slow, repetitive, and easy to get wrong.
The better workflow is to start with one strong source asset, then generate platform-aware outputs from it. That means separate crops, separate durations, caption treatments that suit the placement, and exports that match where the content is destined.
For teams doing this repeatedly, the bottleneck usually isn't creativity. It's version control. Which edit is for feed? Which one is for paid? Which clip has captions burned in? Which export fits the mobile frame? That's why purpose-built repurposing tools have become part of the workflow instead of a nice extra. If you want to see that kind of system in action, Taja's repurpose video content generator is built around turning one long-form video into multiple ready-to-publish assets without manually rebuilding each variation.
The practical win is consistency. You spend less time troubleshooting exports and more time improving hooks, framing, and message clarity.
If you're tired of juggling codecs, crops, captions, and separate exports for every LinkedIn placement, Taja AI gives you a faster way to turn one long-form video into platform-ready content. It's built for creators, marketers, and small teams that need consistent output without becoming full-time editors.


We are blessed to work with leading brands & Companies


We try to make easy and simple for every professionals. Get 30 days free trial - No credit card required.


© 2025 Taja AI. All rights reserved.