.jpeg)

10 Repurpose Examples to Multiply Content Reach
Explore 10 repurpose examples for turning long-form content into clips, posts, blogs, emails, and lead magnets across creator and business niches.
5 min read
September 17, 2026

Confused about how do i upload videos to twitter? Learn to post from any device, optimize for reach, and troubleshoot errors in our complete 2026 guide.
Written by:


Uploading a video to Twitter is easy. You tap a button, pick a file, and hit post. The real question isn't how you do it, but why you're not doing it more often. Because on X (formerly Twitter), video has stopped being a "nice to have" and become the single most powerful tool for getting noticed.

If you're still thinking of Twitter as the place for 280-character text updates in 2026, you're missing the plot entirely. The platform has morphed into a video-first firehose of content, and static posts are getting drowned out. For anyone trying to build an audience or a brand, ignoring video is like showing up to a concert with earplugs.
The numbers are staggering. With 251 million daily active users, the platform is a hotbed for video, with over 80% of all user sessions now including video views. That's not a slow creep; it's a 35% year-over-year explosion in video consumption.
Tweets with video don't just get a little more love. They get 6X more retweets than photos and 3X more than GIFs. You're not just getting more attention; you're getting exponentially more reach.
Let's get real. Beyond the vanity metrics, the strategic cost of ignoring video is huge. Video is your best—and maybe only—tool to:
My own experience with this was a wake-up call. I started repurposing my longer videos into short, punchy clips for X. In less than three months, my profile visits doubled. This wasn't just a number on a dashboard; it translated directly into more qualified leads and better conversations.
This is more than a trend; it's a fundamental recalibration of how the platform works. Getting a handle on video is the first step. In fact, many of the same strategies for repurposing content apply here, just like when you repurpose YouTube videos for Shorts. The goal is to get you excited about what’s possible before we even get into the nitty-gritty of the upload process.
Ready to get your video live? Whether you're at your desk or on the go, the basic steps are pretty straightforward. But knowing the specific workflow for each platform is key, and some creators I know even swear by a dedicated app for streamlined video uploads to simplify the whole process.
Either way, let's break down the two main ways you’ll be uploading.
On your phone, whether it’s an iPhone or an Android, just tap the blue “+” icon to start a new post. The very first time you do this, your phone will probably bug you for permission to access your photo library. Just say yes—it's a one-time thing you have to do to let the app see your video files.
Once you’re in, tap the media icon (it looks like a little picture of mountains) and pick the video you want to share. X immediately throws you into a simple trimming tool.
Mastering this is non-negotiable, especially since a staggering 93% of video views on X happen on mobile.
For desktop users, the experience is even faster, particularly if you’re batching content for the week. Honestly, the quickest way I've found is to just drag your video file from a folder and drop it right into the "What is happening?!" compose box.
The site will start processing the video immediately. While it’s doing its thing, you can start drafting your copy and adding those crucial hashtags.
Video on X can feel like an engagement cheat code. It's a straightforward process: attach your video, give it a quick trim if needed, add some keyword-rich text, and hit publish. With the platform seeing an 8% weekly rise in posts, aiming for three to five video posts daily can help you ride that growth wave.
You'll also notice an "Edit" button pop up over your video thumbnail after you drop the file. This gives you the same simple trimming tool you find on mobile, making the desktop workflow super efficient.
And if you’re looking to make the whole process of creating and managing video even faster, our own AI-powered video maker can help you create optimized clips in a fraction of the time.
There's nothing more frustrating than perfecting a video, hitting "upload," and getting hit with an error message. It’s a moment that makes every creator want to throw their laptop out the window.
This section is your technical cheat sheet to make sure that never happens again. Getting these specs right from the start is the key to a smooth process and making sure your content actually looks good in the feed.
First, let's talk file types. While Twitter (or X, whatever we're calling it this week) technically accepts MOV files, your best and most reliable friend is MP4. Think of it as the universal language for web video. Using an MP4 with an H.264 video codec and AAC audio codec virtually guarantees it will work without a hitch.
This quick-reference guide covers the core limits every creator needs to know before they even think about exporting.
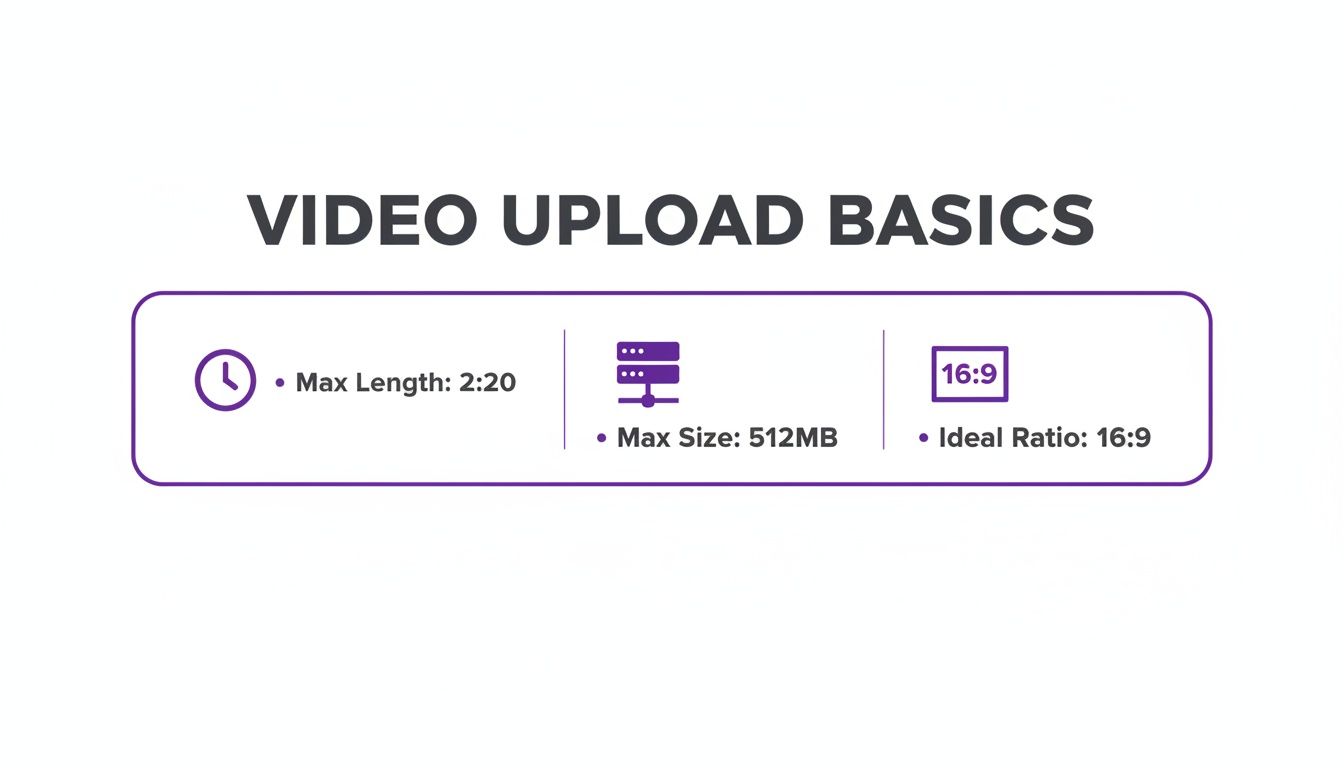
Honestly, these three specs—video length, file size, and aspect ratio—are responsible for about 90% of all upload failures I see. Burn them into your brain.
To make things even easier, I've put all the must-know technical details into a single table. Bookmark this page, print it out, do whatever you need to do. This is your quick-reference guide to ensure your videos meet all of X's technical requirements for a smooth upload and optimal viewing quality.
| Specification | Requirement | Pro Tip |
|---|---|---|
| Recommended Format | MP4 (H.264/AAC) | While MOV is accepted, MP4 is far more reliable and avoids weird compatibility glitches. Stick with it. |
| Max Length | 2 minutes, 20 seconds (140s) | X is for short, punchy content. If your message takes longer, it probably belongs on another platform. |
| Max File Size | 512MB | If your file is bigger, use a tool like HandBrake to compress it before uploading. Don't sacrifice too much quality. |
| Aspect Ratio | Between 1:2.39 and 2.39:1 | Square (1:1) is your best bet for mobile. It takes up more screen real estate and stops the scroll. |
| Resolution | Min: 32x32, Max: 1920x1200 | Aim for 1280x720 for landscape or 1080x1080 for square. This gives you crisp quality without a huge file size. |
| Frame Rate | 60 FPS or less | Stick to 30 FPS. It's the standard for web video, looks smooth, and keeps file sizes manageable. |
Getting these specs right from the export stage saves you from the headache of re-editing and re-exporting later. A few extra seconds of setup can save you an hour of frustration.
Even with that flexibility, your choice of aspect ratio can make or break your video's performance. For a standard account, your video can't go over 2 minutes and 20 seconds (140 seconds) or 512 MB. If your file is too large, you'll need to compress it before uploading.
So when should you use which format?
As the platform cruises past 251 million daily active users and video appears in over 80% of user sessions, getting these specs right is no longer optional. According to HeyOrca's analysis of X media specs for 2026, video views are up 35% year-over-year. This makes it a goldmine for anyone—from marketers to real estate agents—looking to repurpose longer content for fresh reach.
Turning a longer recording into perfectly sized clips is much easier with the right tools. If you need help with this, a long video to short generator can automate much of the painstaking work of clipping and reformatting.

Look, getting your video uploaded is just table stakes. The real work starts now. How you package that video—the text, the tags, the thumbnail—is what separates a tweet that gets 50 views from one that gets 50,000.
The text you write is your hook. Don't just tell people what's in the video; that's boring. Your job is to make them so curious they have to stop their frantic scroll.
Throw out a question. State a bold, maybe even controversial, opinion. Drop a surprising number that makes someone pause and think, "Wait, really?" You have about two seconds to earn that click.
Once you've got their attention, you need to make sure your video travels beyond your own followers. Hashtags are your ticket to ride. They're how you show up in relevant searches and tap into broader conversations.
But here’s the mistake I see all the time: using generic tags like #video or #marketing. That’s like whispering in a hurricane. You need to get specific.
#realestate. Use #AustinRealEstate or #FirstTimeHomeBuyerTips. Get into the mind of someone looking for your exact content.And don't forget about tagging. If your video mentions a specific tool, creator, or company, tag their account. It’s a simple way to get on their radar and potentially earn a retweet. Just keep it genuine—don't randomly tag popular accounts hoping for free exposure. It looks desperate.
Let me give you a pro tip that’s made a huge difference for me: always, and I mean always, set a custom thumbnail. A captivating thumbnail can single-handedly double your click-through rate. It's the most powerful thing you can do to win that initial click.
Here's the final, non-negotiable step: add captions. A huge percentage of people on X watch videos with the sound off. If you don't have captions, you’re basically talking to yourself.
X makes it easy by letting you upload a dedicated SRT file along with your video. It’s a simple step that makes your content accessible and guarantees your message actually gets heard, even in total silence. To really nail this, it’s worth diving deeper into the nuances of captioning your videos for maximum impact.
Nothing kills your creative buzz faster than seeing that dreaded “Your media file could not be processed” error. You’ve got the perfect video, the perfect caption, and then… roadblock. It’s enough to make you want to throw your laptop out the window.
I’ve seen this happen a hundred times, and 99% of the time, it’s not your internet connection. The problem is usually hiding in the video file’s specs, a simple mismatch between your video and what X (formerly Twitter) actually expects.
The most common culprits? A video that’s a few megabytes over the 512 MB limit or a couple of seconds past the 2:20 runtime. An unsupported format is another frequent offender that’ll get your upload rejected on sight.
Instead of just randomly trying to upload again and again, I run through a quick mental checklist that solves the problem in minutes. It’s methodical, and it saves me from a ton of frustration.
First, I go straight back to the source and double-check the file specs. Is it an MP4? Is it under the size and time limits? Honestly, this single step catches about 90% of all my upload failures. It’s almost always something simple.
If your video meets all the technical requirements but still refuses to upload, the issue might be your browser. I’ve seen browser cache or even an overzealous ad-blocker extension interfere with uploads before. The quickest way to test this is by opening an incognito or private window and trying the upload from there.
If the file size or format is definitely the problem, don’t go back and re-render the whole thing from scratch. That’s a massive waste of time. Just use a reliable video converter like HandBrake. It’s a free tool that can quickly compress a file or switch it from something like MOV to MP4 without any noticeable quality loss, getting your video ready for another attempt.
Once you get the hang of uploading videos to X (formerly Twitter), you’ll start hitting the weird little roadblocks that pop up for every creator. This is where we go beyond the basic upload button and get into the nitty-gritty of what to do when things don't go as planned.
Think of this as your cheat sheet for the common headaches and "what if" scenarios that always seem to crop up at the worst possible time.
We’ve all been there. Your video is perfect, but it’s just a few seconds over the limit. For most accounts, that 2-minute and 20-second ceiling is a hard stop. The platform will just refuse the upload.
However, if you have a paid X Premium subscription or you're a verified organization, you often get access to upload much longer videos. Check your account settings under the "Premium" tab to see if you have this unlocked.
If you don't, the best move is to create a "trailer." Find the most compelling, attention-grabbing part of your video, edit it into a powerful short clip, and post that. Then, drop a link to the full version on a platform like YouTube or your own website.
I've found this "trailer" method to be incredibly effective. It forces you to find the absolute best part of your video for X, which often leads to higher engagement on the clip itself and drives more clicks to your full-length content.
Blurry videos are almost always a casualty of X’s aggressive compression. The platform squeezes your file down to save space, and if your original file isn't optimized, the quality loss is brutal.
The goal is to give X a super clean file so its compression algorithm has less work to do.
Hands down, the best practice is to use a dedicated caption file. X has great support for the SRT file format, which lets viewers toggle captions on or off themselves.
After you upload your video on a desktop, you'll see an option to "Upload caption file (.srt)." Use it. This is so much better than burning captions directly into your video file. It’s more accessible, and it caters to the huge portion of users who watch videos with the sound off.
Most video editors and tons of online transcription services can generate an SRT file for you in just a few minutes. It's a tiny extra step that makes a huge difference in your video's performance.
Ready to stop wrestling with video specs and start scaling your content? Taja AI turns one long video into dozens of ready-to-publish, SEO-optimized short clips, captions, and posts for all your social channels. Start creating for free and save hours with Taja AI.


We are blessed to work with leading brands & Companies


We try to make easy and simple for every professionals. Get 30 days free trial - No credit card required.


© 2025 Taja AI. All rights reserved.