.jpeg)

Convert Video to Blog Post for More Traffic
Learn to convert video to blog post with transcription, SEO structuring, editing and republishing tips that turn recordings into traffic.
5 min read
October 16, 2026

Learn how to add a logo to a picture with our complete guide. Covers pro tips for Canva, Photoshop, mobile apps, and batch processing for perfect branding.
Written by:


Before we jump into the how-to, let’s get on the same page about the why. Sticking your logo on an image might feel like a tiny detail, but it’s one of the smartest, simplest things you can do to turn your pictures from random snapshots into hard-working business assets.

Think of your logo as your digital handshake. When someone sees it on a photo, it’s an instant signal of ownership, quality, and professionalism. This isn't just about making things look pretty; it's a core strategy for building a brand that people actually remember.
This plays out in the real world all the time. A real estate agent’s property photos suddenly look more credible when each one is marked with a subtle logo. A freelance photographer’s portfolio gains an immediate air of authority, protecting their work while quietly promoting their services.
Let's be honest—unbranded content floating around the internet feels anonymous, and anonymous often comes across as amateur. When you consistently add your logo to your images, you’re creating a cohesive visual experience that tells your audience you're serious about what you do.
This repetition builds familiarity, and familiarity is the bedrock of trust. Over time, your audience starts connecting your logo with the value you provide, making your content instantly recognizable in a crowded Instagram feed or a sea of Google search results.
A recognizable logo is more than just a decoration; it's a key marketing asset. It’s the visual shortcut that communicates your brand’s promise and quality without a single word.
Your brand doesn't just live on your website. It’s on Instagram, LinkedIn, in your email newsletters, and everywhere else your audience hangs out. Adding a logo to your images ensures you have a unified, professional presence across all of them.
This is especially critical for shareable content. When someone saves or shares your branded image, your logo travels with it, acting as a built-in referral that expands your reach to new audiences completely on its own.
Don't just take my word for it. The data shows just how much a logo impacts what people do. For instance, half of all consumers are more likely to patronize a brand with a logo they recognize, and 34% of U.S. adults admit to buying a product simply because they liked the logo. These numbers prove that a logo directly influences trust and spending. You can discover more insights about this logo design research.
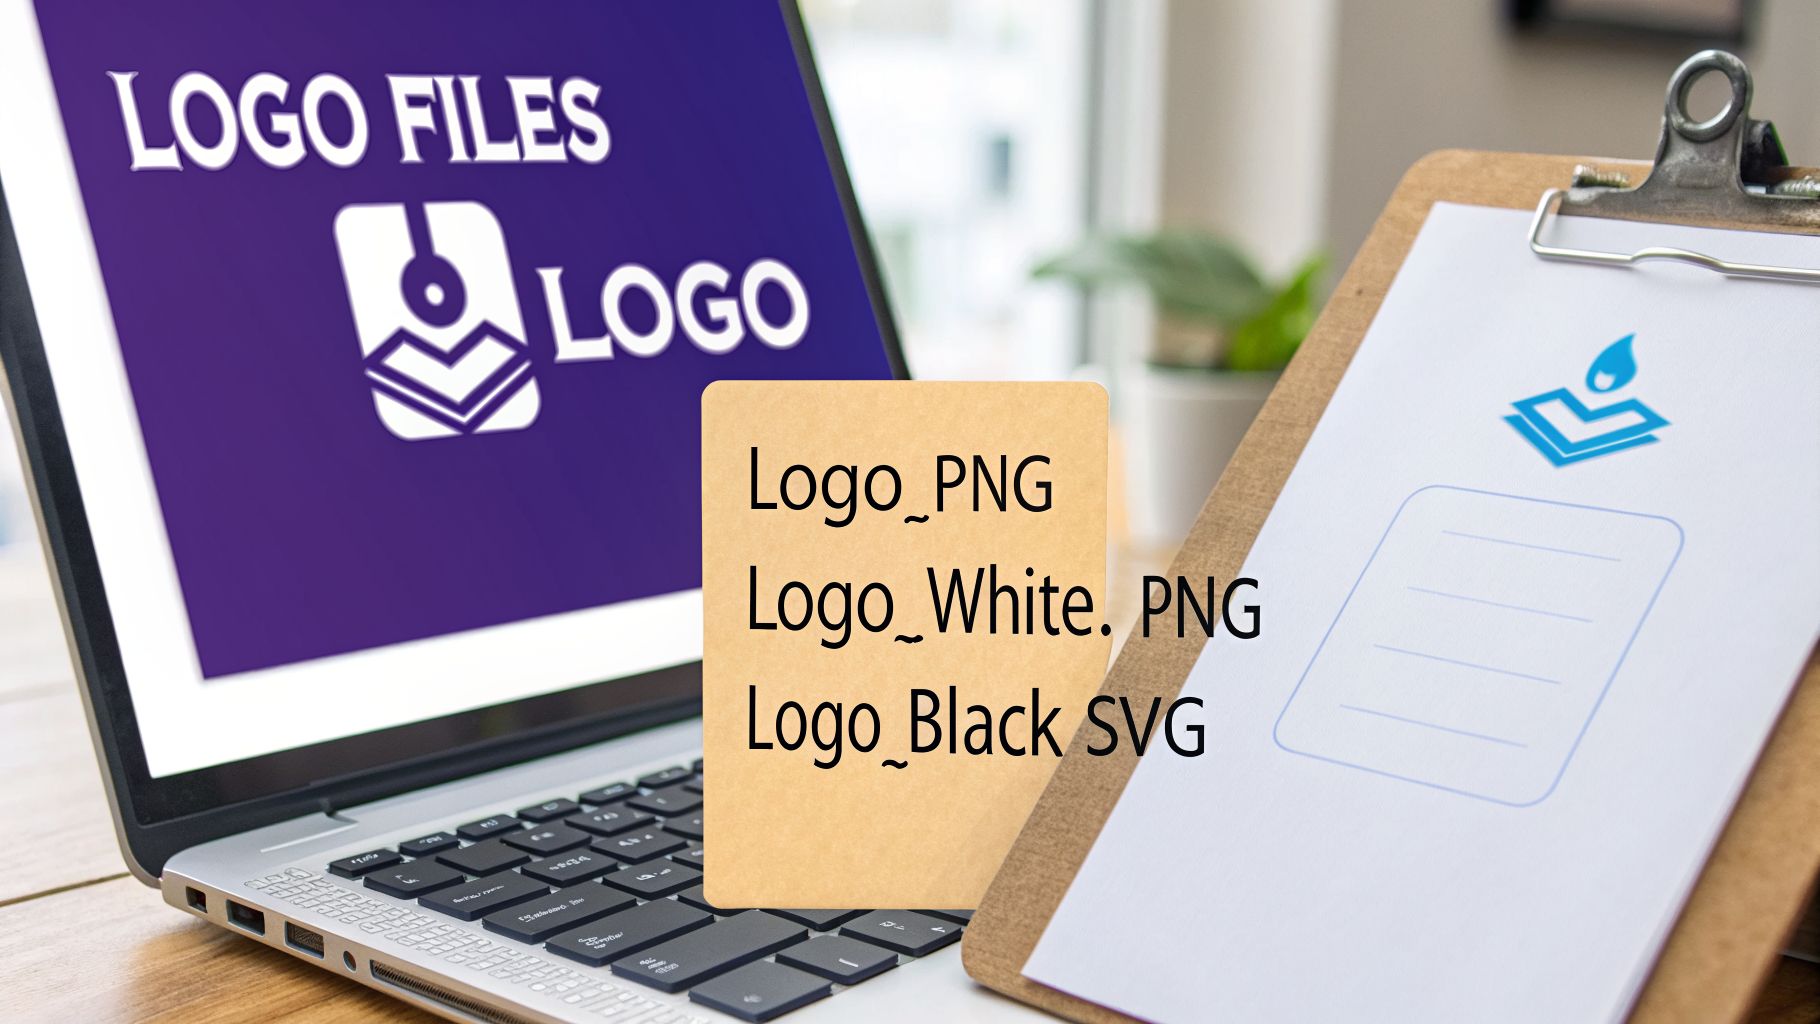
Alright, let's talk about the fastest way to make your beautiful, professional images look cheap and amateurish: slapping a bad logo file on top of them. Before you even open Photoshop or Canva, a little prep work with your logo file is what separates polished branding from a pixelated mess.
The single most important asset you can have—and this is non-negotiable—is a logo with a transparent background. This lets your design sit cleanly on any photo without that clunky, distracting white box around it. If your logo has a solid background, stop right now. We need to fix that first.
So what file format is your best friend here? It’s the PNG (Portable Network Graphics). Unlike a JPEG, which squashes your image data to save space, a PNG uses lossless compression. Most importantly, it supports transparency, which is exactly what we need.
Always get a high-resolution PNG version of your logo from your designer. If you're working with what you've got, you can use online tools to remove the background from an existing file, but just know that starting with a high-quality source file will always give you a cleaner, more professional result.
To help you keep track of which file does what, here’s a quick breakdown of the essential formats you’ll encounter.
| File Format | Best For | Key Feature | When to Use |
|---|---|---|---|
| PNG | Web & Digital Use | Supports transparency | The default choice for adding logos to images. |
| JPEG | Photos Only | Small file size | Never for your logo file; it doesn't support transparency. |
| SVG | Web & Design | Infinitely scalable (vector) | Excellent for web design, but PNG is simpler for placing on photos. |
| AI/EPS | Master Files | Original editable vector | The source file your designer uses. Keep this safe! |
For day-to-day use, that transparent PNG is your workhorse. Just make sure it’s the right size.
Pixelation is the enemy. To avoid a blurry, fuzzy logo that screams "I made this in five minutes," you have to start with a high-resolution file.
A good rule of thumb is to have a master PNG that is at least 1,000 pixels wide. This gives you plenty of room to scale it down for different images without it turning into a blocky disaster.
Remember, you can always make a large image smaller without losing quality, but you can never make a small image larger without it becoming pixelated. Always start big.
But resolution is only half the battle. What happens when your full-color logo needs to go on a dark, busy photograph? It’s going to vanish. This is where logo variations become your secret weapon.
Make sure you have these three essential files ready to go at all times:
Having these three files on hand means you’re prepared for any photo you throw at them. When you’re briefing a designer, be explicit: "I need high-resolution, transparent PNGs in full-color, all-white, and all-black." That one sentence will save you countless headaches.
Finally, don't forget accessibility. Whenever you place your logo, make sure it has the right alt text, like "Taja AI logo," so screen readers and search engines know exactly what it is.
Alright, you've got your logo files ready to go. Now comes the fun part: actually putting them on your images. The secret here isn't just knowing how to add a logo, but choosing the right tool for what you're trying to accomplish.
We're going to walk through the best options, from super-accessible online editors to the pro-grade software the big dogs use. This is about more than just slapping a logo in the corner; it’s about building a consistent and efficient branding workflow. Whether you're branding one social media post or a thousand product photos, there's a right way to do it.
For most creators and small business owners, Canva is the place to start. Its drag-and-drop interface is ridiculously intuitive, making the whole process feel less like a technical task and more like playing with digital stickers.
Imagine you're a life coach prepping a graphic for an upcoming webinar. You've got a great photo, and you just need to pop your logo on it. In Canva, it's a few simple clicks:
One of the best tricks in Canva for this is the transparency slider. Once you have your logo layer selected, look for it in the top-right menu. By dialing the opacity down to around 20-30%, you can instantly transform your solid logo into a subtle watermark. It's perfect for protecting your work without distracting from the main image.
If you want a bit more muscle without paying for a full-blown professional subscription, free online editors like Photopea are fantastic. It’s basically a lite version of Photoshop that runs right in your browser.
Its real advantage is robust layer management, which is a huge step up from simpler tools. A small e-commerce owner, for instance, could use Photopea to brand a new batch of product photos. You’d open your product shot, then use the “File > Open & Place” command to drop in your logo PNG as a new layer. This gives you precise control over placement, size, and even blending modes for more creative effects.
The real power of using a tool with layers is non-destructive editing. You can adjust your logo's size, position, and opacity as many times as you want without ever altering the original photo underneath.
When you demand maximum control and, more importantly, efficiency at scale, Adobe Photoshop is still the industry standard. Its real strength isn't just adding one logo; it’s about creating automated workflows that save you from soul-crushing repetitive tasks.
For anyone who adds a logo to pictures over and over again—like a photographer delivering a client gallery—Photoshop’s "Actions" are a complete game-changer. An "Action" is just a recorded sequence of steps. You can record yourself adding your logo to one photo—placing it, resizing it, adjusting the opacity—and then save that entire sequence. Afterward, you can run that Action on a folder of hundreds of photos, branding all of them in minutes with perfect consistency.
This ability to automate branding is becoming essential as content demands keep growing. In fact, the technology enabling these smart, automated tools is driving massive market growth. The global image recognition market was valued at USD 32.7 billion in 2020 and is projected to hit USD 109.4 billion by 2027.
Many platforms now offer a specialized watermark photos tool designed to simplify this exact process. Whether you're creating visuals for social media or your business, you can find more inspiration in our guide on how to generate compelling thumbnails.
Look, slapping a logo on a picture is easy. Making it look good? That's a different story. It’s more than just dropping a file onto your image; where you put it and how you style it can either make your brand look sharp and professional or like an amateurish afterthought. Honestly, a poorly placed logo is worse than no logo at all.
This flowchart can give you a quick gut check on which tool is the right fit for you, whether you’re a complete beginner or a seasoned pro.
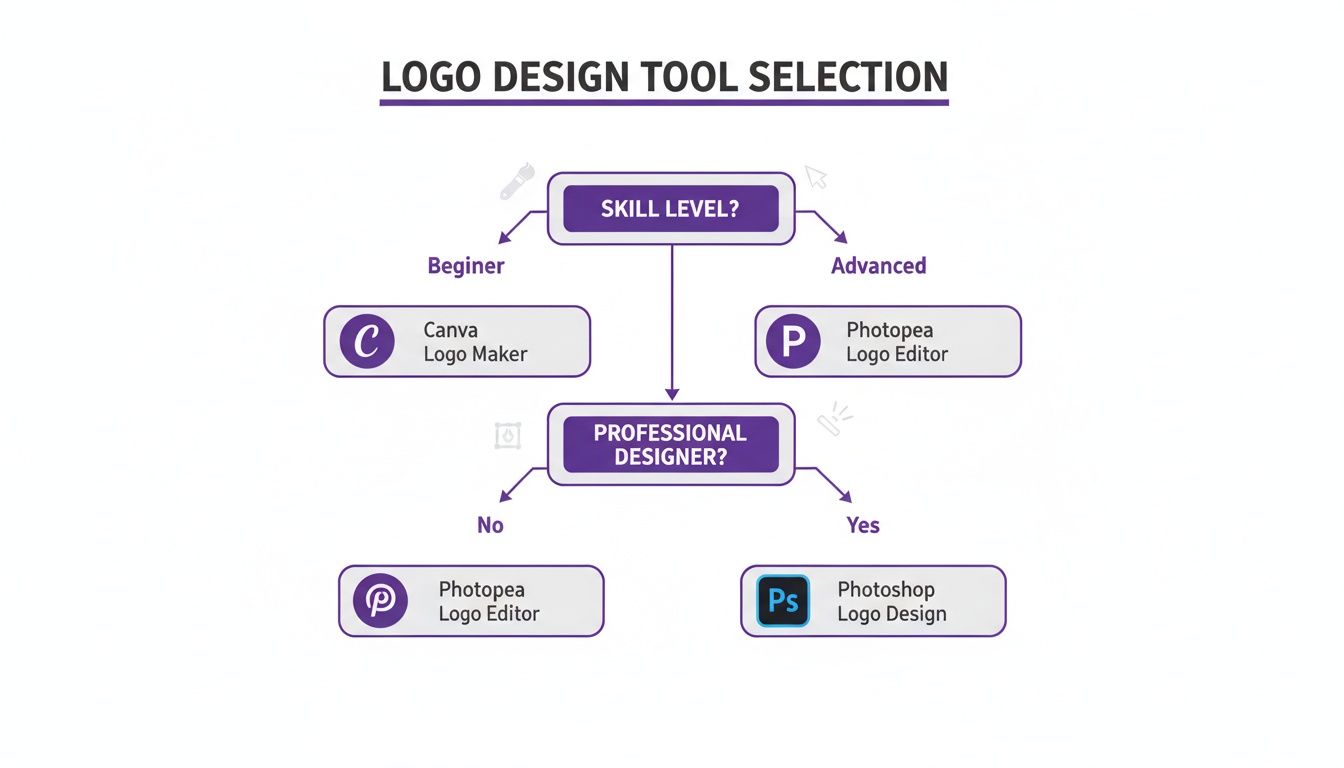
As you can see, plenty of folks start with accessible tools like Canva and only move to more complex software when their needs get more specific.
One of the oldest tricks in the book—and it works every time—is the rule of thirds. Imagine your photo is sliced into a 3x3 grid, like a tic-tac-toe board. The four points where those lines intersect are natural focal points for the human eye. Tucking your logo near one of those intersections, especially in a corner, just feels right. It looks balanced and intentional.
But here’s what drives designers crazy. Avoid these common mistakes at all costs:
Scan your photo for areas of "negative space"—a clear patch of sky, a plain wall, or a beautifully blurred background. These spots act as a clean canvas, letting your logo pop without competing with the main subject. If you really want to get into the weeds on this, some of our advanced advice on how to craft visually striking YouTube thumbnails with AI techniques can offer even more insight.
Just as important as where you put your logo is how visible you make it. The decision between a bold, solid logo and a transparent watermark comes down to one thing: what’s the goal of this image?
A solid, 100% opacity logo is a power move. It’s perfect for promotional graphics, your social media profile pics, or any time brand recognition is the absolute top priority. This is where you’ll want to use your all-white or all-black logo variations to guarantee it stands out with high contrast.
On the other hand, a watermark is all about quiet protection and subtle branding. By dropping your logo’s opacity down to somewhere between 15% and 30%, you create a see-through effect. It clearly marks the image as yours without screaming over the top of your visual content.
This is the go-to technique for photographers sharing client galleries or artists who need to protect their work from being stolen and re-posted. It says, "this is mine," without shouting it from the rooftops. At the end of the day, learning how to add a logo to a picture is really about making deliberate choices that serve both the image and your brand at the same time.
Adding your logo to a single photo is easy. But what about when a client is waiting for an entire wedding gallery? Or you’re an e-commerce store dropping a new product line with 200 new images? Suddenly, that "simple" task becomes a soul-crushing time sink.
Branding photos one by one is a recipe for burnout. For busy creators and business owners, the real win is efficiency at scale. This is where batch processing—automatically adding your logo to hundreds of photos at once—isn't just a nice-to-have; it's a necessity.
The demand for high-quality, branded visuals has exploded. The stock images market ballooned from USD 5.6 billion in 2018 to an estimated USD 6.7 billion in 2024. This reflects an intense need for digital assets, and as a creator, your branded images are a huge part of that ecosystem. Automating logo placement lets you maintain a professional look across everything you publish without the manual grind.
If you're already in the Adobe ecosystem, your most powerful ally for this task is Photoshop Actions. Think of an Action as a 'record' button for your editing process. You perform the task once, and Photoshop memorizes every single step.
Here’s how it works: You’d hit record, open your logo file, drag it onto your photo, resize it, drop it in the bottom-right corner, and maybe dial back the opacity to 80%. Then you stop recording. You've just created a custom, repeatable branding script.
Once that Action is saved, you can unleash it on an entire folder of images using the File > Automate > Batch command. Photoshop will systematically open each photo, apply your logo with perfect consistency, and save out a new branded version. You can process an entire client gallery while you grab a coffee. It’s a game-changer.
For even more efficiency, you can create a "Droplet," which is basically a little icon that lives on your desktop. You just drag a folder of images onto the icon, and Photoshop automatically runs the Action. It's as close to magic as you can get.
For the more technically inclined, command-line tools offer raw, unfiltered power. ImageMagick is a free, open-source software suite that lets you manipulate images directly from a terminal window. It has a steeper learning curve, sure, but for pure automation, it’s unmatched.
A simple command could overlay your logo onto every single JPEG in a folder. It might look something like this:
mogrify -gravity southeast -draw 'image Over 10,10 0,0 "logo.png"' *.jpg
This command tells ImageMagick to place your logo.png file in the bottom-right corner of every .jpg file, with a 10-pixel margin from the edge. Once you get the hang of it, you can process thousands of images in seconds, making it perfect for server-side tasks or custom scripts.
Pro Tip: Whether you're using Photoshop Actions or a command-line tool, always work on copies of your original photos. Never, ever run a batch process on your master files. This non-destructive workflow saves you from the horror of accidentally overwriting your originals.
Of course, there are also plenty of mobile apps and online services designed specifically for bulk watermarking. If your goal is to brand a high volume of e-commerce images, you might even consider using an AI Product Photo Generator to integrate your logo efficiently from the start.
And for other creative assets, like YouTube thumbnails, the same automation mindset applies. Check out our guide on how to automate your thumbnail design with AI to see how you can take back even more of your time.
Even after you’ve got the basics down, a few nagging questions always seem to pop up when adding a logo to a picture. Honestly, getting these details right is what separates a decent workflow from a great one.
This isn't just about the tool anymore. It’s about making the smart, strategic decisions that ensure your logo looks sharp and works for your brand, every single time.
There’s no magic number here, because the "perfect" size depends entirely on your photo's resolution and where it's going to live. But here’s what I tell everyone: have a master logo file—a transparent PNG—that's at least 1000 pixels wide. This high-res source is your safety net, letting you scale it down for any use without losing a shred of quality.
For a standard web image, like a 1200px wide blog photo, a logo around 150-250 pixels wide tucked into a corner usually feels right. If you're going for a subtle watermark, you might use a much larger version, but dial the opacity way down. My advice? Always test it on a sample image first. Check for clarity before you even think about batch-processing a hundred photos.
Look, if you remember one thing, make it this: start big. You can always scale a large logo down without a problem, but trying to blow up a tiny logo will give you a blurry, pixelated mess that completely torpedoes your professional look.
Absolutely. In fact, it's easier than ever, and a ton of great mobile apps make this ridiculously simple. Apps like Canva, Adobe Express, and YouCam Perfect let you import your logo and slap it on a photo in seconds. The process is super intuitive: upload your transparent PNG, drag it where you want it, pinch to resize, adjust the opacity, and save. Done.
If you’ve got more advanced needs, like branding a whole batch of photos on your phone, you’ll want to look at dedicated watermarking apps. Tools like eZy Watermark or Watermarkly are built for this and often have batch processing features that can save you a serious amount of time.
Turning your logo into a watermark comes down to one simple adjustment: opacity. It doesn’t matter if you’re in Photoshop, Canva, or a free online editor—you’ll find an "Opacity" or "Transparency" slider somewhere in your layers or effects panel.
A solid, in-your-face logo is set at 100% opacity. To get that watermark effect, all you have to do is lower that value. I find that a good starting point for a subtle but still visible watermark is somewhere between 15% and 30%. This makes the logo transparent enough that it doesn't hijack the main subject of your photo, but still clearly marks the image as yours.
Ready to stop manually branding every single piece of content? Taja AI automatically generates dozens of ready-to-publish assets from a single video, complete with your brand's style. Start free and scale your content today.


We are blessed to work with leading brands & Companies


We try to make easy and simple for every professionals. Get 30 days free trial - No credit card required.


© 2025 Taja AI. All rights reserved.