.jpeg)
10 Best Instagram Reels Maker Tools for Creators in 2026
Compare 10 Instagram Reels Maker tools for editing, vertical templates, captions, and publishing, with honest limits and use cases for 2026.
5 min read
October 15, 2026

Learn how to make a video loop on desktop, mobile, and social media. Our guide shows you how to create seamless loops that boost engagement and go viral.
Written by:


To make a video loop, you need to edit it so the last frame transitions back to the first without a single bump. You can do this by duplicating your clip, reversing one of them, and adding a clean crossfade. Or, even better, you can film the action so it naturally returns to its starting point. Mastering this technique is key for creating hypnotic social media content.
Ever found yourself watching the same short video three, four, maybe five times in a row before you even realize it? That's the hypnotic power of a good loop.
Social media platforms like TikTok and Instagram are engineered for one thing: to maximize the time you spend on their app. Their algorithms are constantly on the hunt for content that keeps viewers glued to the screen. A perfectly seamless loop isn't just a cool effect; it's a creator's secret weapon in this battle for attention.
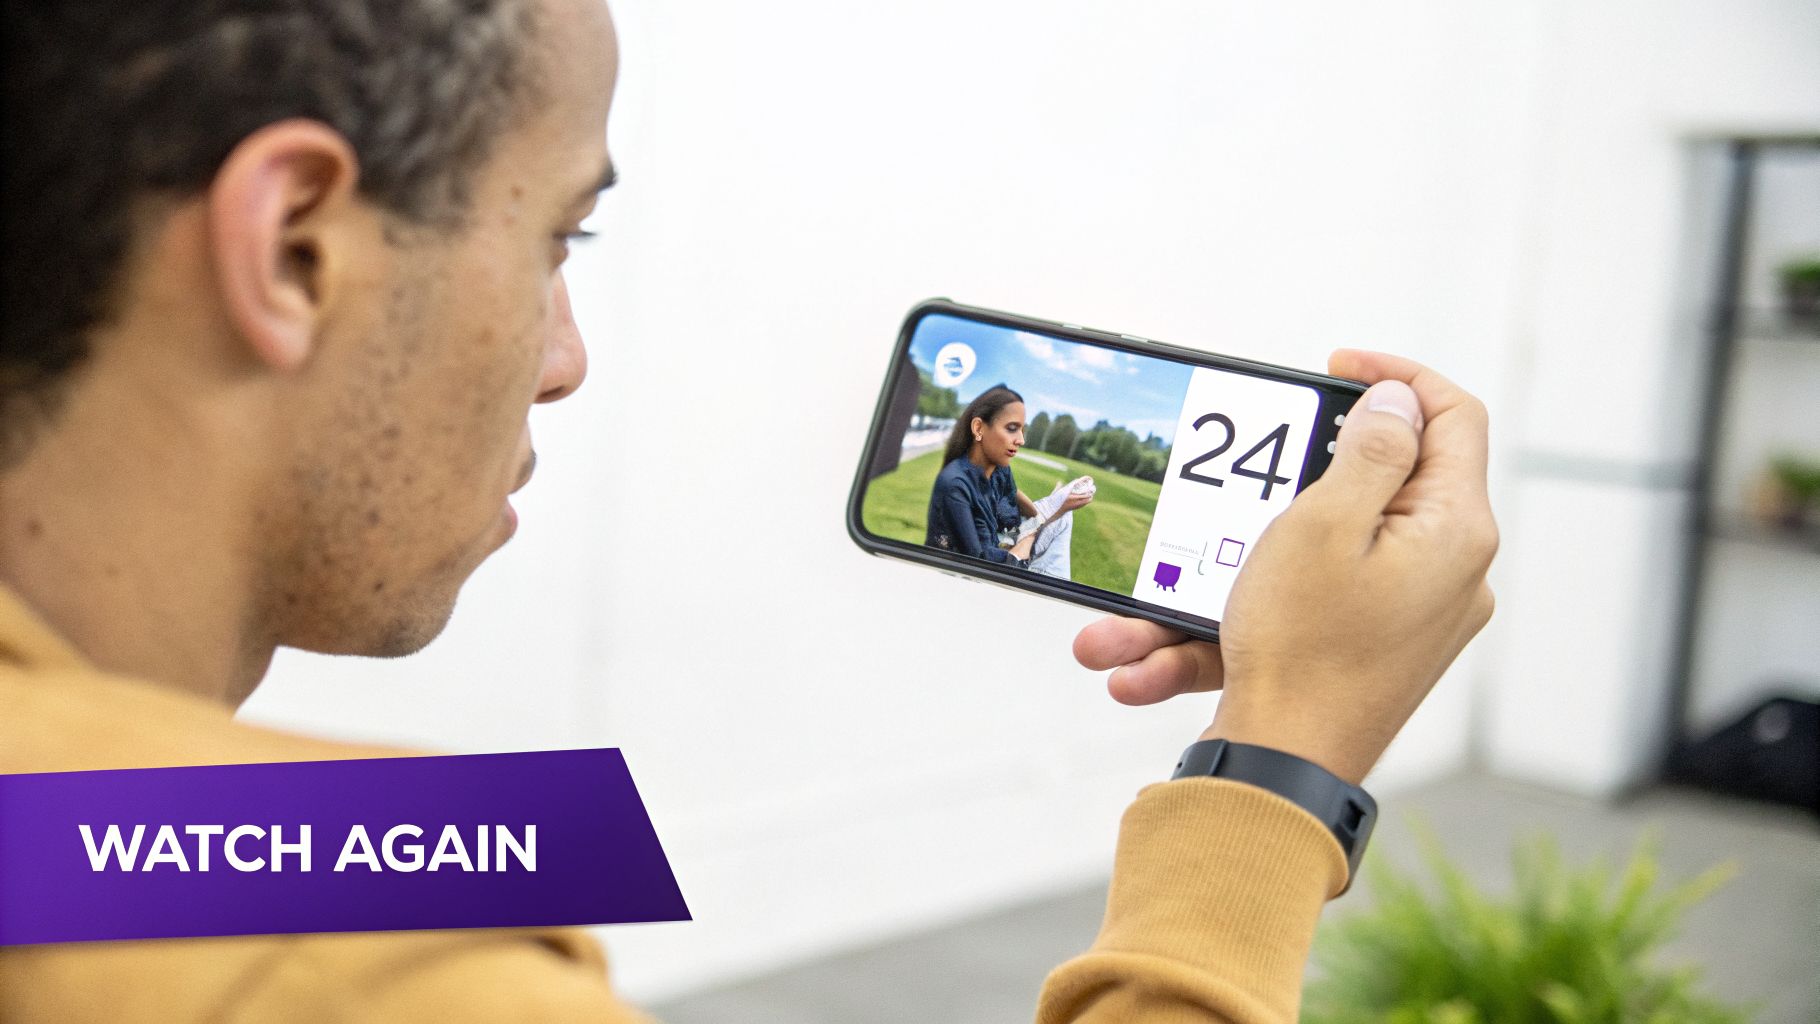
When a video restarts without a noticeable cut, it basically short-circuits the part of our brain that decides to scroll away. This repetition is oddly satisfying and creates a mesmerizing effect, which directly juices a metric the platforms obsess over: average watch duration.
For creators and small businesses, the payoff is huge. A well-executed loop doesn't just get watched once. The same user might re-watch it multiple times without even noticing, and each one of those replays sends a powerful signal to the algorithm that your content is engaging.
This has a direct impact on your reach:
The core principle is simple: the longer you can hold someone's attention, the more the platform will reward you. A looping video works tirelessly to do just that, turning a single piece of content into a perpetual engagement machine.
And look, this isn't just a gimmick for dance videos or funny memes. For a business, a looping video can be an incredibly powerful marketing tool.
Imagine a product video where an item rotates endlessly, showing off every angle without a single stutter. Or a shot of a barista continuously pouring the perfect latte art. Maybe it's a sped-up video of a service being completed that flows right back to the start.
These loops are perfect for:
By learning how to make a video loop, you're not just learning a neat trick. You're transforming a static message into a dynamic, endlessly watchable asset that captures attention and drives actual results. It's a fundamental skill for anyone serious about growing their presence online in 2026.
A perfect video loop doesn't happen by accident in the editing room. It's a trick you pull off before you even hit record. If you're trying to force a loop after you've already shot your footage, you've already lost. You have to start thinking in circles from the very beginning.
The whole game is about creating what's called a "match frame." The idea is simple: your video's very last frame needs to be identical—or at least really close—to its first frame. When you nail this, there’s no jarring jump when the video restarts. It just… flows. Instead of trying to fix a bad cut, your goal is to film something that naturally wants to return to where it started.
Start looking for rhythm. Repetitive, cyclical actions are happening all around you, and they are golden opportunities for a seamless loop. You just have to train your eye to spot them.
Think about motions that already feel endless:
I once saw a real estate agent use this brilliantly. Instead of a boring virtual tour, she filmed a slow, smooth pan across a gorgeous backyard view. The shot ended exactly where it began. Looped on the listing page, it created this perpetually stunning vista that made the space feel serene and way more expansive than a static photo ever could.
The most convincing loops are the ones that don't feel like a trick. They feel like a natural, endless moment you just happened to capture. Getting this pre-production mindset right will make the actual editing ten times easier.
Let's walk through a real-world example. Imagine you’re a chef showing off a new dessert. Your big move is drizzling a perfect spiral of raspberry coulis over the top.
Here's the plan: Start recording before you even begin the drizzle. Film the entire action. Keep recording for a few seconds after your hand is out of the frame and the drizzle is complete. This gives you clean footage at the beginning and end. Later, in your editor, you'll find the perfect segment that starts mid-drizzle and ends at the exact same point in the pouring motion, creating an endless, mouth-watering loop.
This isn't just a social media gimmick; this kind of planning is fundamental to modern web design. Since HTML5 made video backgrounds a reality, looped MP4s have become the standard, powering over 85% of sites that use them. Why? Because they're lightweight and universally supported. Some sites report that switching from clunky old GIFs to a well-planned MP4 loop can slash load times by as much as 30%.
So, when you master how to film for the loop from the start, you're not just making more engaging content. You're creating assets that are technically superior and more efficient for any platform you publish on. You can discover more insights about looping video techniques and their performance benefits.
Ready to move beyond basic mobile apps? When you need a loop that’s truly seamless, desktop video editors like Adobe Premiere Pro and DaVinci Resolve are where the real work happens. They give you the frame-by-frame control required for a professional, invisible loop.
While every program has its quirks, the core technique is surprisingly consistent once you get the hang of it.
Let's imagine a real-world scenario: you're creating a mesmerizing, endlessly spinning product shot for a landing page. The key is planning before you even hit record. You'll want to film the product completing more than one full rotation to give yourself plenty of clean footage to work with in the edit.
Honestly, a great loop starts long before you ever open your editing software.
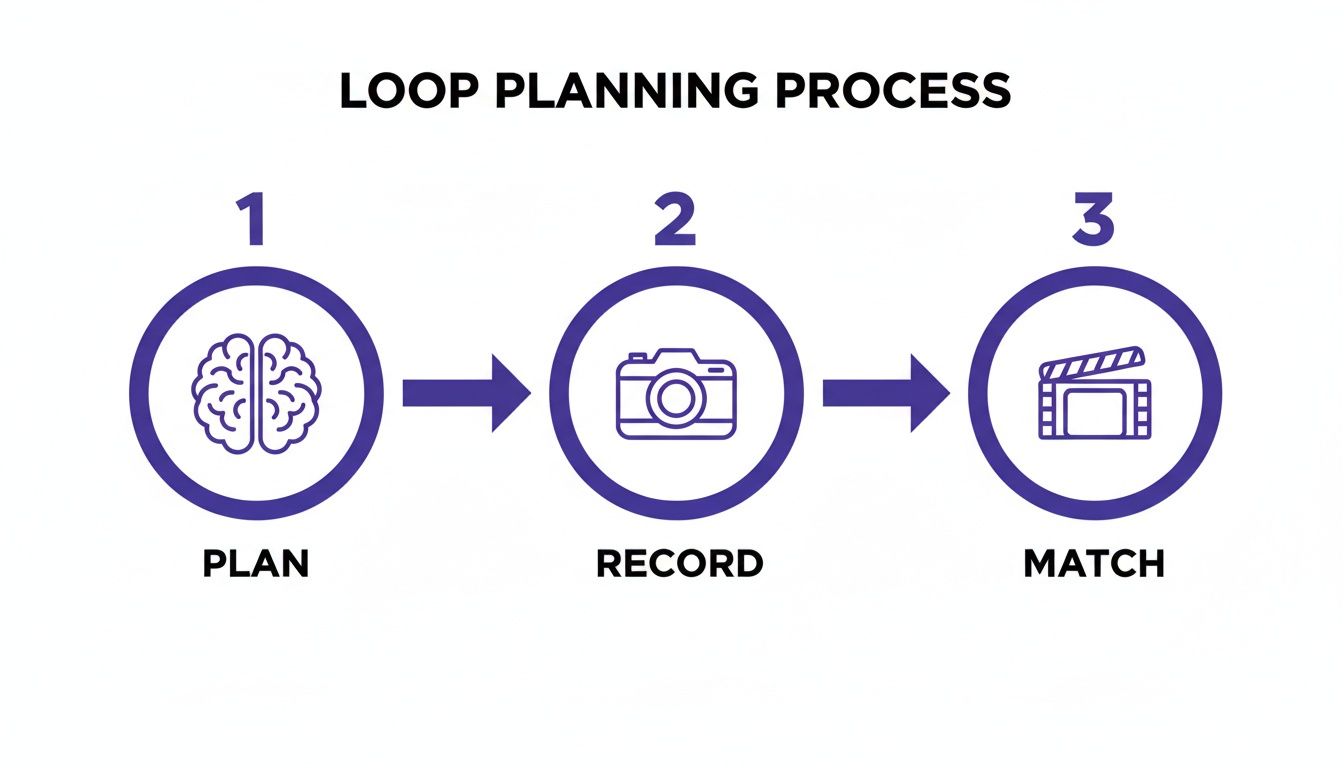
Think of it in these three stages: plan the shot, record with the loop in mind, and then match the frames in post-production. Nail the first two, and the third becomes exponentially easier.
Different projects call for different approaches. I've broken down the most common desktop techniques to help you choose the right one for your specific needs, whether you're a beginner or a seasoned pro.
| Technique | Best For | Software Example | Pro Tip |
|---|---|---|---|
| Cross-Dissolve | Professional product videos, nature scenes, or any smooth, continuous motion. | Adobe Premiere Pro | Keep the dissolve short—around 10-15 frames is usually enough to smooth the seam without being noticeable. |
| Boomerang (Reverse) | Quick social media clips, simple movements like a wave or a toast. | DaVinci Resolve | Works best when the action can logically play in reverse. Avoid for actions like walking forward or a full product rotation. |
| Match Frame Cut | Animated graphics, fast-paced action where the cut is masked by motion. | Final Cut Pro | This requires perfect matching. A single pixel off and the "jump" will be obvious. Use motion blur to help hide it. |
| Time Remapping | Advanced slow-motion or fast-motion effects that need to loop seamlessly. | Adobe After Effects | Use the graph editor to create an "S" curve at the end that perfectly matches the speed and value of the first frame. |
While the Cross-Dissolve is often the go-to for reliability, having these other methods in your back pocket will prepare you for any looping challenge that comes your way.
This is the workhorse technique, and it's the most reliable way to get a flawless loop. Once you have your spinning product clip on the timeline, your entire goal is to find two identical frames. For our product, this would be the exact moment it faces dead-center to the camera.
Scrub through your footage and find that perfect "match frame." Place a marker, then trim your clip so it starts and ends at that exact point.
Now for the magic. Duplicate that trimmed clip and snap it to the end of the original. You now have the same motion playing twice in a row. Overlap the last few frames of the first clip with the first few frames of the second clip.
Apply a cross-dissolve transition over that tiny overlap. A short dissolve, maybe 10 to 15 frames, is all you need. This subtle blend melts the two clips together, hiding any tiny imperfections and creating the illusion of a single, continuous movement.
This method gives you a professional result every time. Of course, if you're looking to create dozens of clips without the manual labor, our video maker can automatically generate engaging shorts from a single long-form video, saving you hours of editing.
What if you're on a tight deadline and just need something that works for a quick social post? There's a faster, though less precise, method that creates a simple back-and-forth loop.
First, drop your clip onto the timeline. Then, duplicate it and place the copy directly after the original.
Select that second clip and reverse its speed to -100%. The video will now play forward and then immediately backward, automatically returning to the starting frame.
This "boomerang" effect is perfect for simple actions like a person waving or clinking glasses. However, it can look pretty unnatural for more complex movements like a full product spin or someone walking across a room. It's a useful trick for social media where perfection isn't the goal, but it’s not the right move for polished brand content.
No matter which technique you use, the final step is always the same: set your timeline to loop and watch it. A lot. Look for any jump, stutter, or change in speed at the seam. If you see one, dive back in. Adjust your trim points, tweak the length of your dissolve, or nudge your clips by a frame or two until the loop is absolutely invisible.
You don't need a high-end desktop to create those endlessly watchable loops that dominate social feeds. In fact, some of the most successful creators build their entire brand from their smartphones, and you absolutely can too. This is your guide to making hypnotic loops on the go with apps you probably already have, like CapCut and InShot.
Let's walk through a real-world scenario I see all the time. Imagine you're a social media manager at an event and you capture a great 5-second clip of a speaker making an emphatic gesture. Or maybe you're a small business owner who just filmed a ridiculously satisfying shot of frosting being piped onto a cupcake.
You can turn that moment into a looping video for Instagram Stories or Reels in under five minutes.
The process is remarkably similar to the desktop boomerang method we talked about, but it's even faster. This is a trick I use constantly for quick, daily promos when I'm away from my computer.
Import Your Clip. Fire up your chosen app (CapCut is fantastic for this) and start a new project with your video.
Trim the Fat. Cut your clip down to the core action—just the gesture or the frosting spiral. A short, punchy clip of about 2-4 seconds works best.
Duplicate It. Tap on your clip in the timeline and find the "Duplicate" or "Copy" button. This creates an identical clip right after the original.
Reverse the Copy. Now, select the second clip. Look for the "Reverse" option in the editing tools. The app will process it, and now your video plays forward and then immediately backward, creating a perfect loop.
This simple forward-and-reverse motion is a staple for a reason. It guarantees a perfect, seamless return to the starting frame, creating a hypnotic effect that's absolute gold for social media algorithms.
This mobile-first approach is all about speed and efficiency. You can literally go from filming to a published loop in under five minutes, all from the palm of your hand.
Once you have the basic loop, take another minute to refine it. Sometimes the reverse action can feel a bit jarring or abrupt.
A hidden feature in apps like CapCut is adding a subtle flash transition. While a full cross-dissolve isn't always an option, you can add a quick white or black flash right at the transition point between the two clips. This makes the direction change feel more intentional and less like a mistake.
If your goal is to use your looping video as a dynamic background, you'll find similar techniques covered in guides on how to make moving wallpapers.
For those of you creating content specifically for TikTok, you'll want to optimize your loops for the platform's algorithm. We have a more in-depth guide on our blog about the best practices for using a TikTok clip maker. This is how you start turning quick mobile edits into content that genuinely performs.
Okay, so you’ve created the perfect, invisible loop. A huge win, right? But your work isn’t done. A technically flawless loop can still completely bomb if you don’t package it correctly for the specific platform where you’re posting it.
Every social network—from TikTok to Instagram to YouTube Shorts—has its own set of rules, its own algorithm, and its own user expectations. What looks incredible on your editing timeline can turn into a pixelated mess once their compression algorithms get ahold of it.
Before you even think about hitting that "Export" button, you need to dial in your settings. Think of it as tailoring your suit before a big event; the details matter. While the specifics can vary slightly, there's a universal starting point that works wonders for vertical-first platforms like TikTok, Instagram Reels, and YouTube Shorts.
Here’s what I use as my baseline:
Here’s a pro tip that’s saved me countless headaches: Always do a quick test upload. A subtle color shift or a weird compression artifact sometimes only shows up after a platform's servers have processed your video. It’s a small step that makes a huge difference.
This attention to detail is what separates the amateurs from the pros. It ensures your loop plays back exactly how you envisioned it—crisp, clean, and without any technical glitches that could break that hypnotic effect you worked so hard to create. To make sure these loops really hit home, it's smart to build them into a larger strategy using proven social media video strategy examples.
Here’s the thing: most modern social platforms are already designed to loop short videos automatically. You can, and should, use this to your advantage.
On TikTok and Reels, for example, videos play on a continuous loop by default. When you know this, you can engineer "perfect loops" where the end flows seamlessly back to the beginning. This encourages people to re-watch your video over and over, driving up your average view duration—a metric the algorithm absolutely loves.
This concept isn't new, by the way. Back in 2013, Vine hooked over 200 million users with its addictive 6-second videos, racking up a mind-boggling 1 billion daily loops. Today’s platforms have just amplified that effect. Short videos with perfect loops see significantly higher completion rates, which directly translates to more reach. You can learn more about the impact of short-form video on Taja's YouTube channel.
For busy creators trying to scale, this is where automation becomes a lifesaver. Instead of spending hours manually trying to find and edit dozens of looping clips, you can lean on AI. Using a viral clip maker, you can feed it one of your long-form videos and let it automatically identify the most engaging moments, format them for different platforms, and even suggest optimized captions.
Suddenly, you're not just creating one-off loops. You're turning a single piece of long-form content into a full week's worth of posts, all perfectly tailored to grab attention and keep people watching.
You’ve followed all the steps, but your loop still has that annoying “jump” at the end. Or maybe you're worried that looping your video is going to turn it into a pixelated mess. I get it. Getting a loop to feel truly invisible often comes down to solving a few small but critical problems.
Think of this as your personal troubleshooting guide. We're going to fix those nagging issues that separate an amateur attempt from a professional, hypnotic loop. Let's dig into the most common headaches and how to solve them.
A jumpy cut is the number one sign of a rushed loop. If your video abruptly “jumps” back to the start, it completely shatters the illusion you're trying to build. The fix almost always comes down to one of two things: your edit points or the transition you're using (or not using).
First, go back to your editing timeline and zoom in. No, I mean really zoom in. Nudge the start and end points of your clip frame by frame. That "perfect" match you thought you found? It’s probably off by a single frame. Find a stable, non-moving element in the background and use it as your visual anchor to line things up perfectly.
But what if the frames are an exact match and you still see a subtle jump? This usually happens because of tiny shifts in lighting or motion between the start and end. This is where a cross-dissolve becomes your best friend.
A dissolve that’s too long is just as bad as a hard cut. Keep it short and sweet—somewhere between 5 and 15 frames is usually all you need to melt that seam away without drawing attention to the effect itself.
This is a huge concern for creators, but the short answer is no. The act of looping itself has zero impact on your video quality. The quality is determined entirely by your export settings, not by whether a player repeats the video.
Where people run into trouble is with re-exporting. Every single time you compress a video, it loses a tiny bit of data. If you make a loop, export it, then import that file back into your editor to make a change and export it again, you're going to see a noticeable drop in quality. It's called generation loss, and it's a quality killer.
To keep your loops looking crisp, follow these simple rules:
The "best" format really depends on where your loop is going to live. While you have tons of options, only a few really matter for most creators and businesses.
For pretty much all social media—TikTok, Instagram Reels, YouTube Shorts—and for website backgrounds, MP4 (H.264) is the undisputed king. It gives you the best mix of quality, compression, and universal browser support. It just works everywhere.
However, if you're making a very short, simple animation with a limited color palette for a website, a GIF can still be a decent choice. Just know what you're getting into: GIFs are stuck with only 256 colors and often have much larger file sizes than an MP4 of the same length.
Finally, if you’re creating something for high-end digital signage or a professional presentation where every pixel counts, you might want to use a MOV file with a ProRes codec. These files are massive, but they retain the maximum visual information, ensuring your loop looks absolutely pristine on a big screen.
Ready to stop manually creating loops and start scaling your content? Taja AI turns your long-form videos into dozens of perfectly optimized, ready-to-publish short clips for every platform. Try Taja AI for free and reclaim your time.


We are blessed to work with leading brands & Companies


We try to make easy and simple for every professionals. Get 30 days free trial - No credit card required.


© 2025 Taja AI. All rights reserved.